Roof Tops


Red Roofs, Port Clyde, 11 x 14 Pastelbord

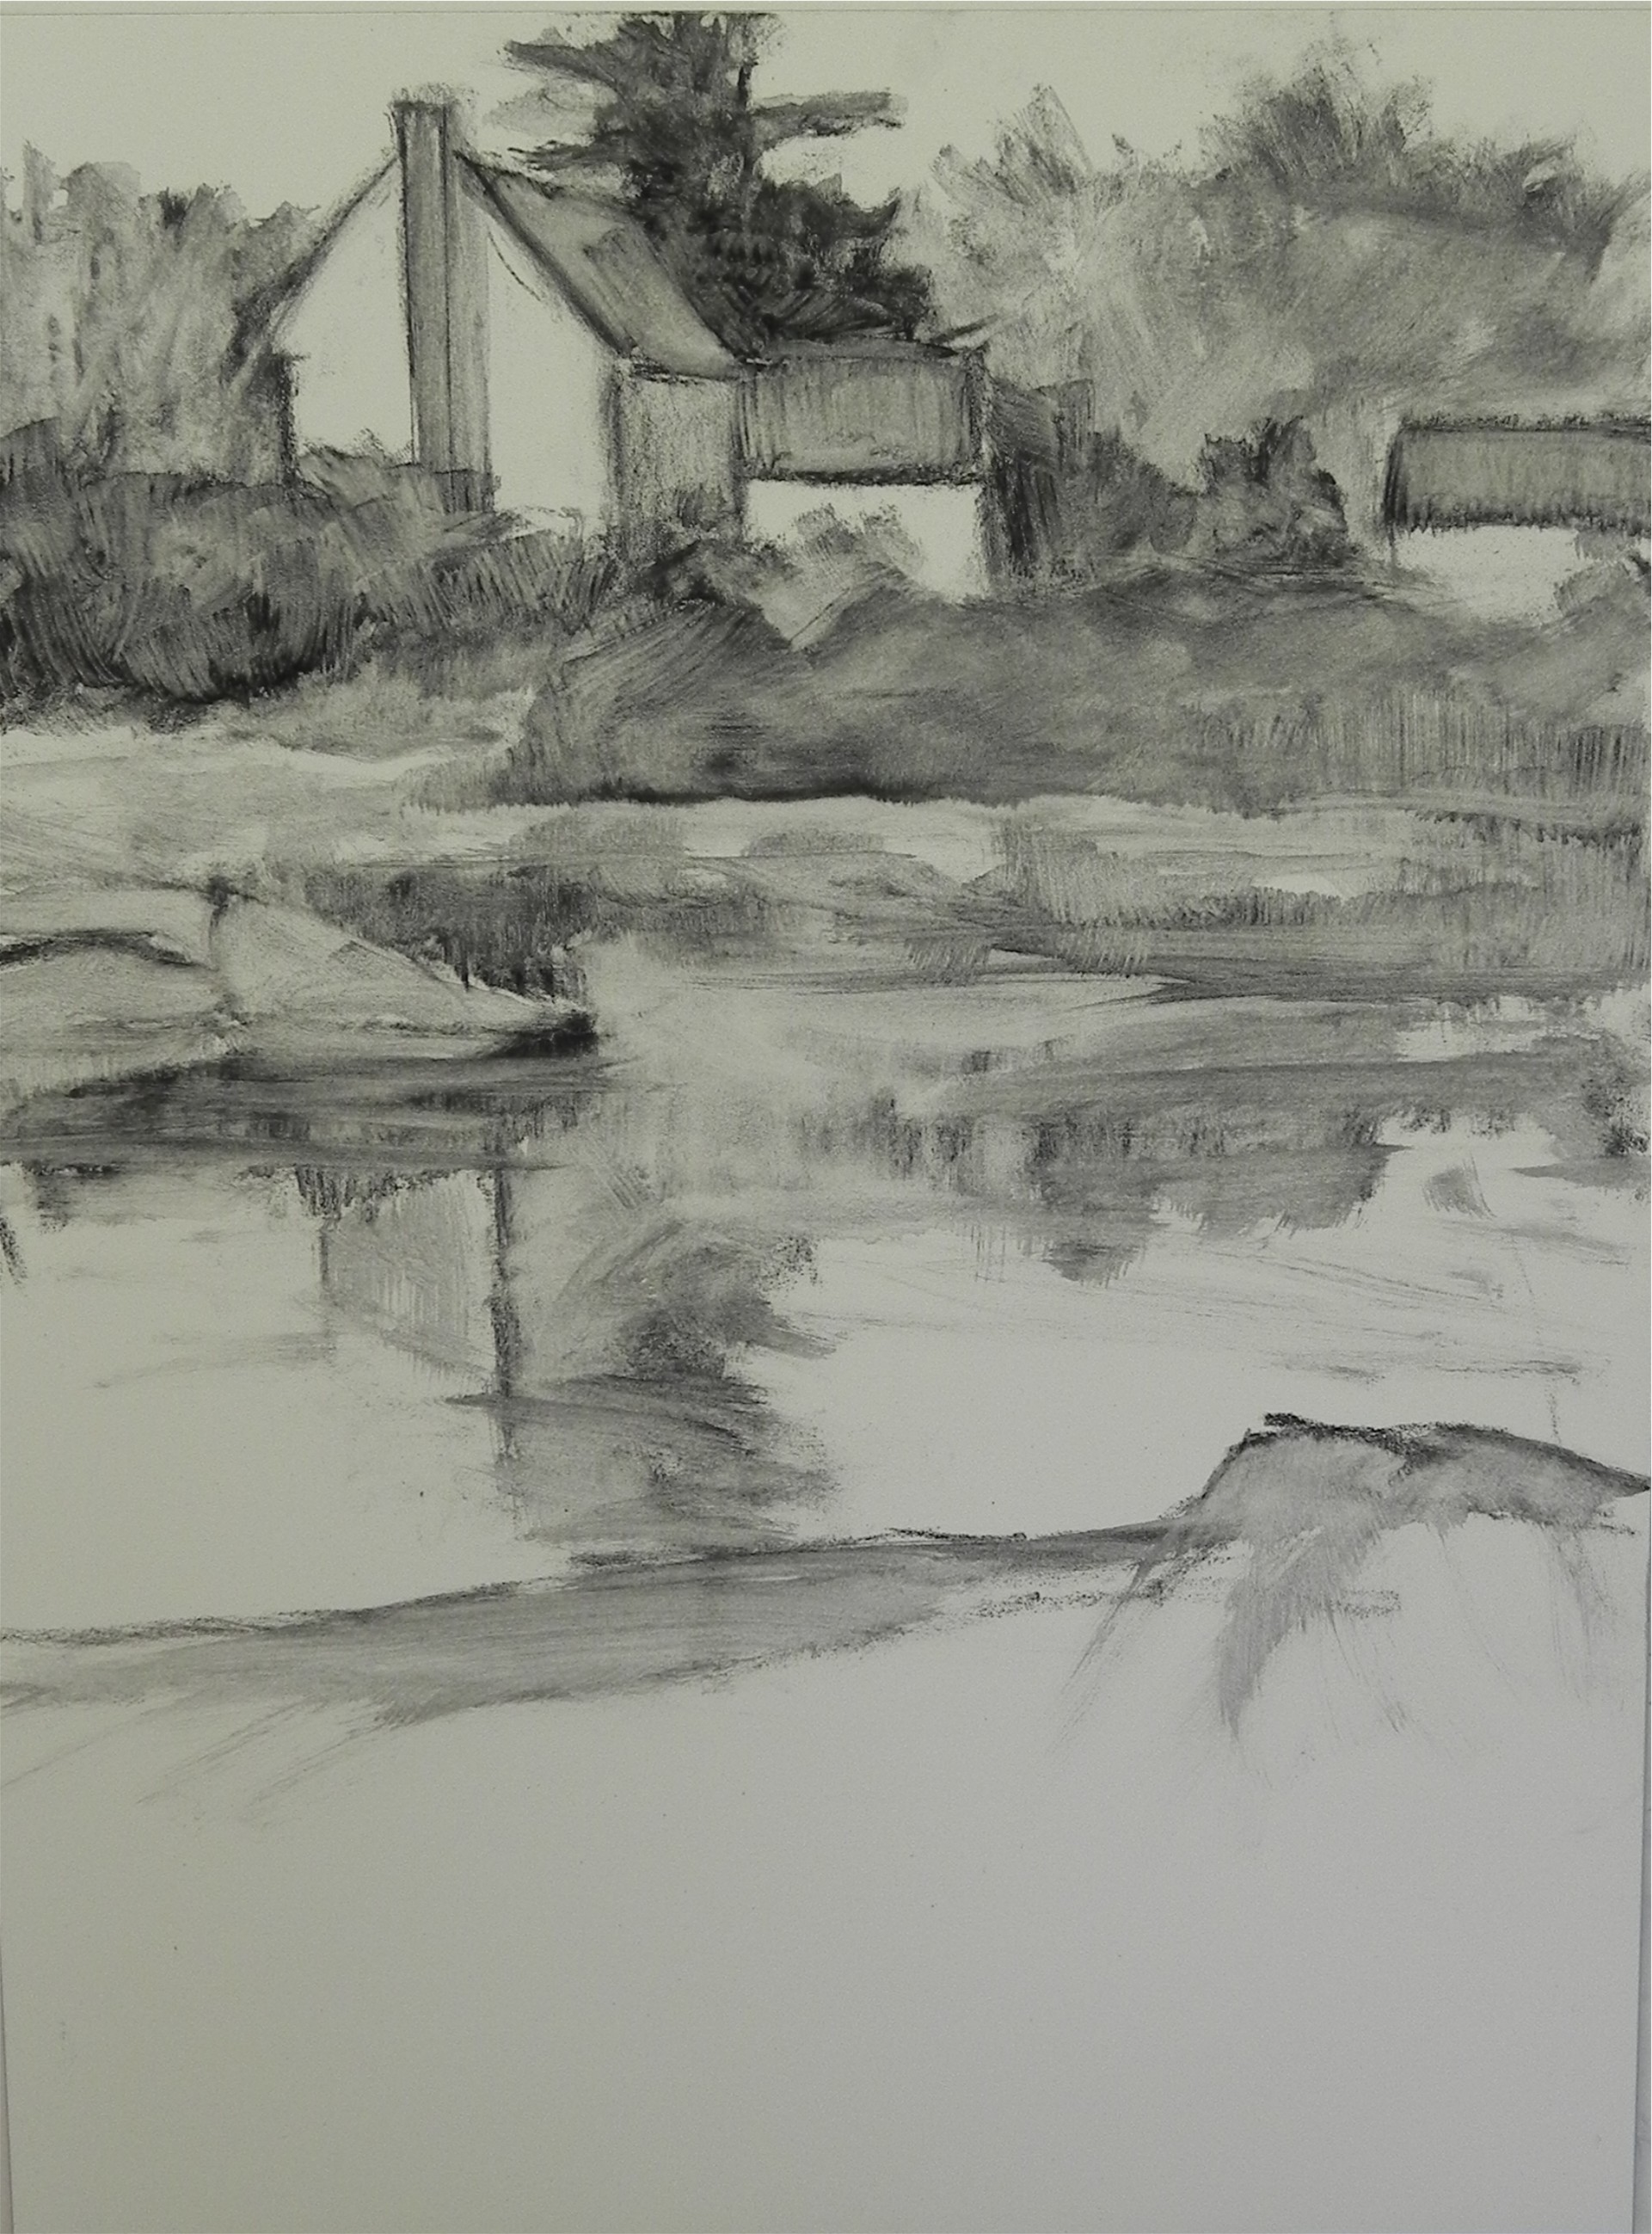
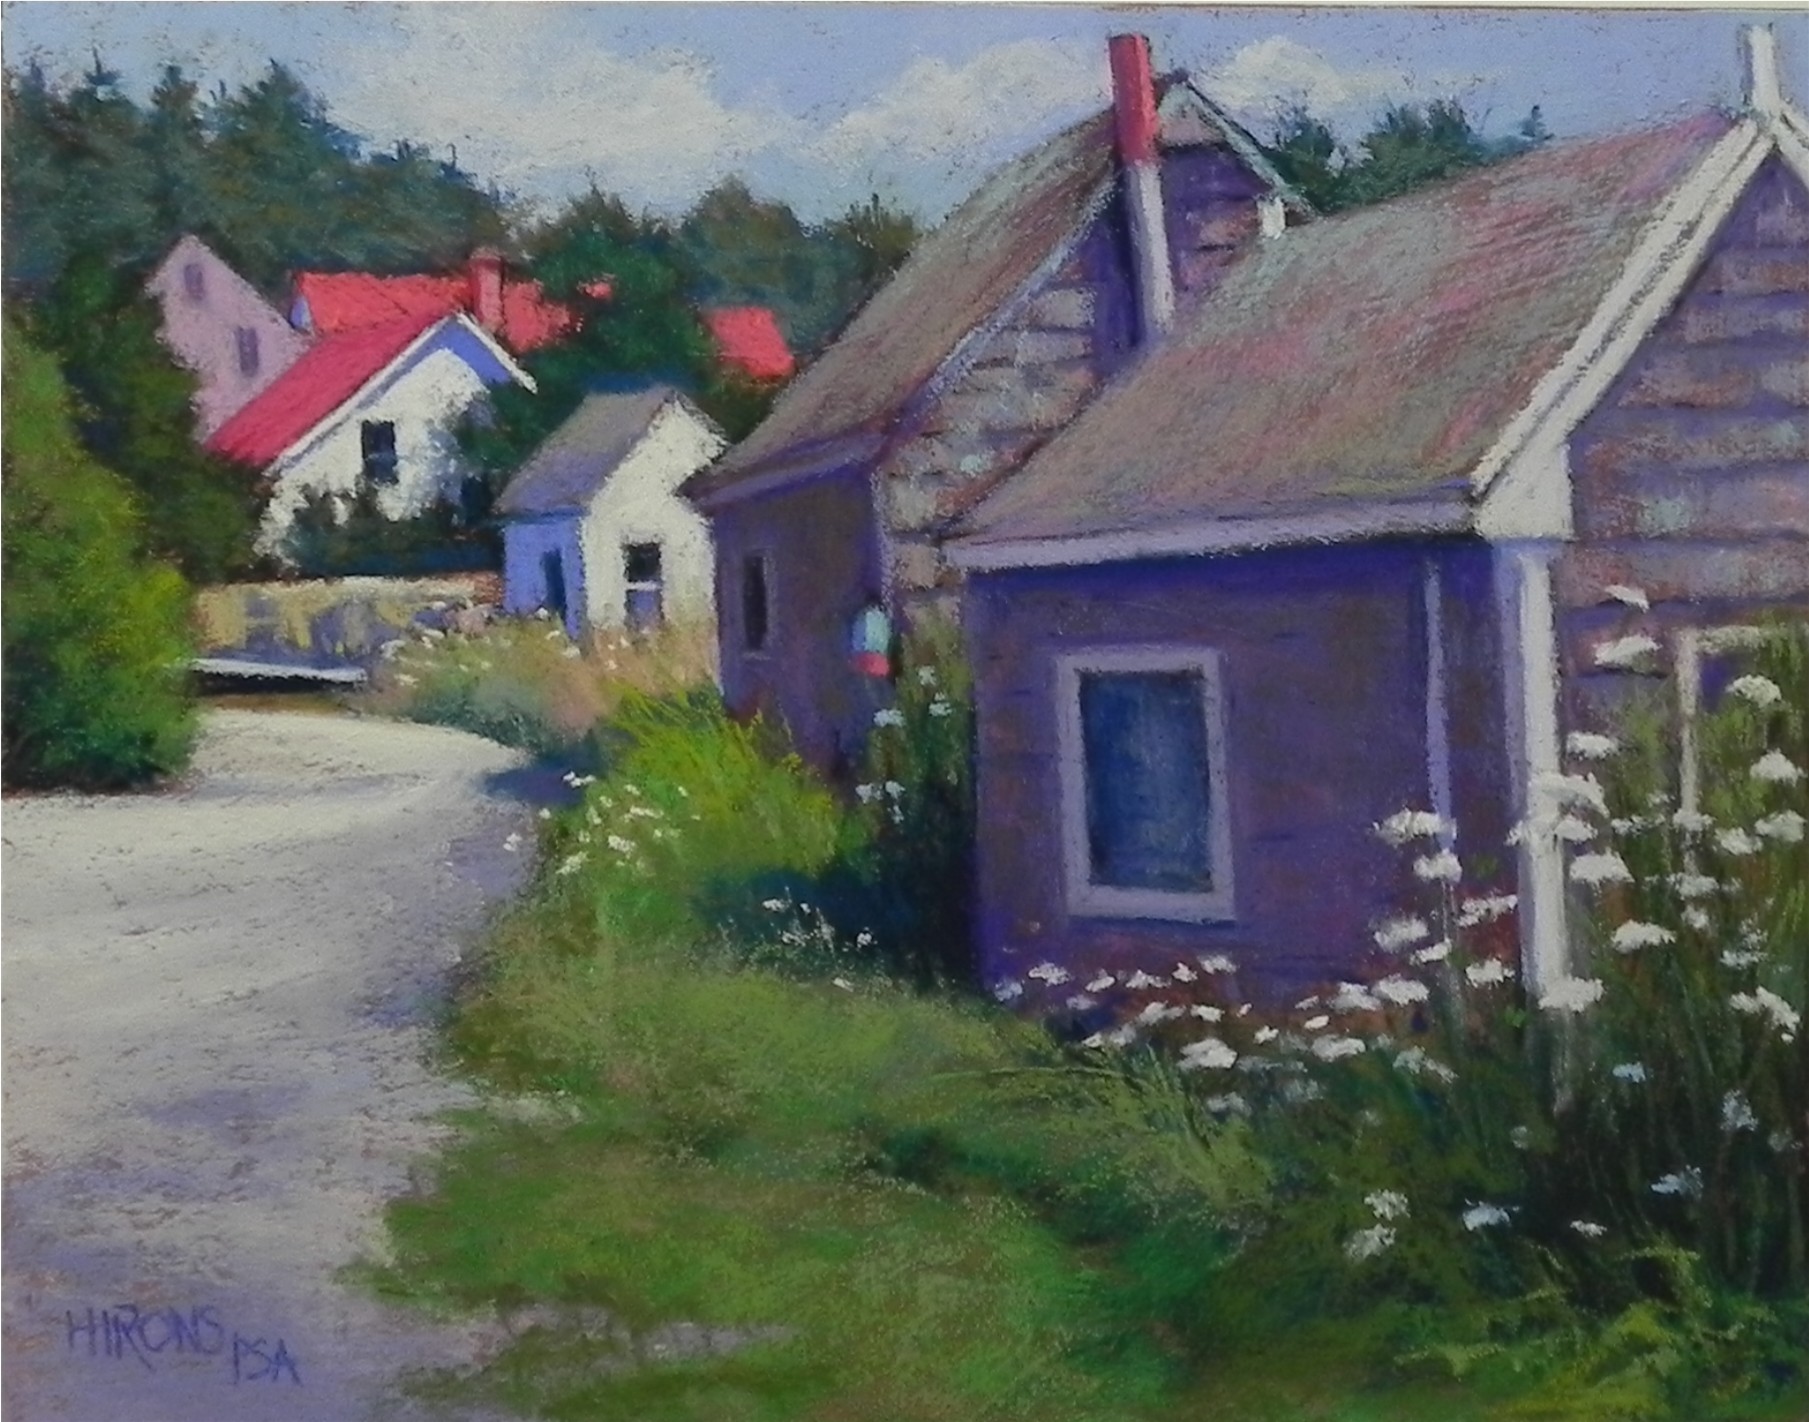
Red Roofs, Port Clyde, 11 x 14, Pastelbord

Source photo

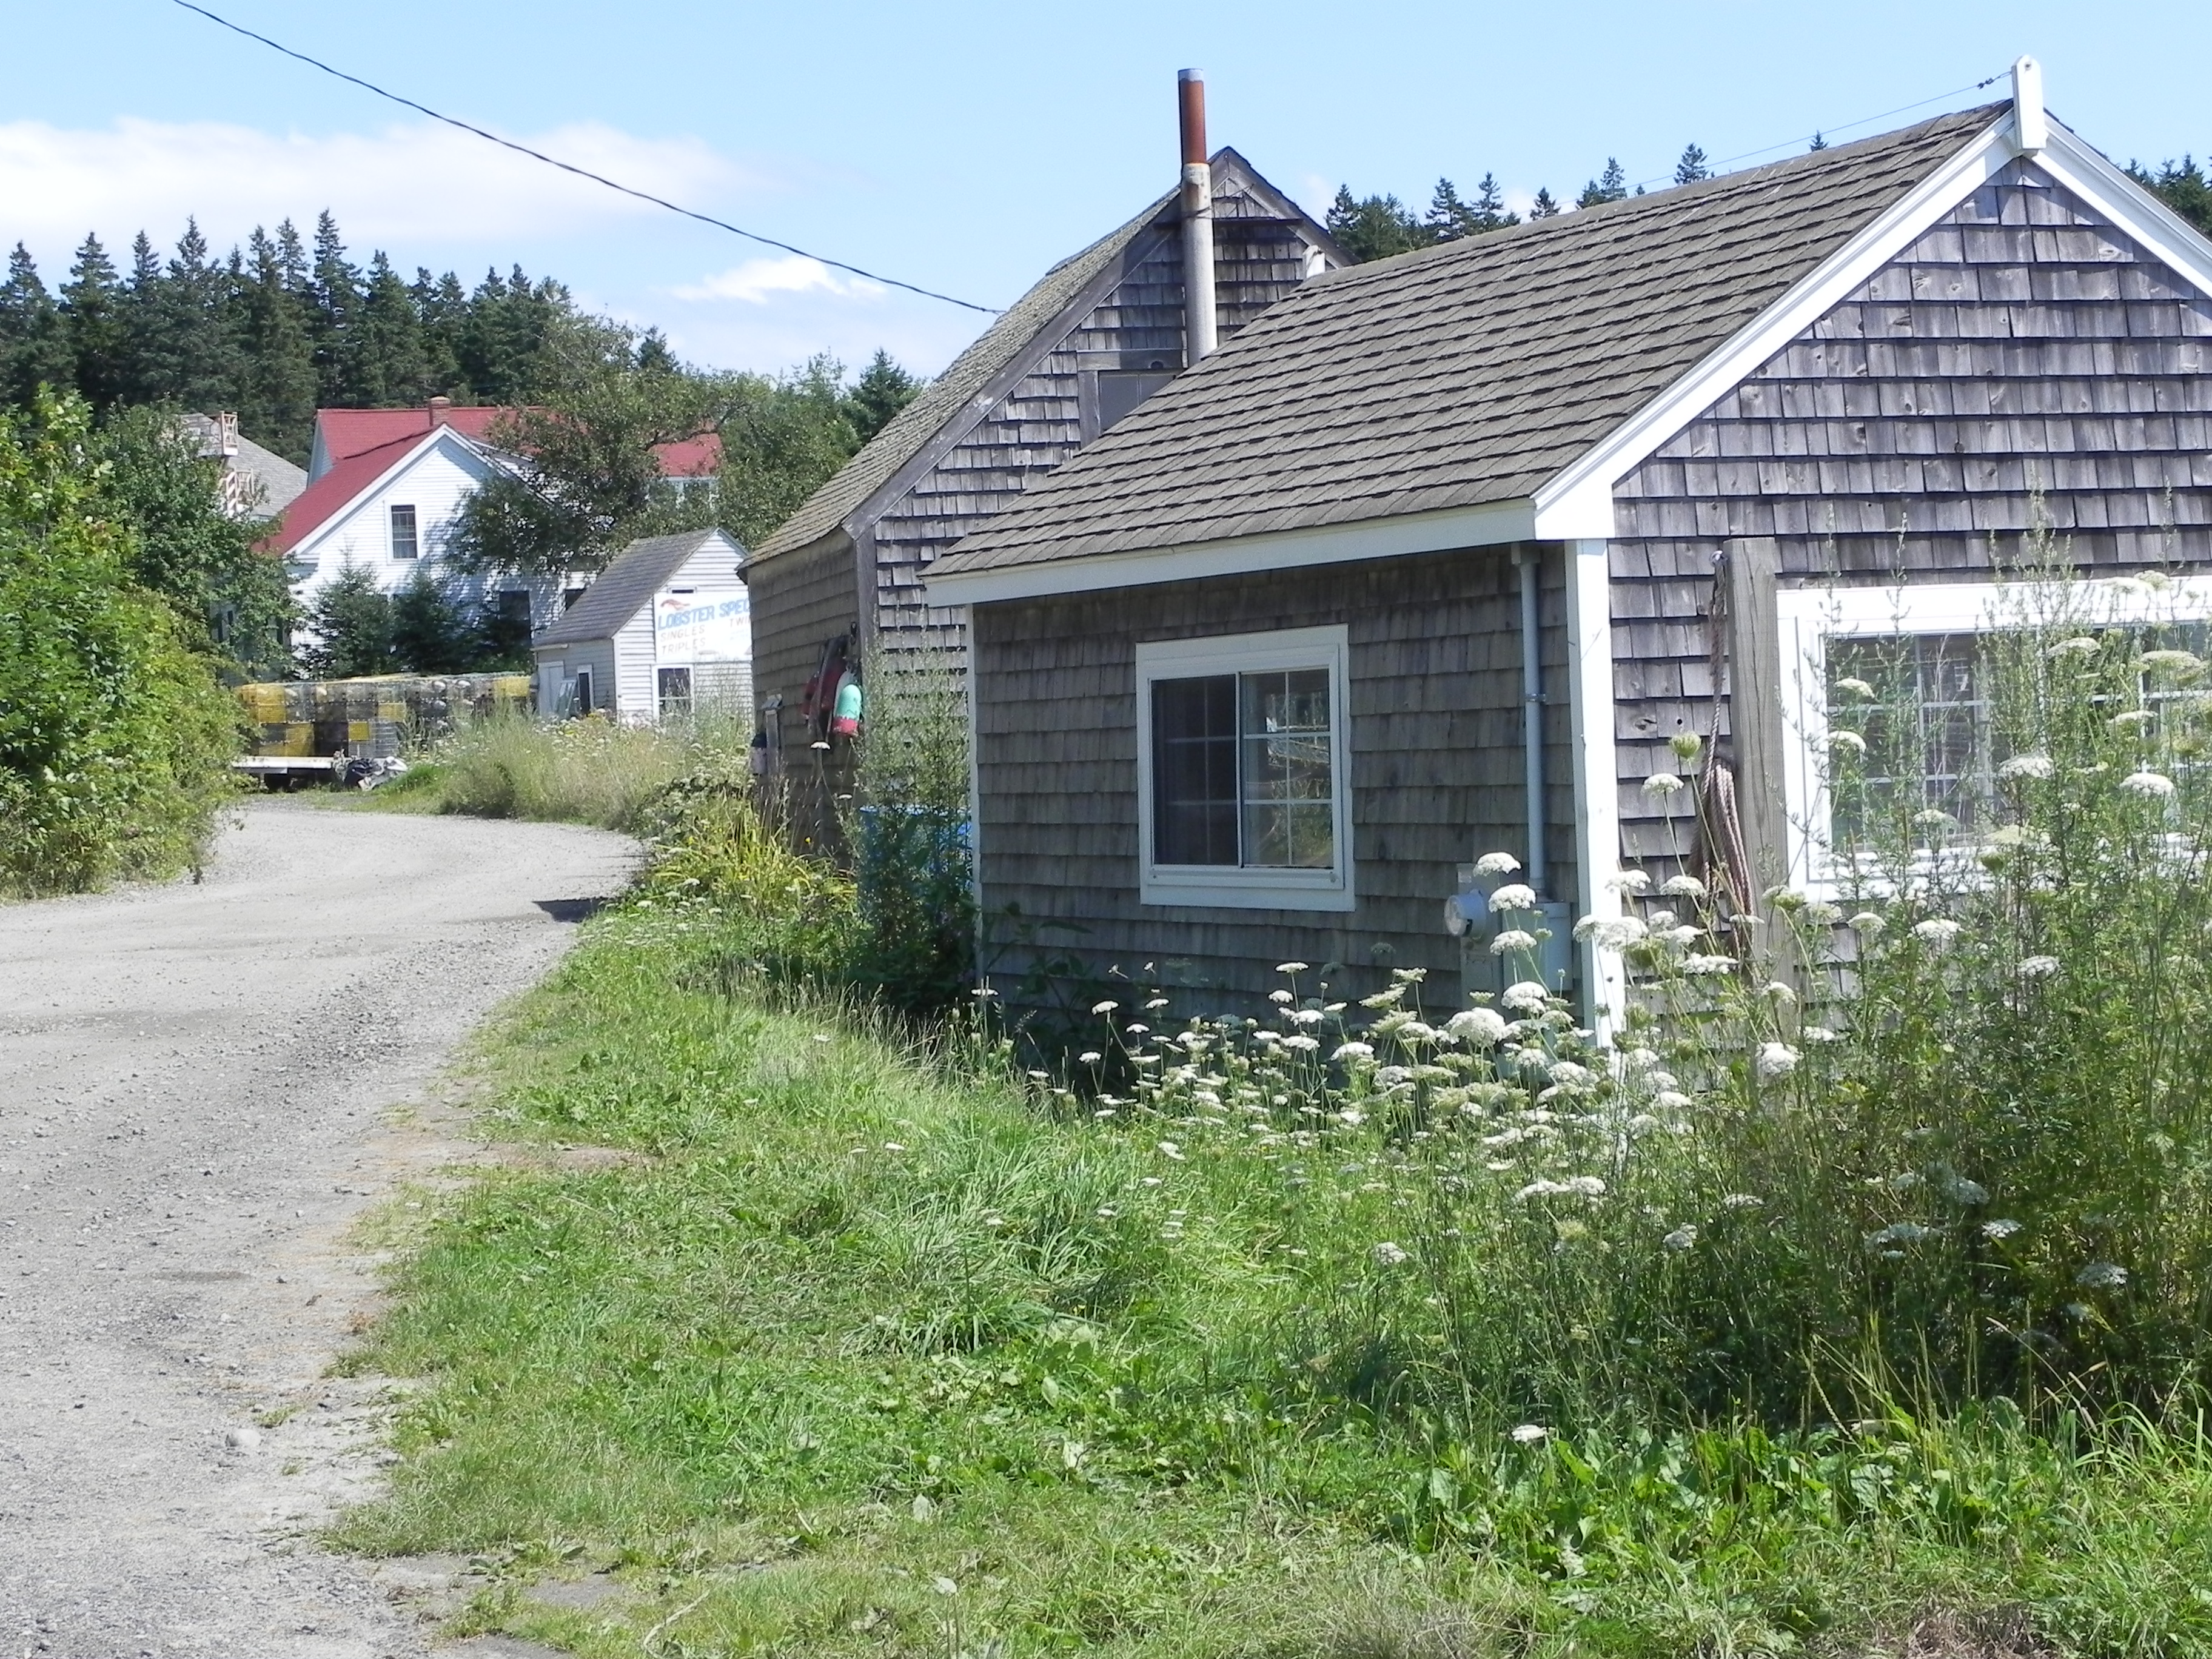
My latest painting was begun on Monday during our latest snow event. I’ve been looking at this photo from Maine for some time. I really liked the way the planes of the buildings lead the eye back into the area where there are sunlit houses and red roofs. However, the dull, gray, weather beaten shingled buildings scared me–and that large expanse of roof as well!  I decided to use a re-used Pastelbord on which I had applied two coats of  reddish-toned AS Colourfix liquid primer. This had the advantage of creating subtle lines, that show in the roof (maybe not in this image though). Using the 11 x 14, which is squarer than the photo, allowed me to shorten the foreground building. I then made the window smaller and when painting, used many colors in the siding and roof.  I learned years ago that there is nothing more boring than a large expanse of roof that is all the same!  So I used warm and cool colors of the same value (pinks, oranges, greens, and aqua) to lay in color and provide a more interesting surface. On a completely different note, I’m very honored to be included in the latest issue of the Pastelagram, the magazine of the Pastel Society of America. I’m featured as someone who paints buildings in the landscape, so I’m glad that I’ve returned to buildings for a bit!  Thanks to editor Robert Carsten for including me.

When the Color Photo is Needed

Road Through the Cornfields, 16 x 12, Pastelbord

Road Through the Cornfields, 16 x 12, Pastelbord

It’s snowing like crazy here!  I’ve cancelled my Monday class and am looking out at winter wonderland–not really what I want the week before Easter!  I’ve just spent time finishing off last week’s painting.  When I worked on it last Monday I only had a black and white photo.  I began with a charcoal wash and liked the way the trees developed. I then did an underpainting with hard pastel using some really wild color–bright yellow green  in the sky! I worked with the soft pastels fairly intuitively, knowing this is a scene from autumn on the Maryland Eastern shore. But there were some problems–the main one being that the sky and the leaves were the same value, as were the road and the neighboring grass. So it was very hard to determine where each should be!  I did my best, but this morning I worked with the color photo. I really liked the shape of the sky holes in the trees and I was losing a lot of that with the B & W photo. In the photo, the background trees are all green and the foreground foliage is orange. I didn’t change that, trying to be faithful to my intuitive color. But I did carve out more sky pieces and worked on the color of the road.

An Experiment

Harvest Moon, 12 x 12 Pastelbord

Harvest Moon, 12 x 12 Pastelbord

Last weekend I decided to experiment with washed off Pastelbord. One of the things I like about the surface is that it can be reused. However, I find that once washed off, it’s too smooth and has lost some of its tooth. My solution has normally been to add one or two coats of Art Spectrum liquid primer, either toned or clear. But this really changes the surface to something completely different. So I decided to try spraying the surface with Krylon workable fixative. I gave it a good spray outside and let it dry, then started playing.  I found that the surface was quite “hard” and that hard pastels wouldn’t do much on it. So I decided to experiment in another way: do a painting completely with my four boxes of Blue Earth pastels (blue, cerulean, orange, and yellow). The buttery consisency of these pastels worked quite nicely on the hard surface and I was able to apply a number of layers. (I did resort to Giraults for the small tree branches.)  I have MANY used boards sitting around ready to be reused! I’ll probably put gel on some and try the spray again on others. It’s definitely not a perfect solution. Another issue regarding Pastelbord: I have noticed that the surface of the  gray 12 x 12 boards seems to have less density than the white 16 x 20s.  Has anyone else noticed this difference?  (This painting will probably end up in the sink as well! It’s based on a remarkable photo of a huge rising moon in Easton, MD that I took years ago.)

Path to the Sea

Path to the Sea, 6 x 12, Pastelbord

Path to the Sea, 6 x 12, Pastelbord

This is the small painting that I mentioned last week in the post about pastel bliss.  As I said, it is a quiet picture, but I managed to add a lot of color that wasn’t there.  I intended the center of interest to be where the path leads into the distance. The clump of grasses on the left grabs the eye and hopefully leads it into the background, as does the strong diagonal of grasses on the right.  I used blue violet in the snow in the foreground (barely visible on my monitor) and warmer colors in the snow in the middle. I think this makes a big difference in the actual painting.  Took it and others for my October show in Bethesda to my framer’s yesterday. Decided to frame this by attaching to a black mat and floating an off-white mat around it with 3/8th” of black showing. Will use a small, flat black frame. It creates quite a distinctive look and the floating mat allows the entire surface to show.  It works very nicely for boards like this.

One Way to Get Started

Charcoal wash

Charcoal wash

House at Mosquito Cove, 16 x 12, Pastelbord

House at Mosquito Cove, 16 x 12, Pastelbord

This painting was done as a demonstration for my Tuesday class. When I do a demo that has a complicated composition, I like to have it set into the paper or board before I do the demo. I find that using charcoal and water works really nicely for this. I had problems getting the house reflection aligned and changed it a number of times by just adding water and wiping off with a paper towel. The resulting wash gives me a good road map for my painting and doesn’t mix with the subsequent layers of pastel.  For this painting, I used  hard pastels to do an underpainting, then added soft pastel over. I’ve made a number of changes since the demo, such as warming up the colors in the background and removing distracting flowers from the foreground. One of the challenges was the division of space between the houses, water, and land at bottom. The reflections coming down and the reeds going up, hopefully, tie it all together.


The “Wow” Factor vs. Pastel Bliss

Gracie, 12 x 12, Pastelbord

Gracie, 12 x 12, Pastelbord

On Monday I will be holding a discussion with my advanced class on the “wow” factor. I was first introduced to this concept by Richard McKinley at a workshop in 2008. And the Pastel Journal, in its April issue on the Pastel 100, has included a special article on the “wow” factor and what it means for jurists.  They cover many things, but the one that seems to be at the center is the emotional factor.  When a painting encompasses the “wow” factor it speaks to others. But lately, I’ve been thinking about a different concept–“pastel bliss”–to coin my own phrase.  I experienced this last Monday when I did a small 6 x 12 painting in class. The composition came together nicely, I liked the colors, the surface and pastels were working well and every stroke brought enjoyment. And the one problem area was quickly resolved by pieces of grass that I love. (My photo of the painting didn’t work well, but it was filmed yesterday and I will share it when the disk is received.) For now, I’ll share the picture of my mother’s cat, Gracie, another painting that came together in two hours and basically painted itself.  The difference that I’m speaking about is the impact on others of some paintings vs. the enjoyment we receive when we paint certain paintings. I guess that perfect bliss is achieved both the pleasure and the “wow” element are combined in the same painting.  But sometimes, the pleasure alone is enough. When people ask me at a show what my favorite painting is, invariably it’s the one that I enjoyed painting the most. Others have no knowledge of this and assess the paintings based on their own experiences and how the paintings speak to them. This is as it should be.  Which brings me back to the element of emotion in our paintings. This is very difficult for me to describe or define. I rarely like paintings that are too obviously meant to stir the emotions. So I think it’s something that comes from within, from the relationship we have to the subject matter. Last week’s painting was another snow picture from Mattapoisett, from a place I visit every time I’m there and near our first house. So I know the feeling of it well. Perhaps that translates as I’m painting.  It’s definitely not a “wow” picture. It’s very quiet and I have no idea whether anyone else would find it emotionally appealing. But it speaks to me.

Snow Shapes

Dry underpainting

Snow Shapes, 12 x 12, Pastelbord

I began this painting on a 12 x 12 gray Pastelbord. I started out with the basic shapes in cool colors and decided to spray with a workable fixative. This gave more tooth to the board and kept the colors from mixing. (Note that I changed the shape at bottom right from the original.) For this painting, I wanted to avoid green completely and used a mix of violets, earth tones, and warm pinks. I added rust to the tree at left to indicate oak leaves still hanging on. This picture was really fun!  I love the abstract quality of it and the ability to use a pleasing color palette. The board had lines in it, however, that I strugged to get rid of–an altogether too common problem with this surface.  But I love what I can do with it.

Blue House on the Marsh

Early stage

Blue House on the Marsh, 11 x 14, Pastelbord

Further completion

Here is an early stage and the completed picture for one of two paintings I did today!  They are based on the color studies I posted earlier. The first issue was the size. I tried out a 16 x 20, but decided there would be way too much tree!  So I used an 11 x 14. The board I had available was a toned brown board. So I began with charcoal and a small amount of light Girault to lay in the basic shapes. I worked down, primarily with Girauls (except for Schmincke in the sky). I really enjoyed adding the little houses to this picture, which didn’t fit in the 7 x 5 study. I also decided to tone down the colors and not use such dark and bright colors.  Decided also to use the grayed blue of the house and added grayed blue to the snow in the foreground and other places to add balance. This is a quiet picture, but I’m happy with it.  The reeds are all Unisons from their brown earth series.