
Easel and box set up
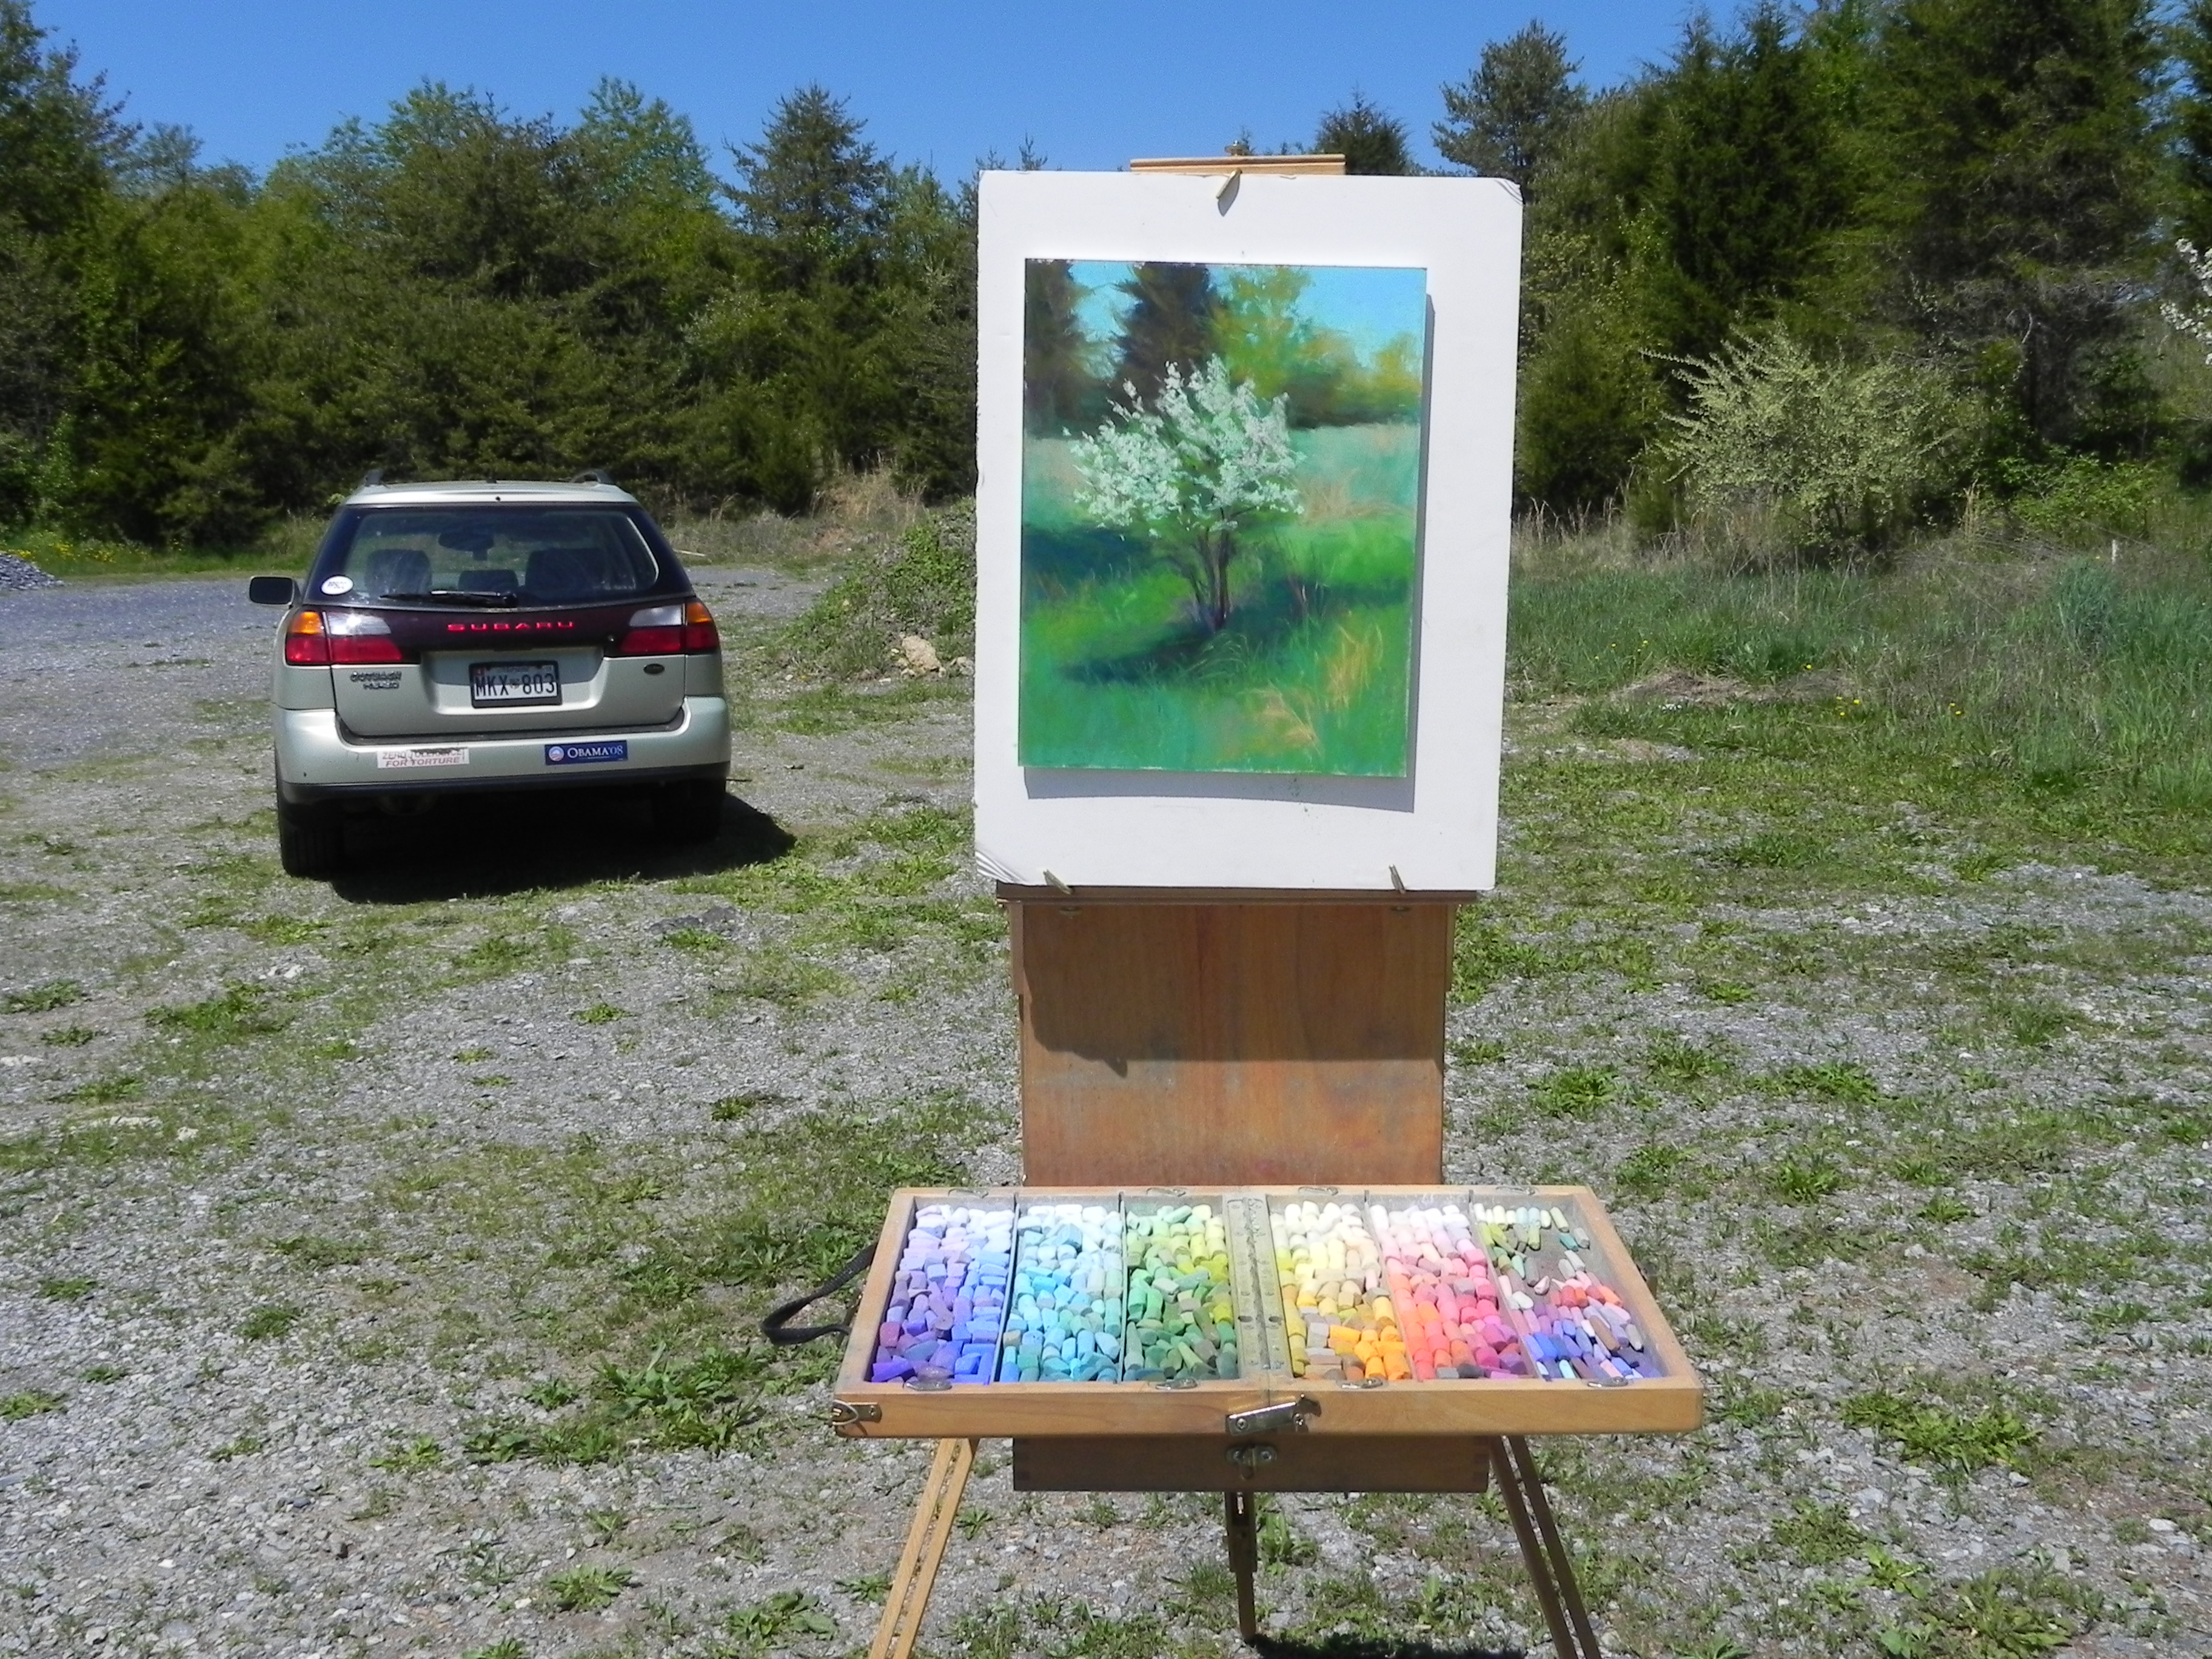
I thought I was done posting, but I went out to paint today and decided that it would be nice to share my personal journey of plein air painting with you. There is a lot of information out there on what to bring and use, but I thought I’d share with you what I’ve found most useful. I also want to talk about what I look for when choosing subject matter, which I’ll cover in the next post. This one will discuss equipment, materials and techniques. For that reason, I’m repeating this photo from my first outdoor session this year so I have something for you to look at! I began painting outside on 9-11! I set up my new Julian easel with the legs backwards, but it was OK. It was so wonderful to be outside in nature and not feel like everything I knew had changed. I’ve been painting outside now for 12 years and it’s been a real odyssey. I finally feel like I have my act together (maybe!) so I thought I’d share my experiences with you. First of all equipment. I use a standard Julian easel for its sturdiness. I’ve painted with it on windy hillsides and by the ocean and it hasn’t let me down (but I’ve seen other peoples easels and paintings go flying!) I don’t take this on planes and basically avoid painting when I go anywhere on a plane! I also use the Heilmann back pack box for my pastels. I love this box–really well made and carries the right amount of pastel. There are 6 columns and I have 5 of them devoted to soft pastels (Ludwig, Schmincke, Great American and Unison) and one for Girault on the right. I also carry a small plastic box of hard pastels that I use for underpaintings, and have a few of them in the Girault space in case I need more detail. Those are the basics. In addition, I have an old bag in which I carry everything else–brushes, alcohol, sun lotion and bug spray, paper towels and wet ones, and my box of corn meal. I also try to remember to put some business cards in there. AND, almost forgot–my 3 in one picture perfect viewfinder, which I always use. One other piece of equipment is a small plastic stool that allows me to sit and rest. I have been all over the place on surfaces, beginning with sanded, moving to rough home-made, then to Pastelbord. Now I’m into UART and I’m sticking with it for now. Here’s what I’ve learned: 1) use a surface that you really like; 2) don’t work too large (I generally don’t go about 12 x 16); 3) use a surface that won’t take too much time to complete! I used to feel that sanded surfaces were restricting because I got too heavy on them. But I realized that the rough surfaces take forever, unless I use really soft pastels, which get too gummy. Learning to use my Giraults and a light touch has really helped. I like the UART (400 and 500) because I get immediate gratification! The pastel goes on so nicely. This is true of Wallis as well, I just don’t happen to have as much of it right now. And because my outdoor painting is done in humid, damp climates on the East Coast, I like to have the paper mounted. Ive purchased the UART 500 boards from ProArt Panels on foam core (very nice) and more recently I got the 400 grit from Dakota in 11 x 14 and 12 x 16 sizes. These are my preferred sizes for painting outside–not too large and not too small. I’ll also be taking some 9 x 12 mounted Wallis gray to the Cape, given that I have it on hand. As to pastels, the major change I’ve made over the years is to use more Girault. I first purchased the Mowry Poetic Landscape set in wood box in 2002 and really didn’t like them. I was so used to the soft Great Americans. They seemed hard and not pleasant to work with. But as I’ve gotten back into softer sanded surfaces, I know how much I depend on them. I also use the soft pastels, but I try to be careful not to build up too much pastel. As to techniques, I now prefer a hard pastel and alcohol underpainting. I’ve used watercolor a lot, but the hard pastel is easier and gives me more in the way of composition and values support. I’ve been doing my layin with the side of a hard pastel and moving quickly to the underpainting. I don’t always do any studies in my notebook, I have to confess! But it’s there, along with the Tombow pens, just in case!
Hi Jean;
Thanks for your emphasis on plein air painting this spring. The review of your equipment and approaches to selecting the right subject and composition among all of the overwhelming options the outdoors presents helps me to focus and get to work. The painting of the vegetation and reflections on the lake in your next post is very nice. It feel loose and lazy while looking great!
I look forward to seeing you at IAPS next Wednesday!
Susan