
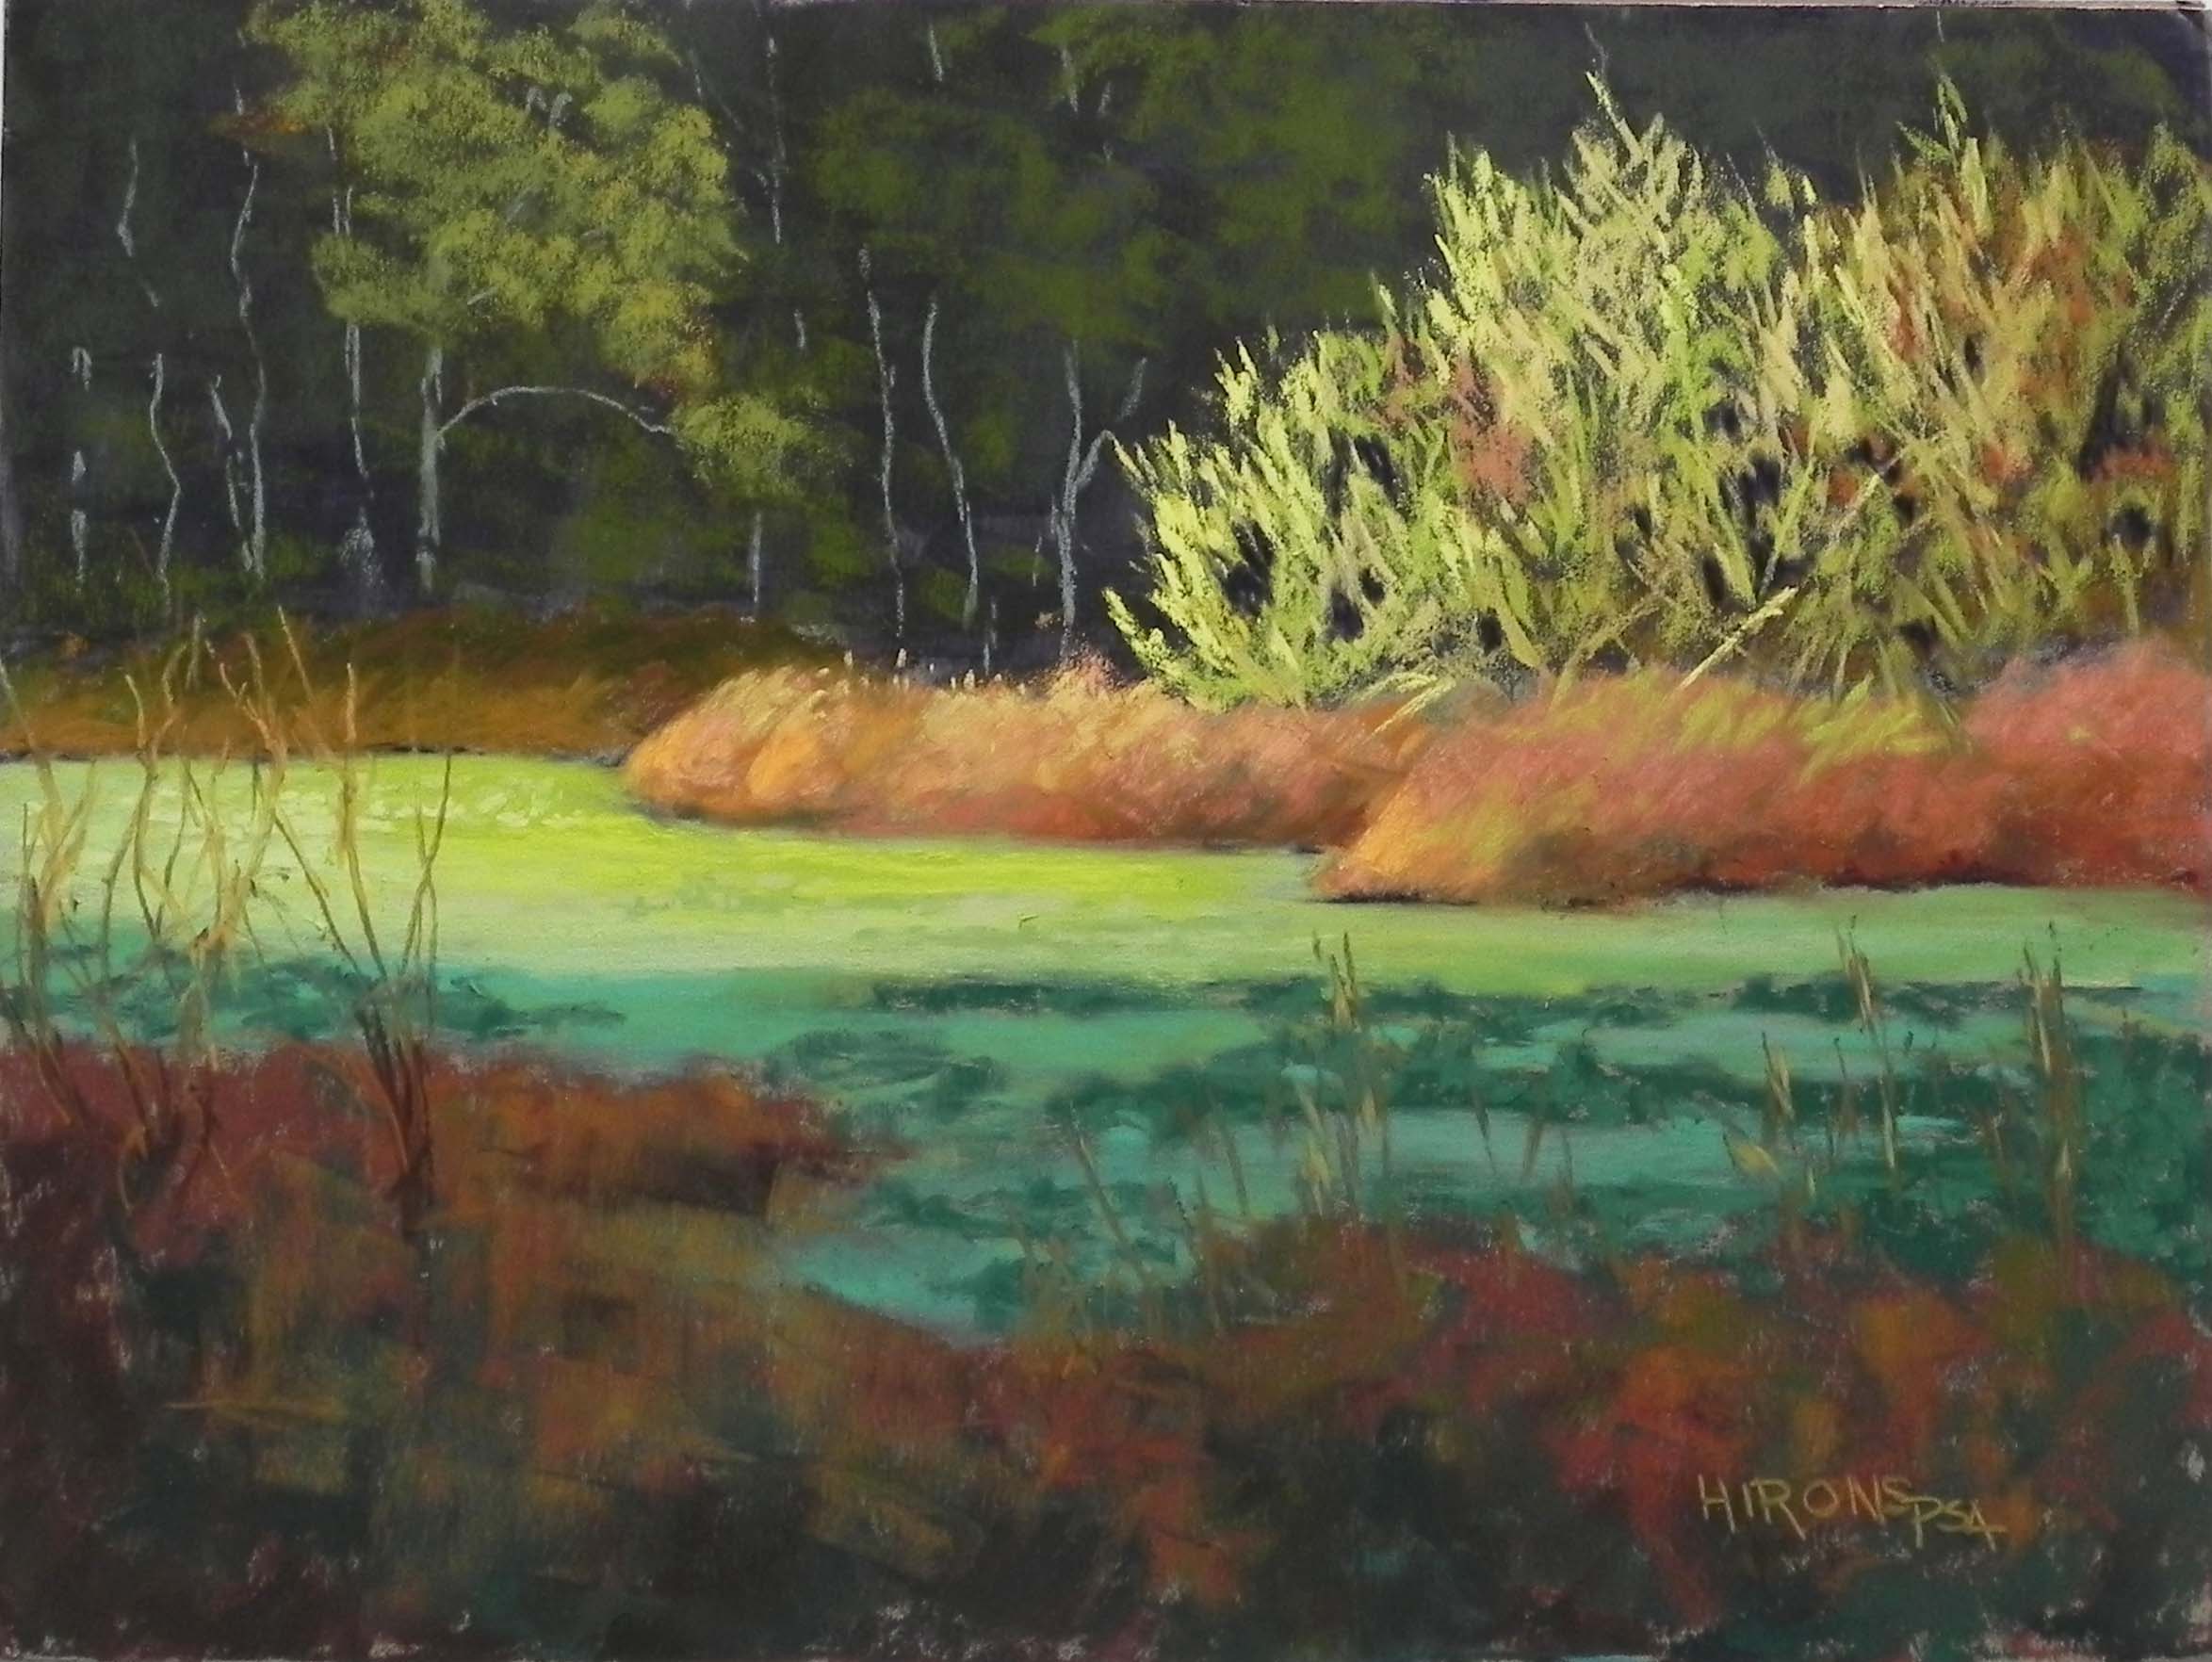
Break in the Clouds, 12″ x 16″, Pastel Premiere “Italian clay”
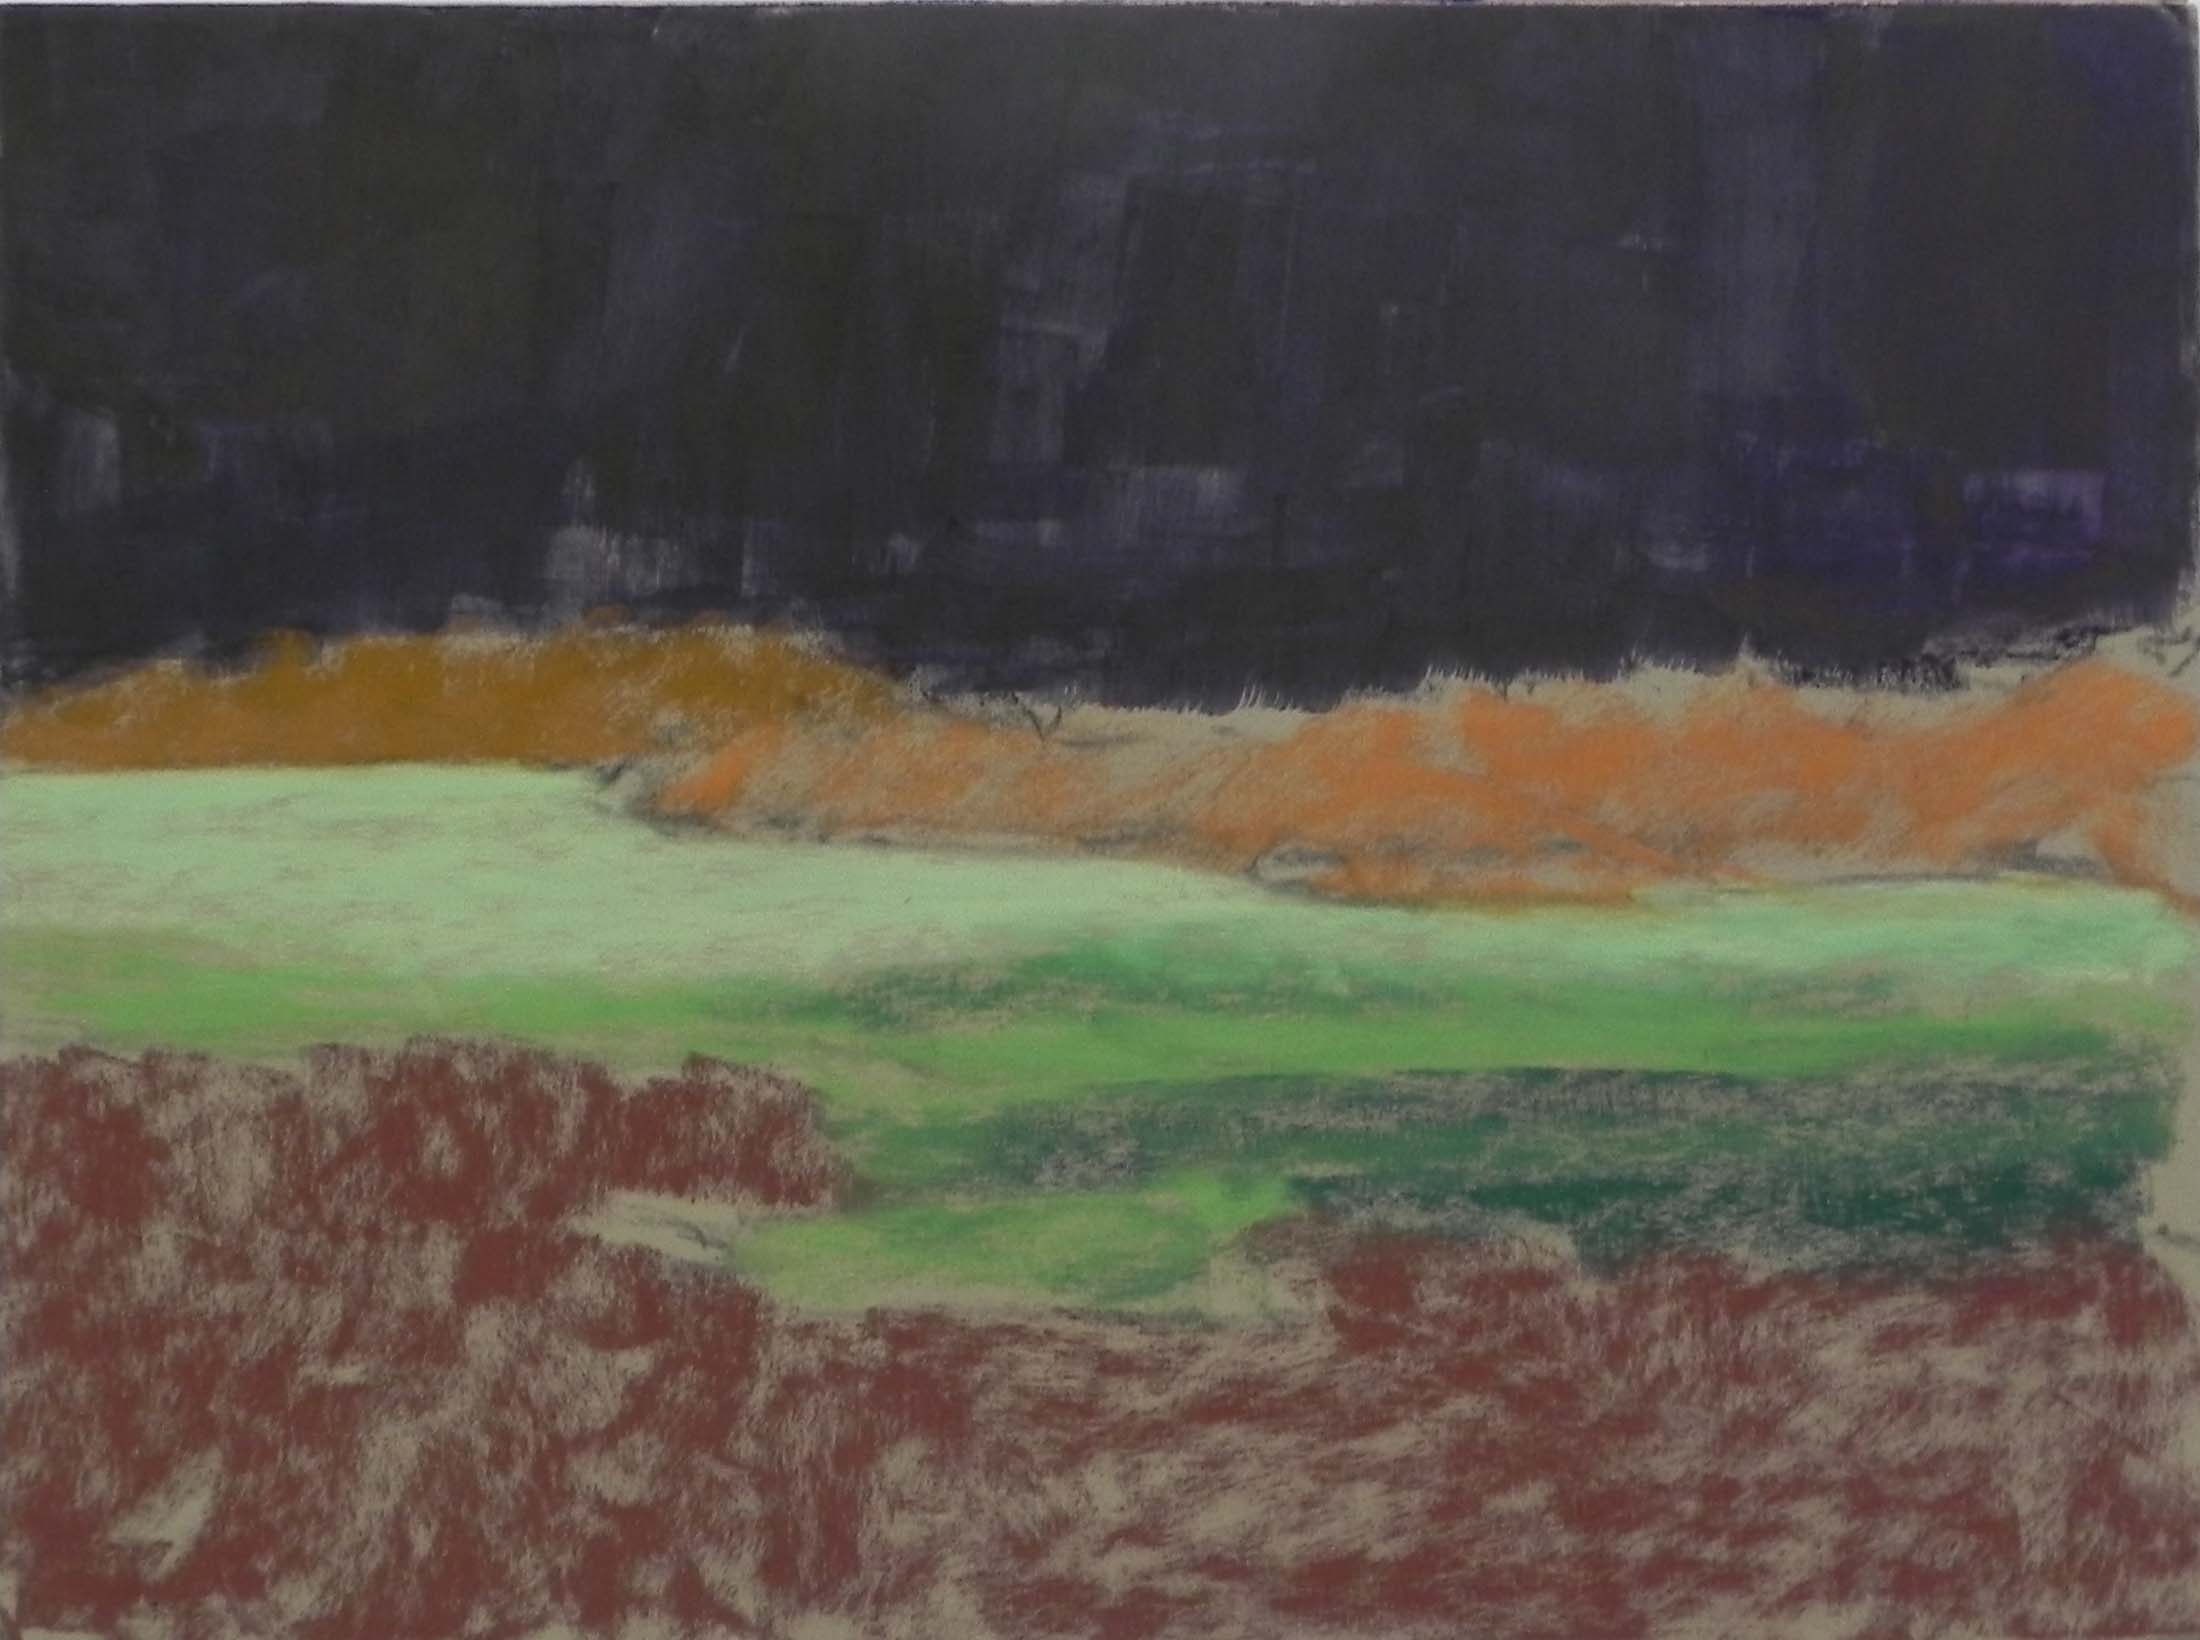
Partial underpainting and block in
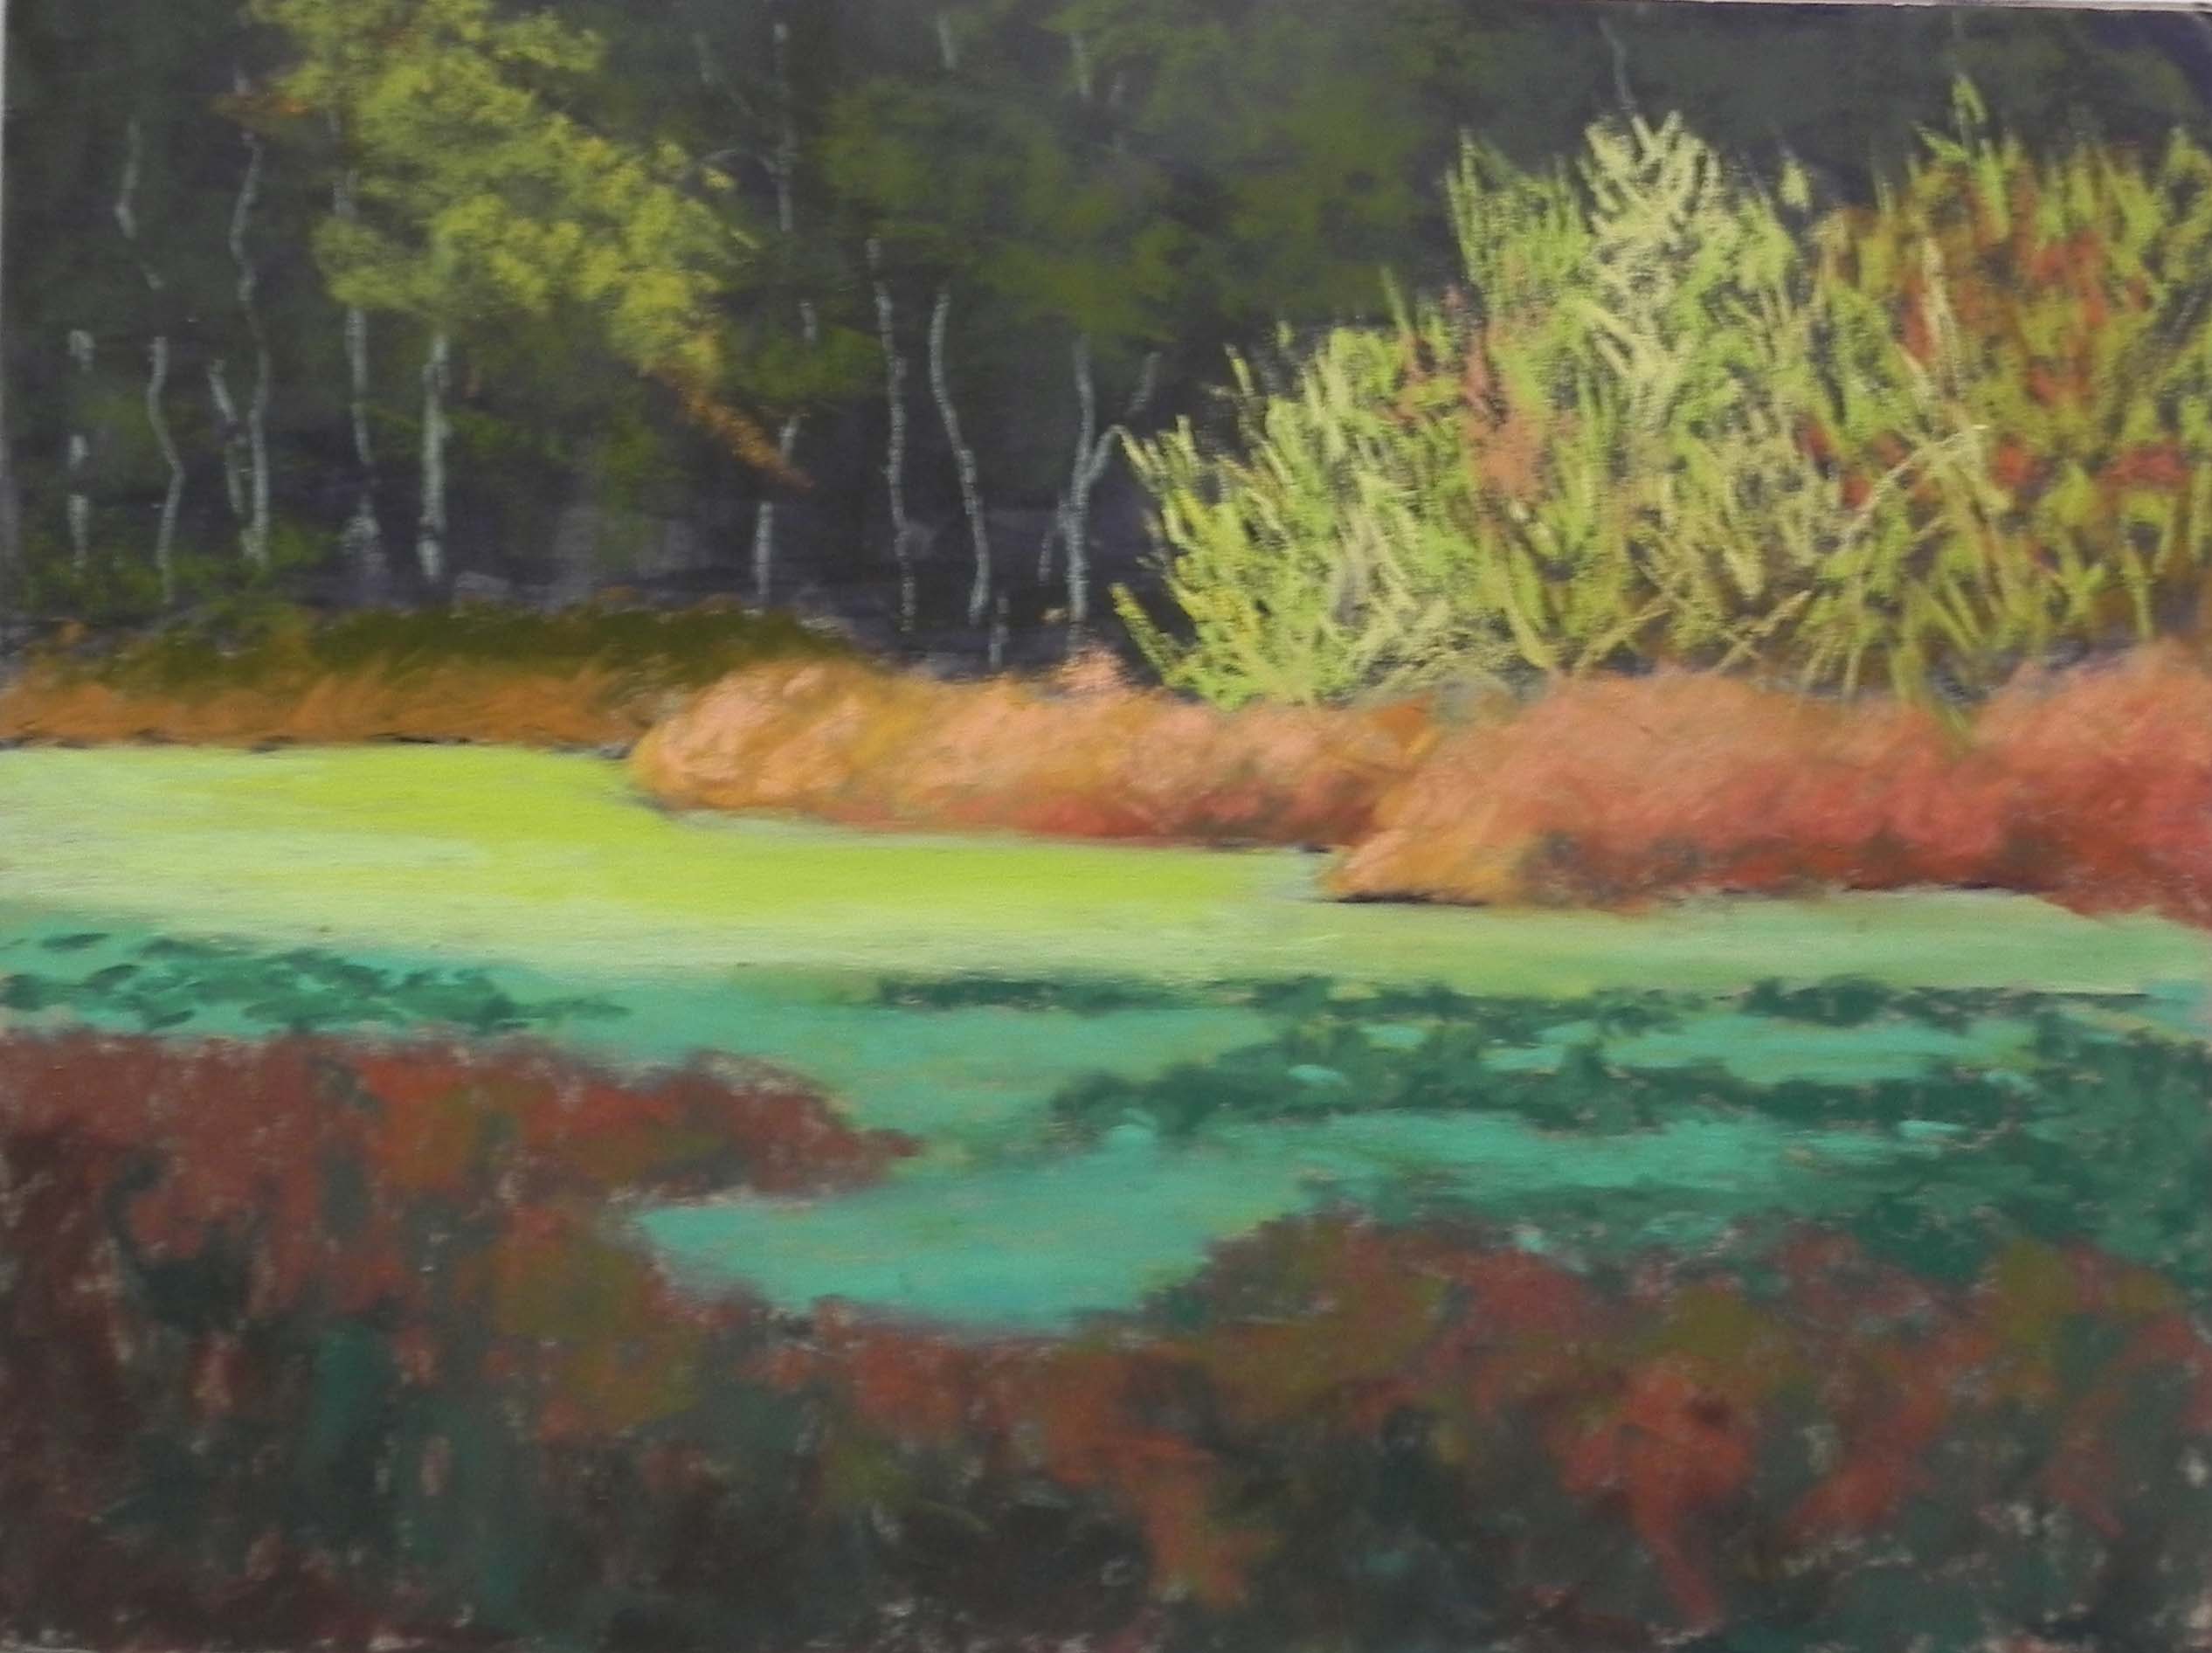
Early stage of completion
Today I did my second demo of the week and my second painting from the McKee-Beshers preserve in Poolesville, MD. Like the first one (Sun on the Marsh), the background is just trees and quite dark. Unlike the first one, however, the background trees have no light and there is a group of bushes in dramatic sunlight in front of the trees.
I chose a 12 x 16 mounted sheet of Pastel Premiere Italian clay to work on. I drew a composition using charcoal lightly on the surface. One of my challenges was that the photo was not good. I had captured only a portion of the bushes in light and the bottom shapes were really boring. I looked at other photos and combined them to come up with what I thought would be a decent composition.
After I did the purple underpainting, I used some Giraults to lightly lay in the shapes of the water and plants growing in the water. This is all watery with various types of plants growing and in light and shadow. Once that was done I lightly indicated the bushes over the background to mark the shape.
For the background trees, I used several warm green Giraults and lightly brushed in foliage then added trunks with a light grayed blue green. Then I added the foliage of the large tree coming down on the left. I kept it to two fairly dull greens, so as not to compete with the bushes. I began the sunlit bushes with a light yellow green Girault, a sienna, and several values of yellow and brown. I didn’t want to go to a bright yellow at first. At one point it was decided that I hadn’t left enough holes, so I used the eggplant pastel to create them and it worked great. (You can see the difference in the two photos of the initial and final completions).
I really liked the effect of using cool blue green in the water to denote the shaded area but my students had problems reading it and I ended up adding more of the dark green leaves and changing the shape of the reddish bottom. For the warm sunlit water I first put in some Girault whitish green and yellow green, then some Blue Earth, then a little Roche. I kept experimenting! Finally, I realized that the same plants were growing in this area and needed to be at least hinted at so I used my Blue Earths to put in small specs of lighter and darker greens. With the water to my satisfaction I could then add some vertical twigs over in the lower left corner.
My final notes were in the bushes and grasses below them where i went to soft pastels, added a real yellow at the top and several oranges in the grasses.
All of this took exactly 2 hours! I got lots of useful comments from the class and really enjoyed the exchange, even the harangues! It’s a better painting because of their input.