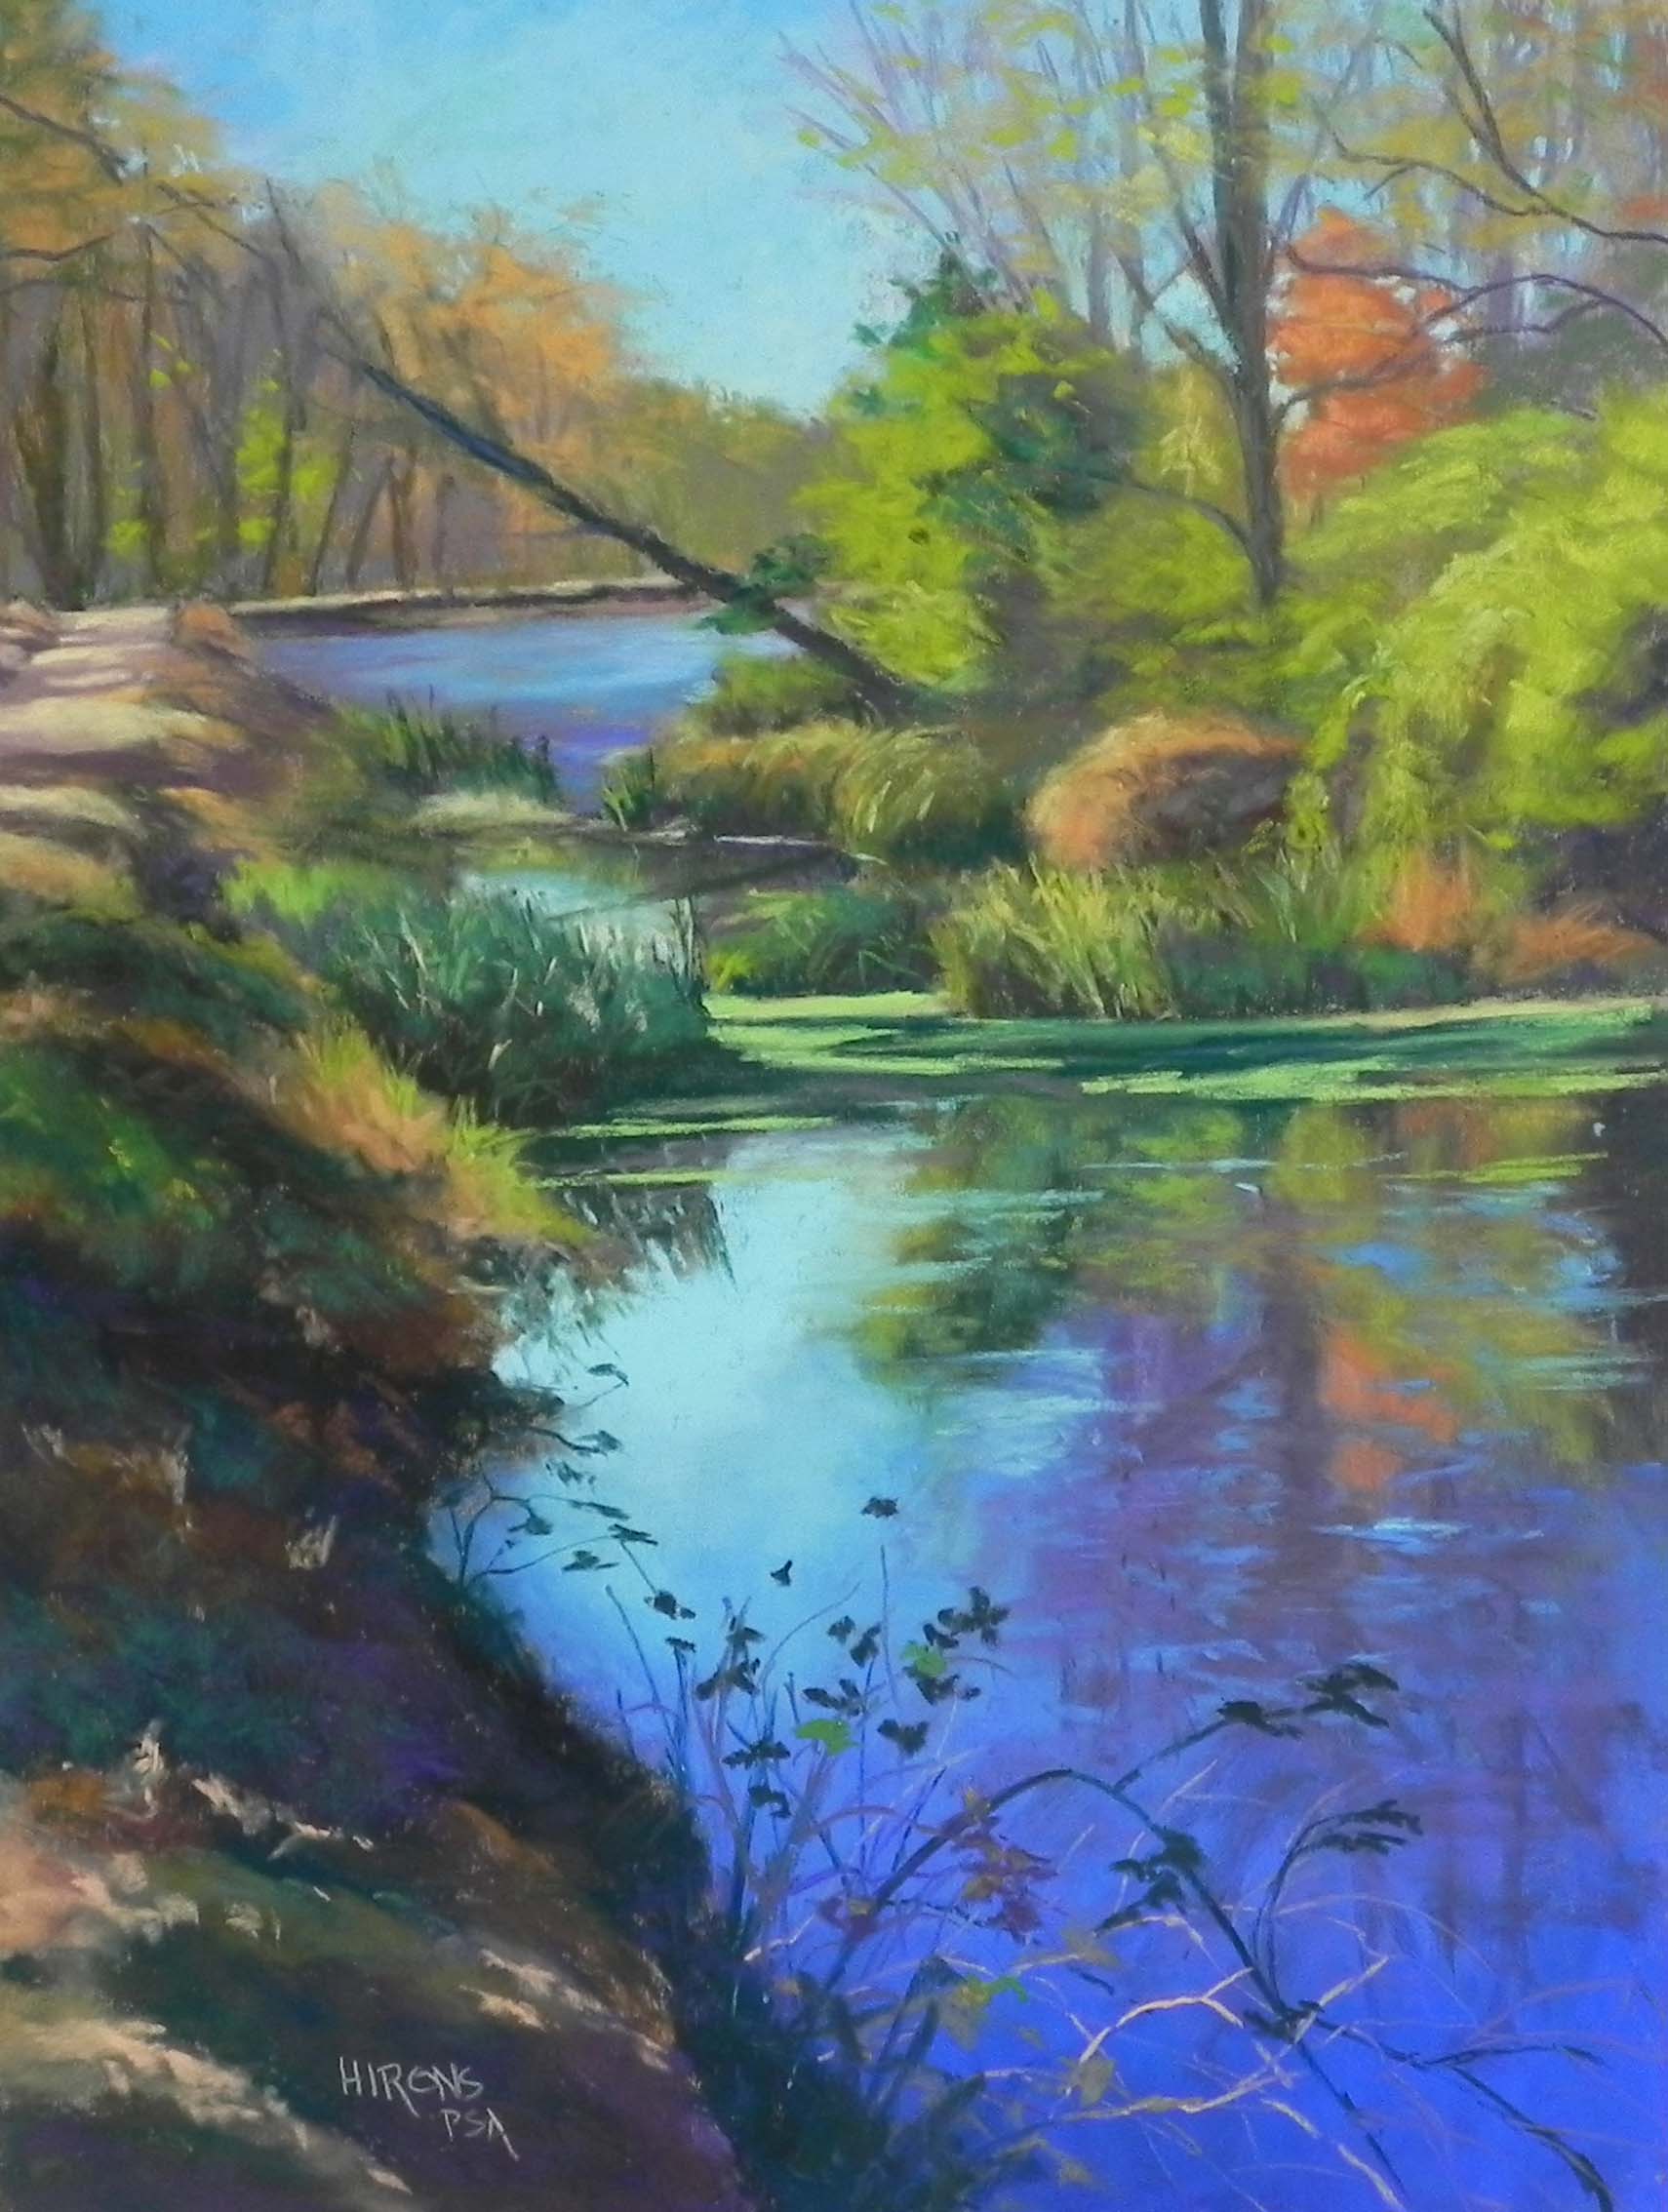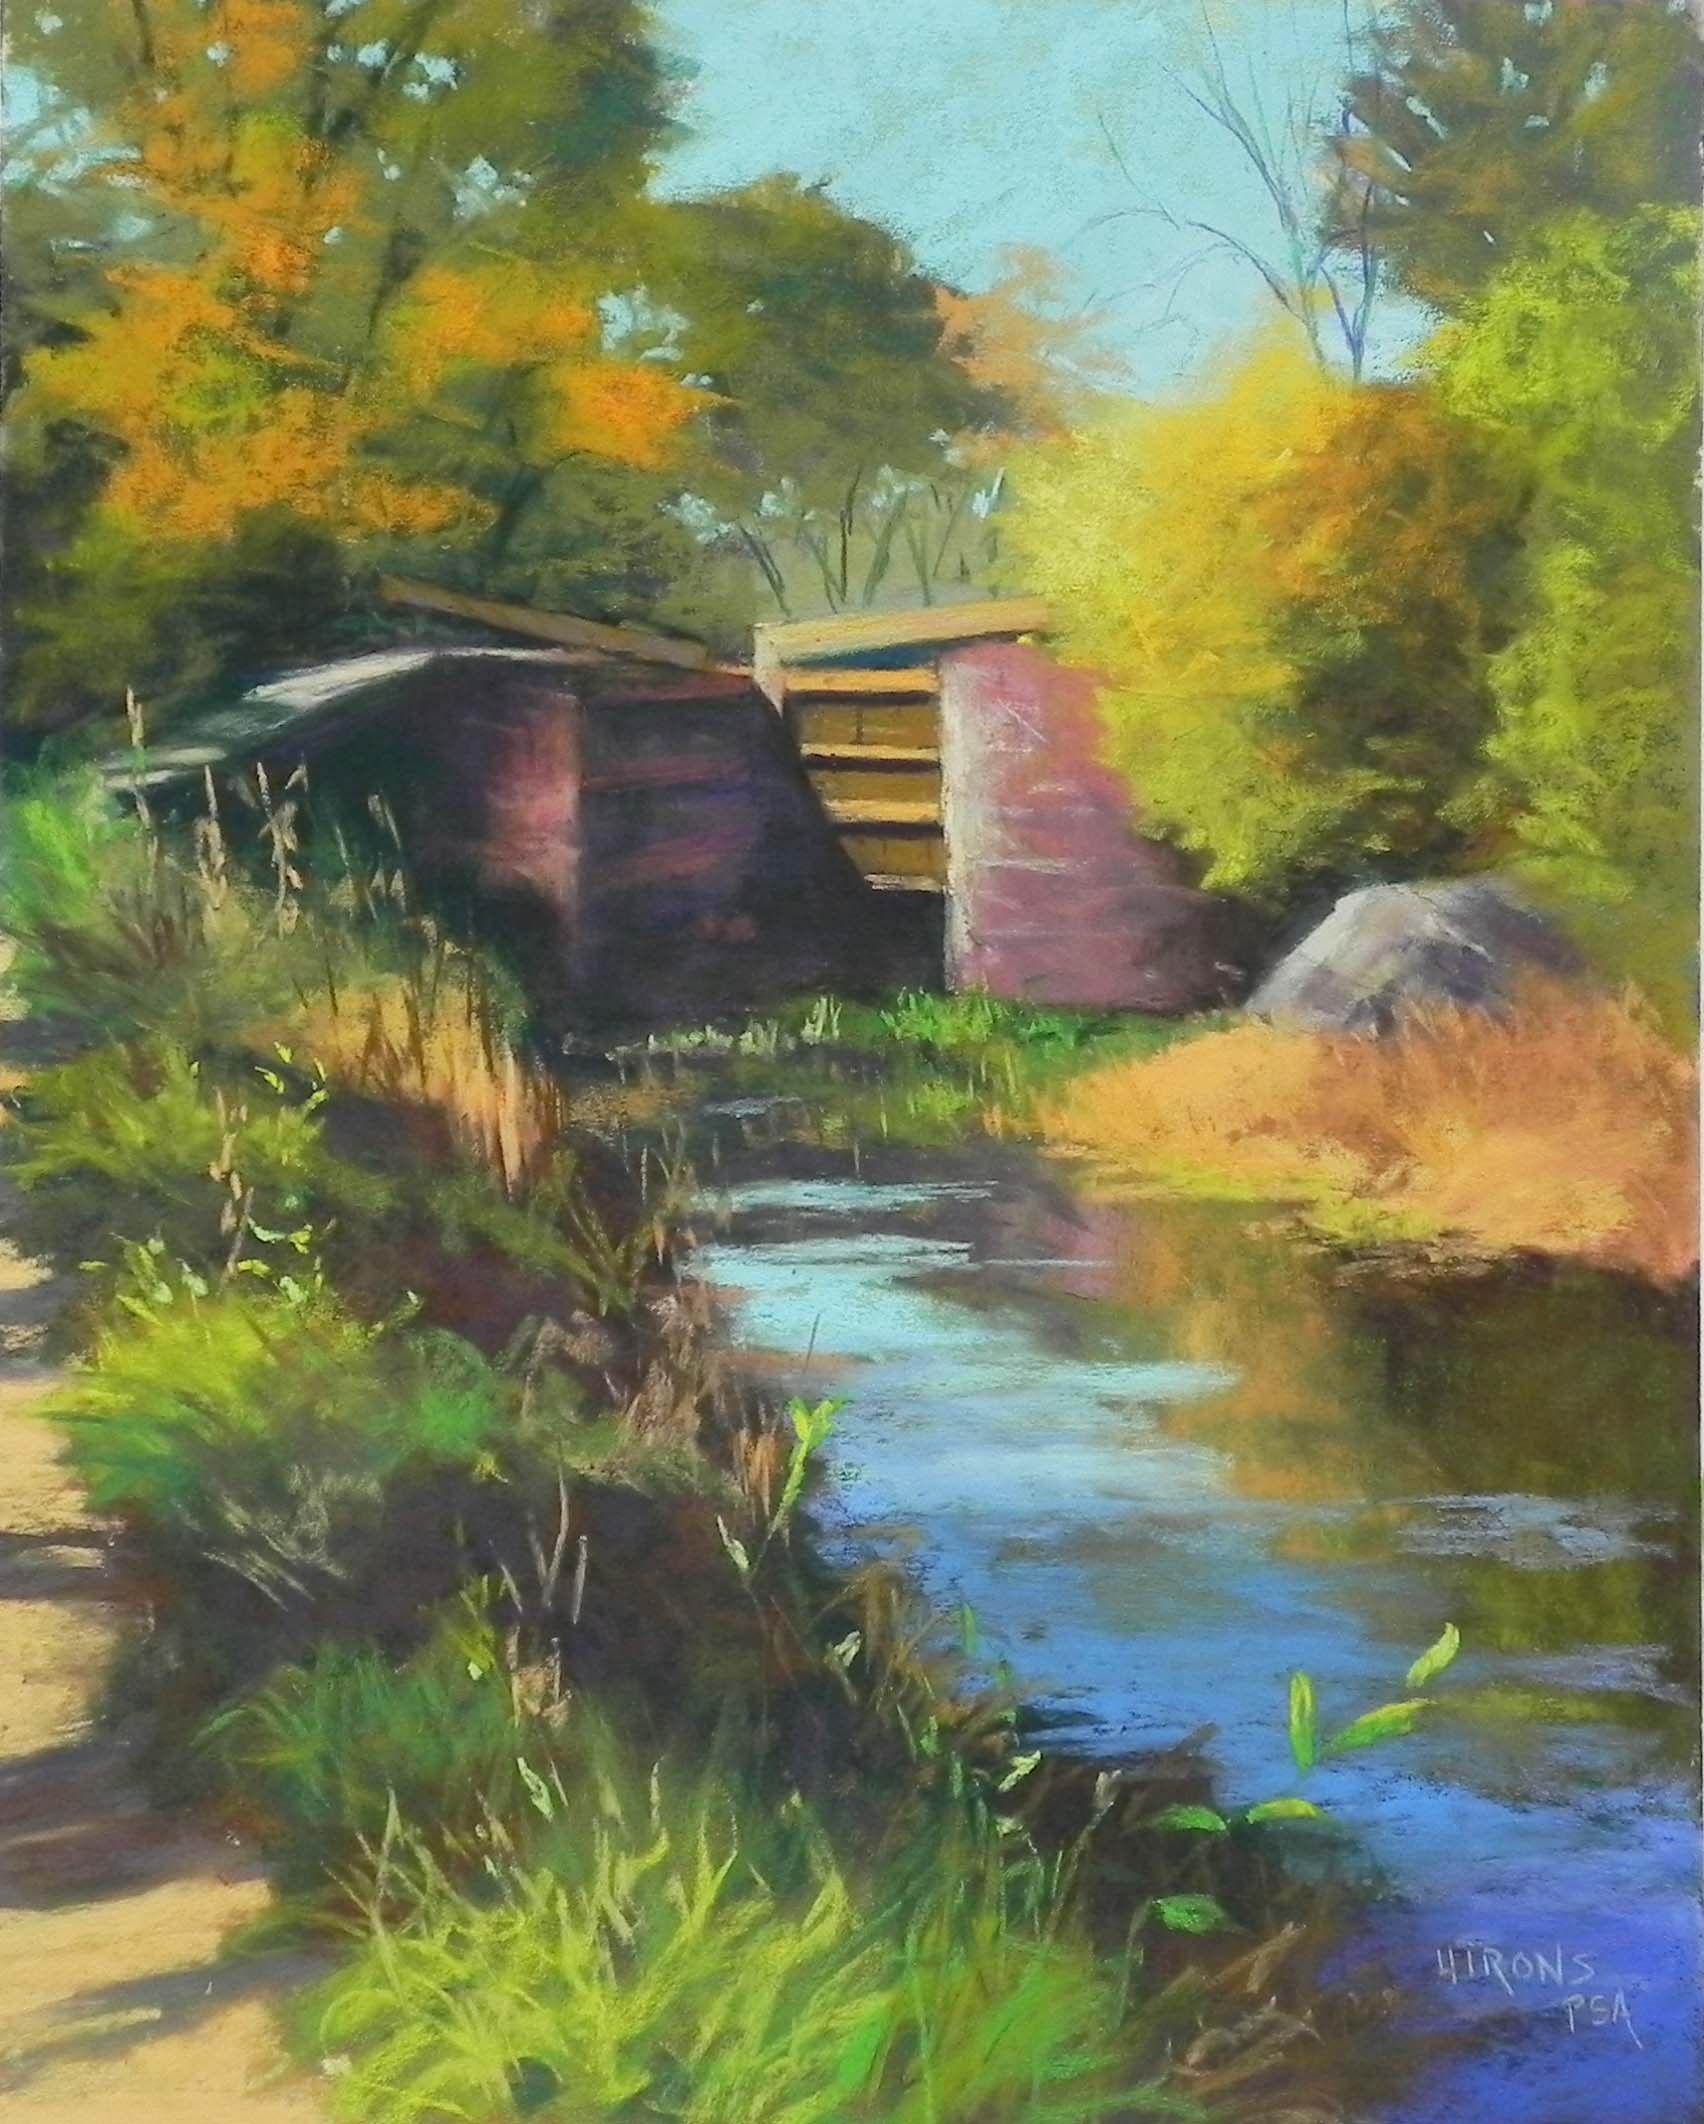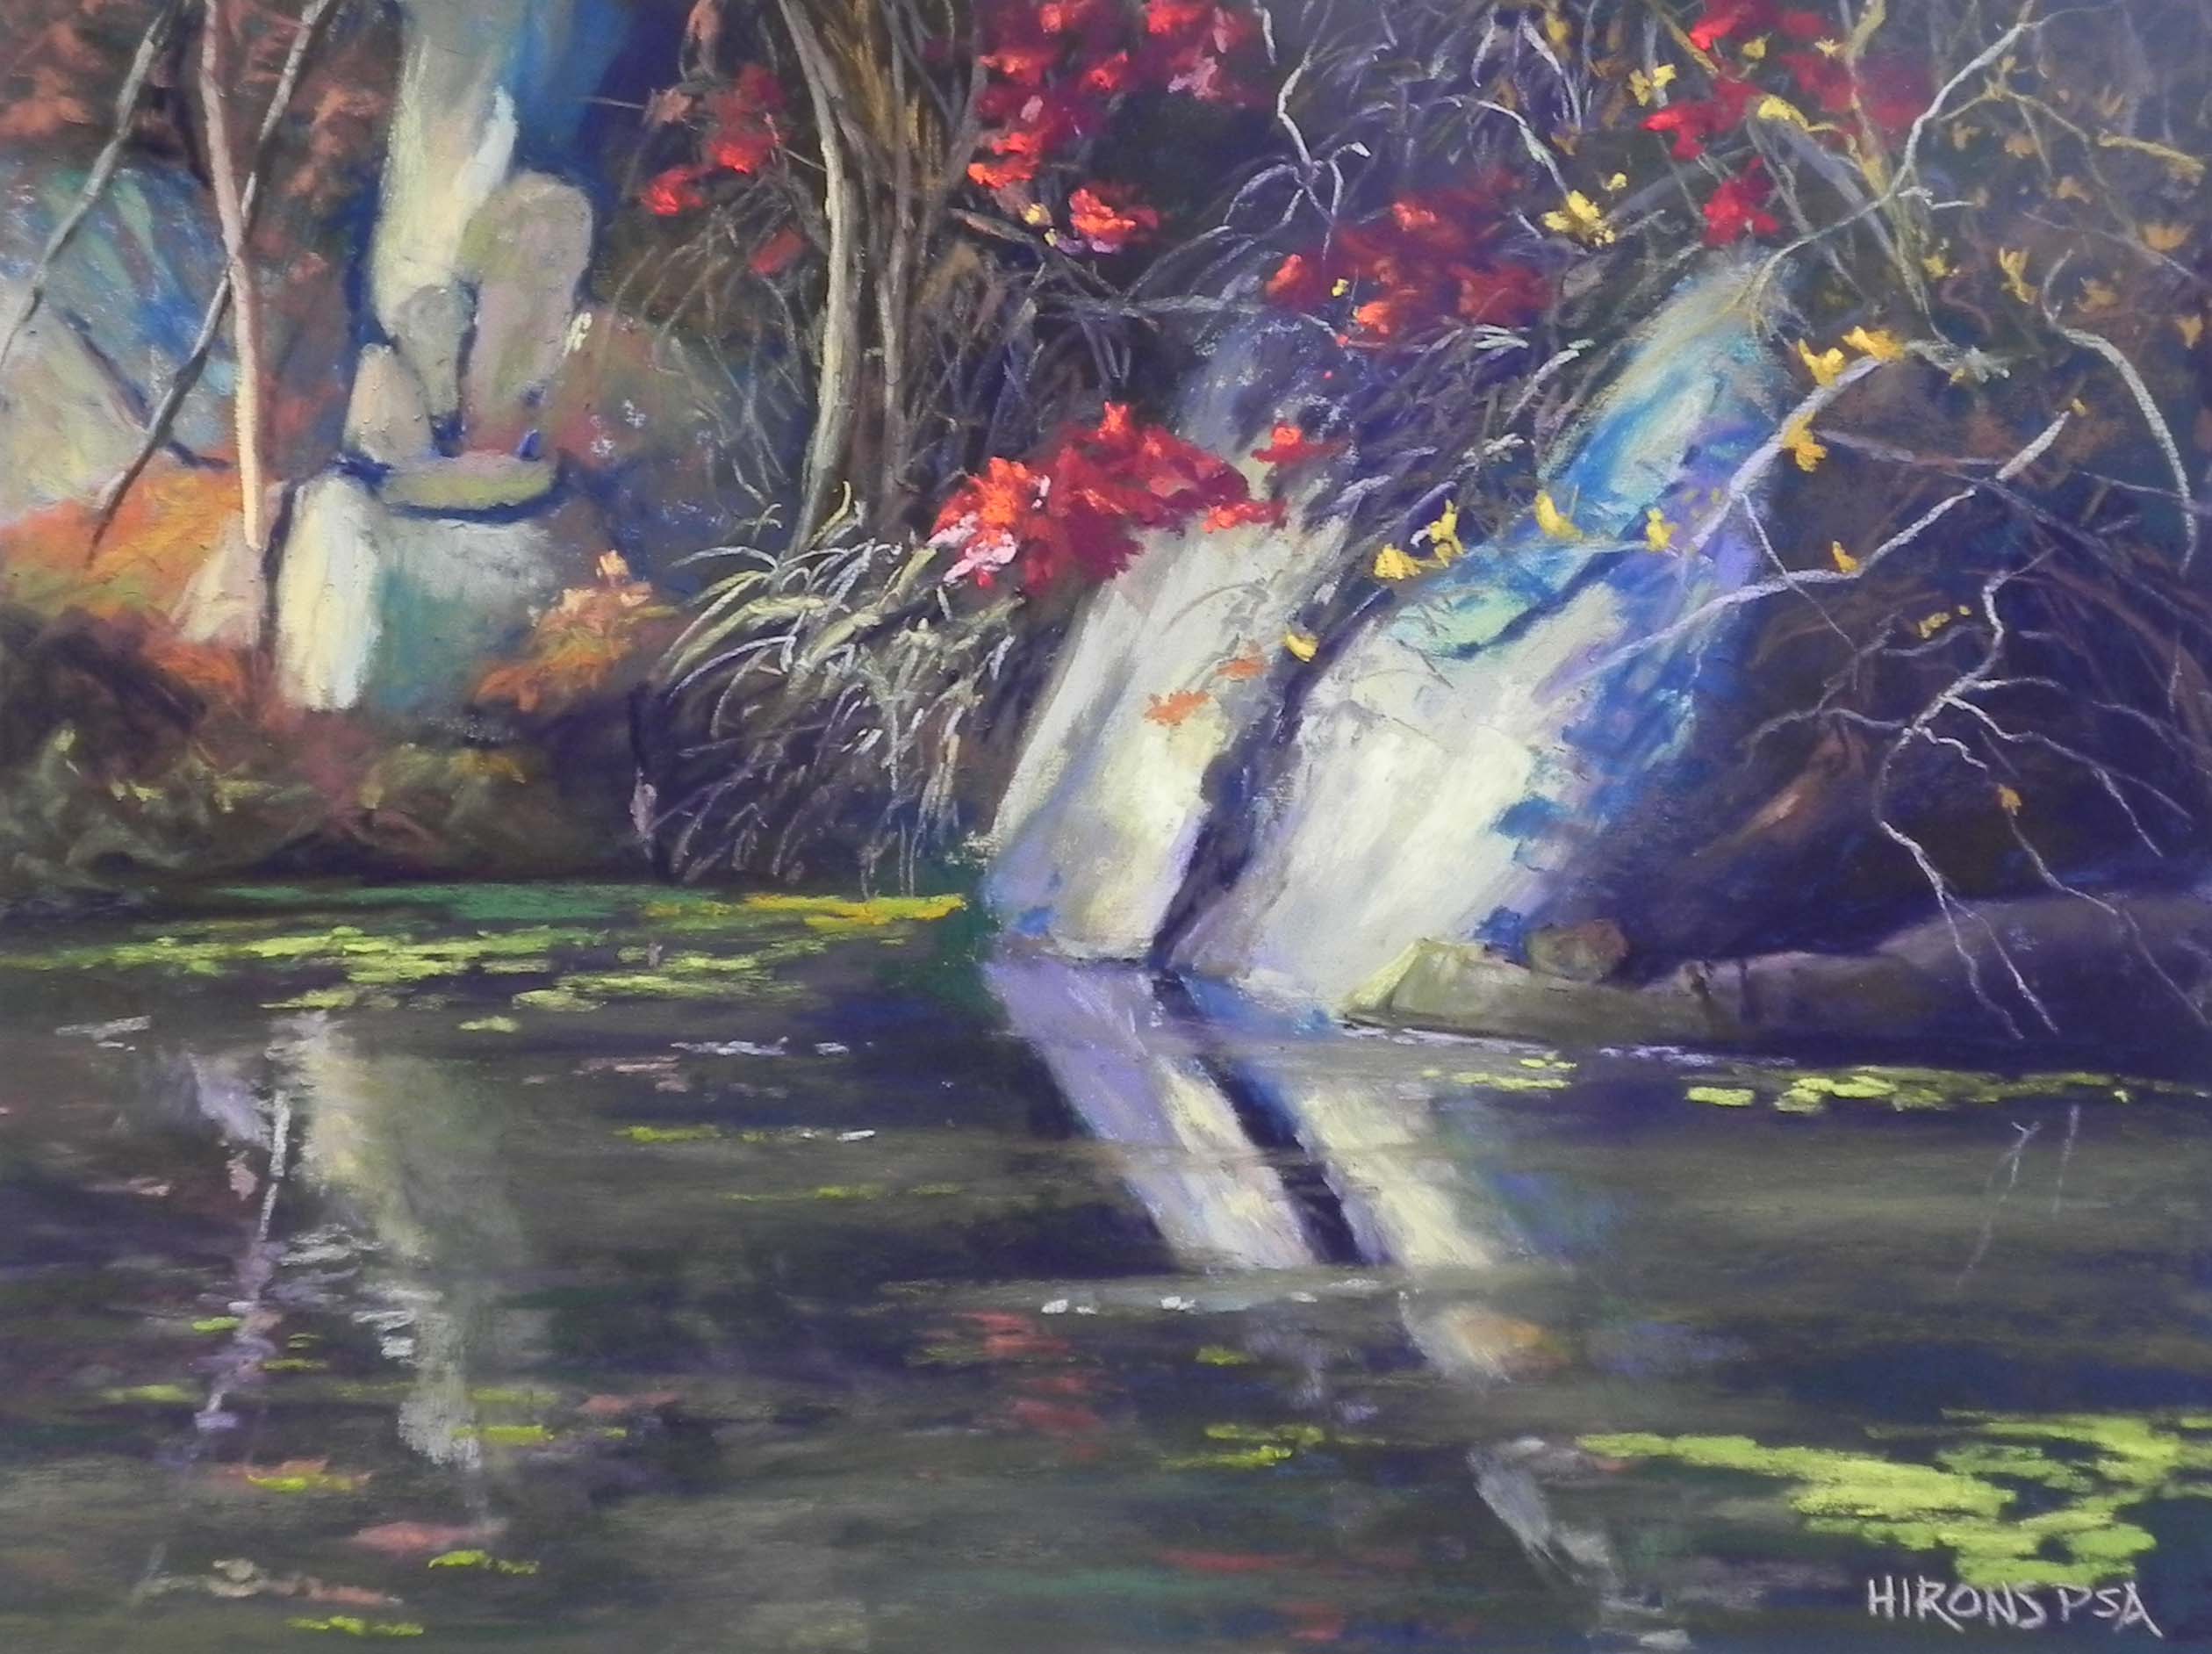
Red Leaves and Rocks, 12 x 16, UART 400
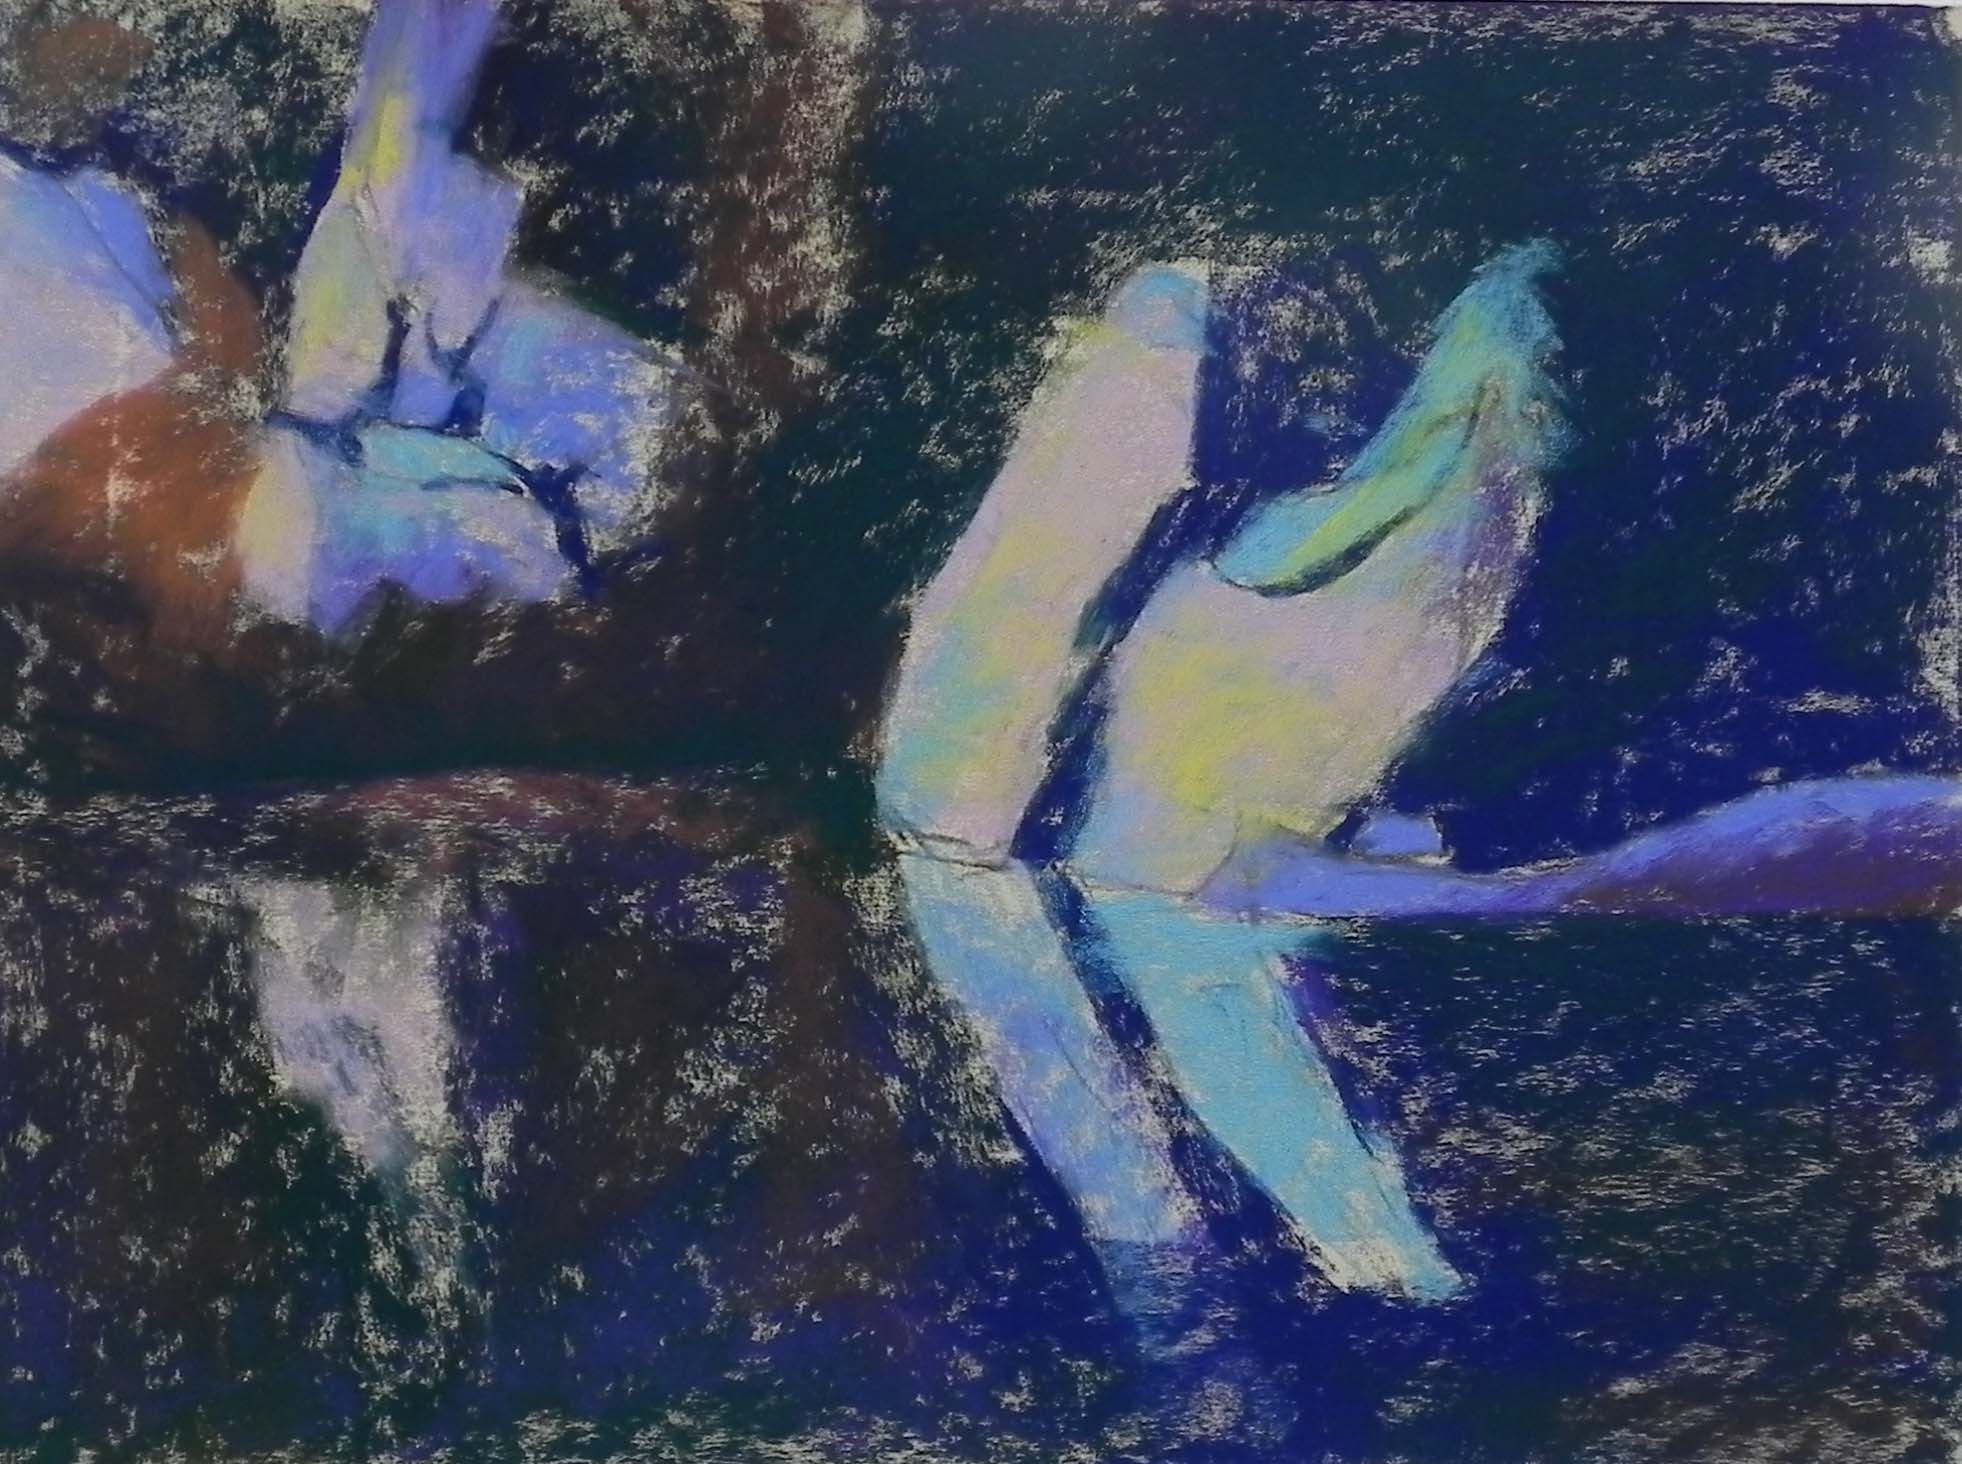
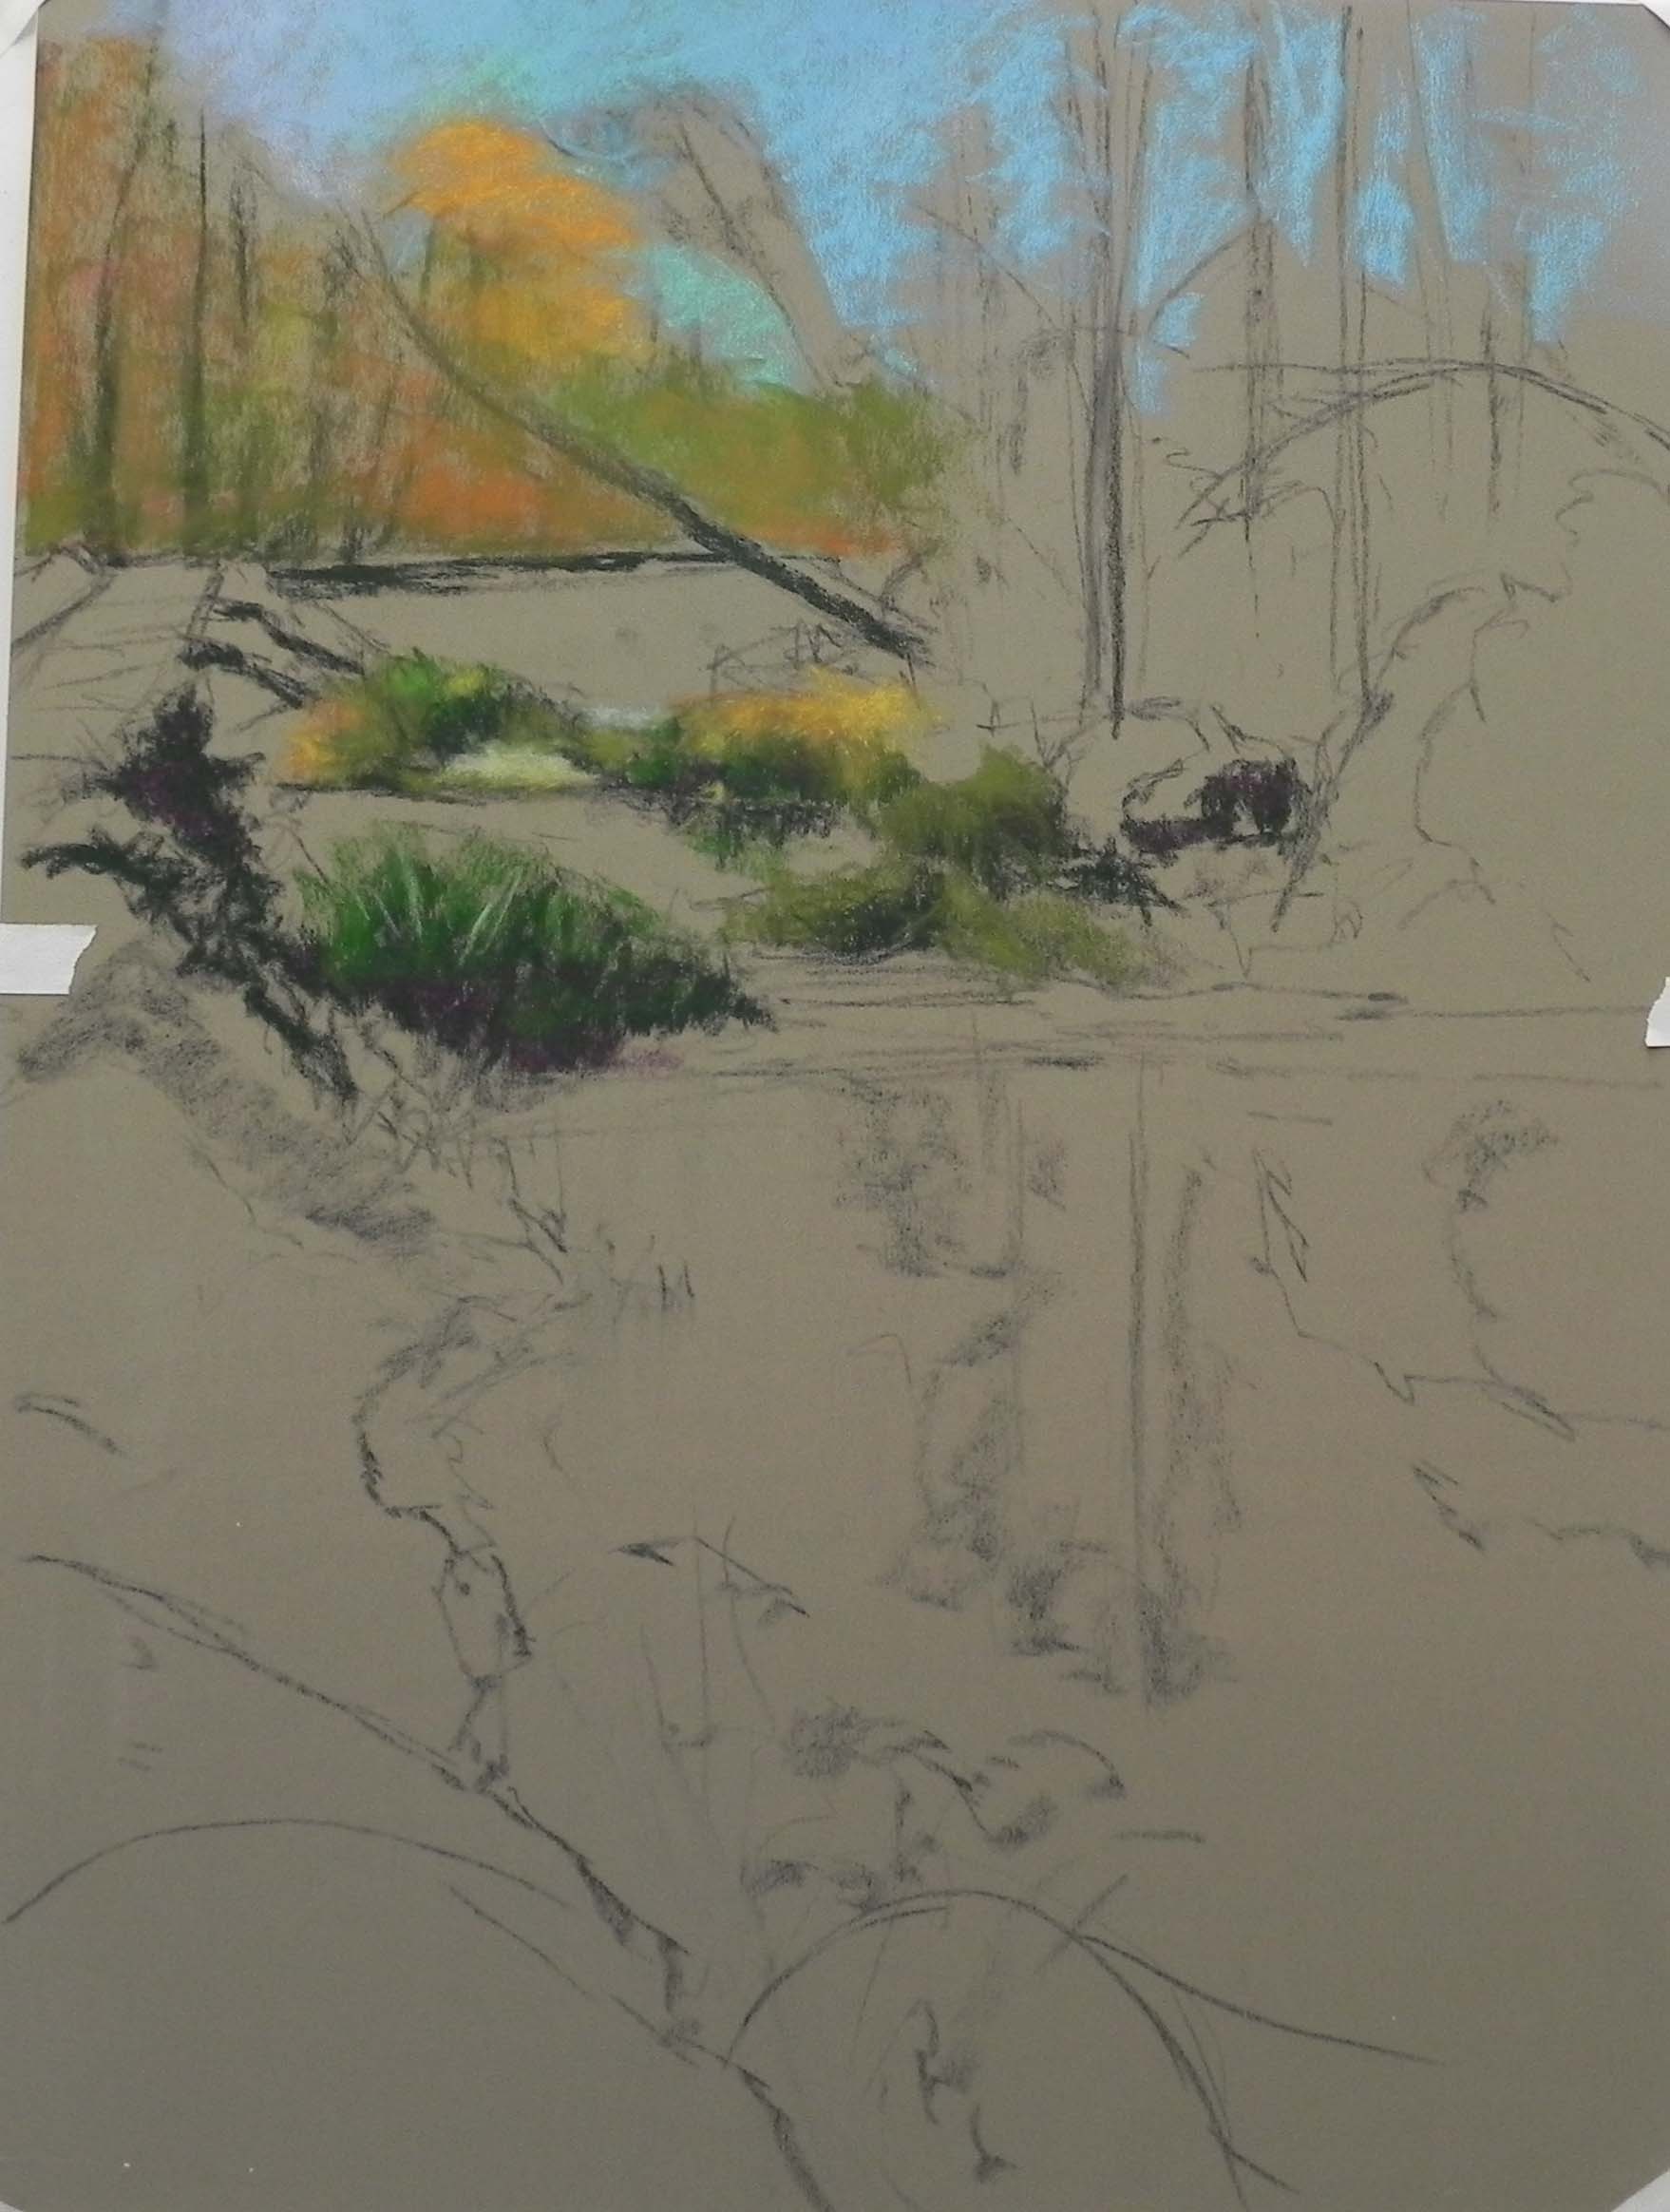
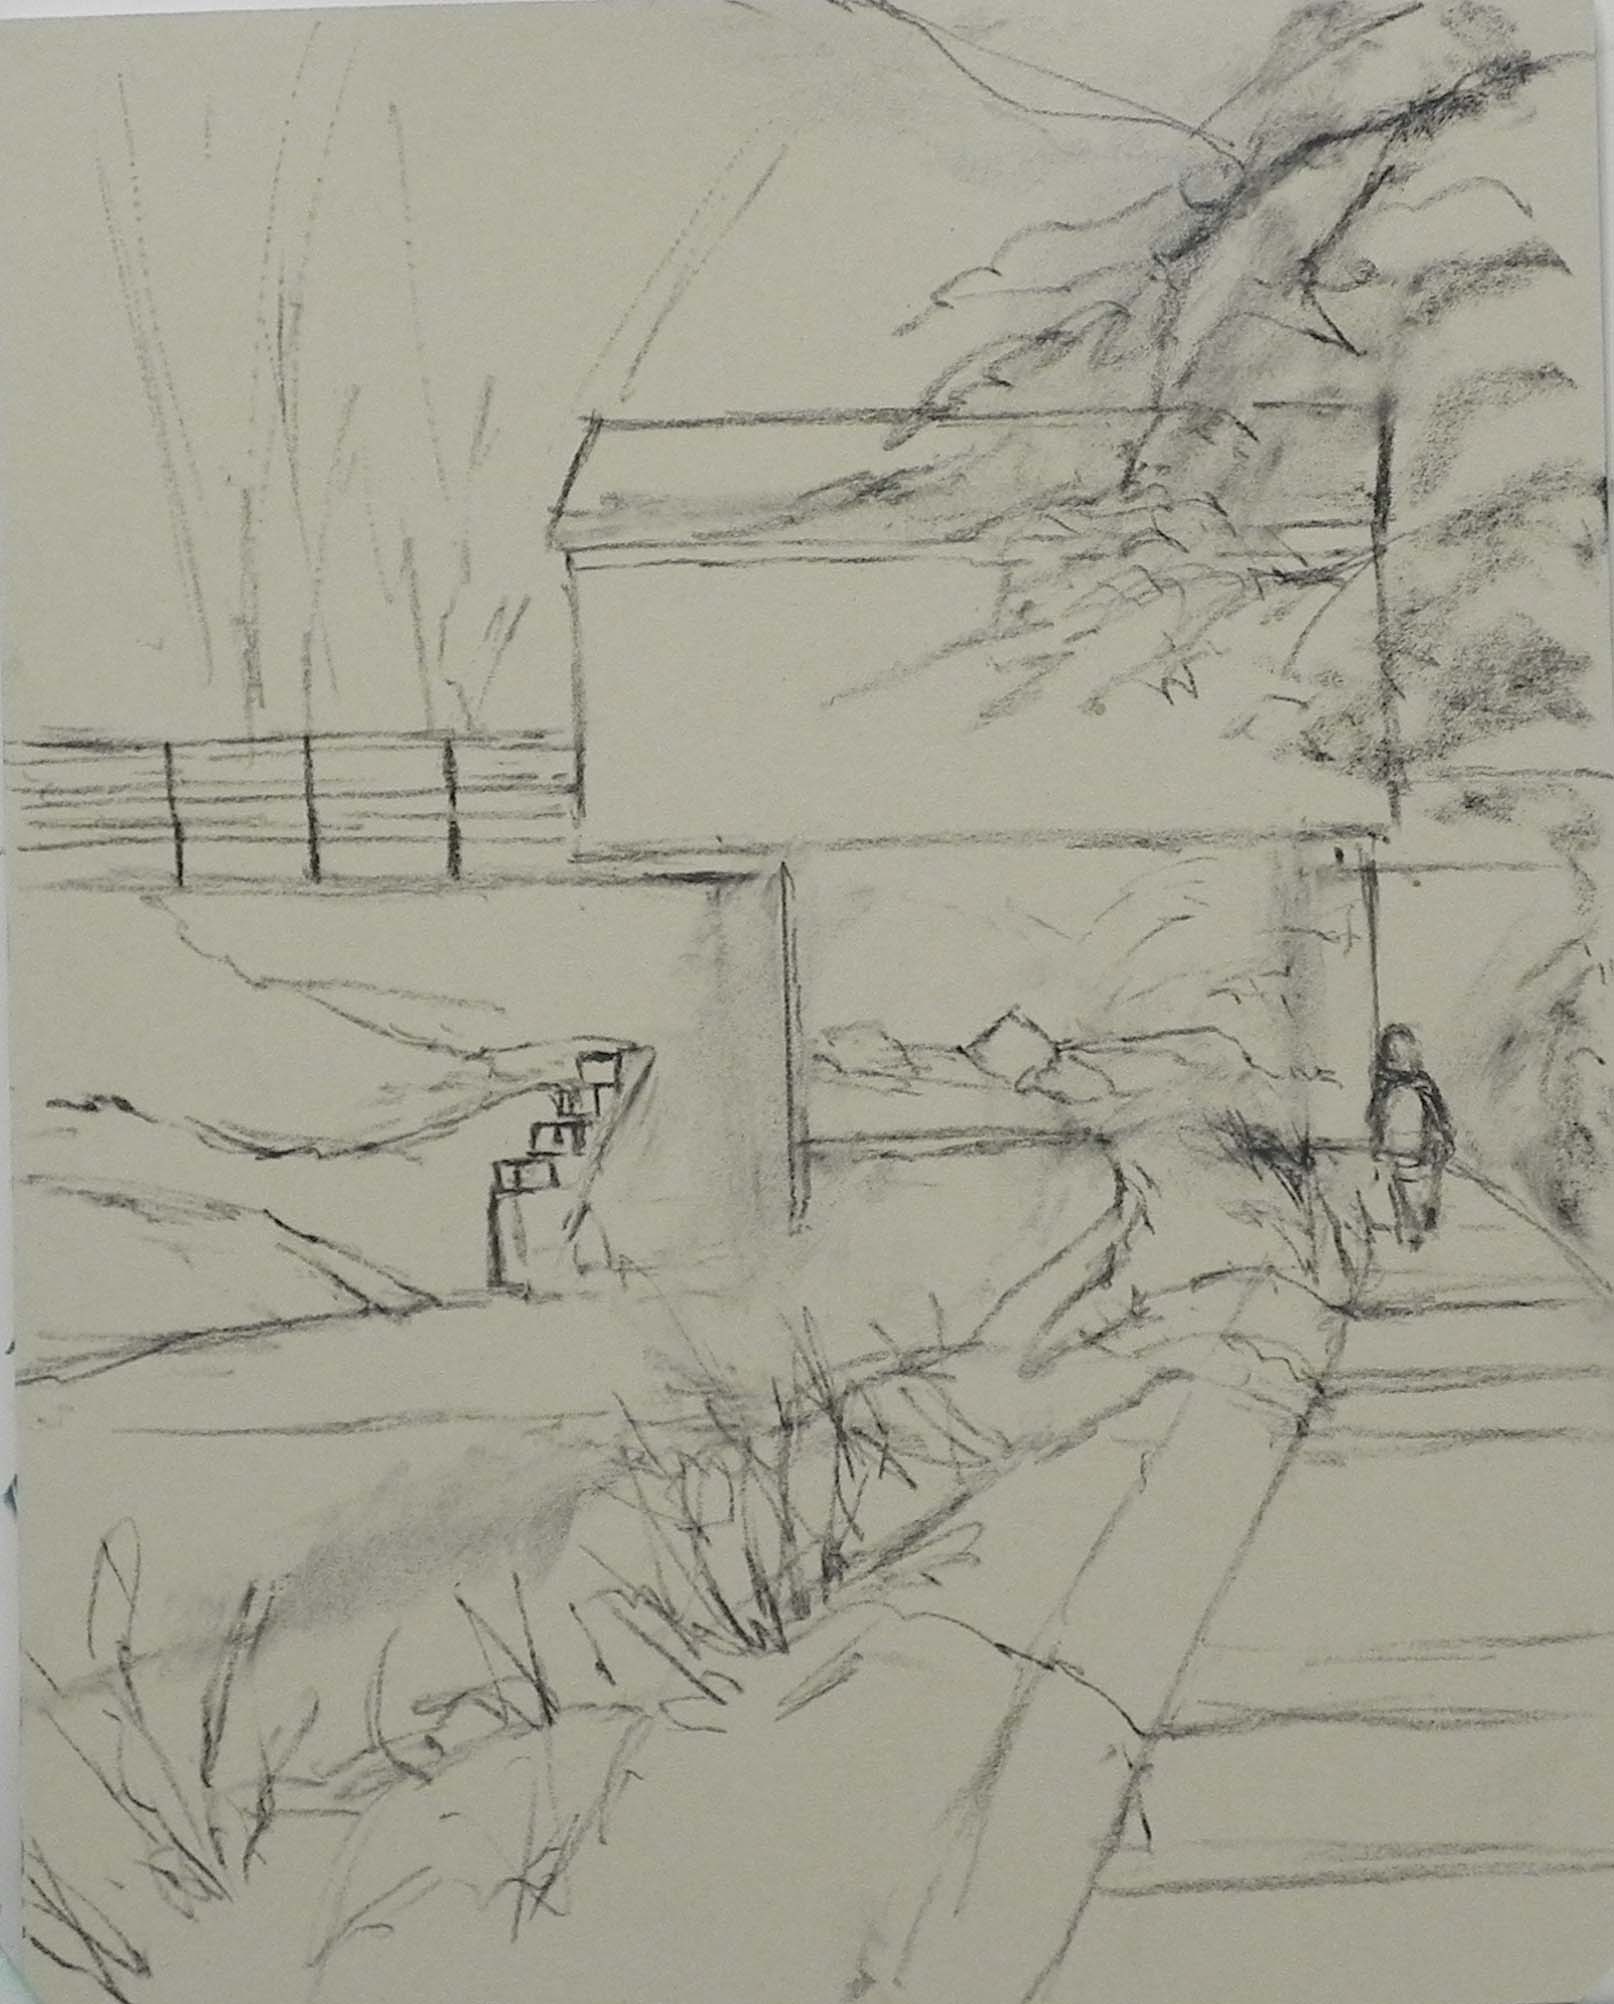
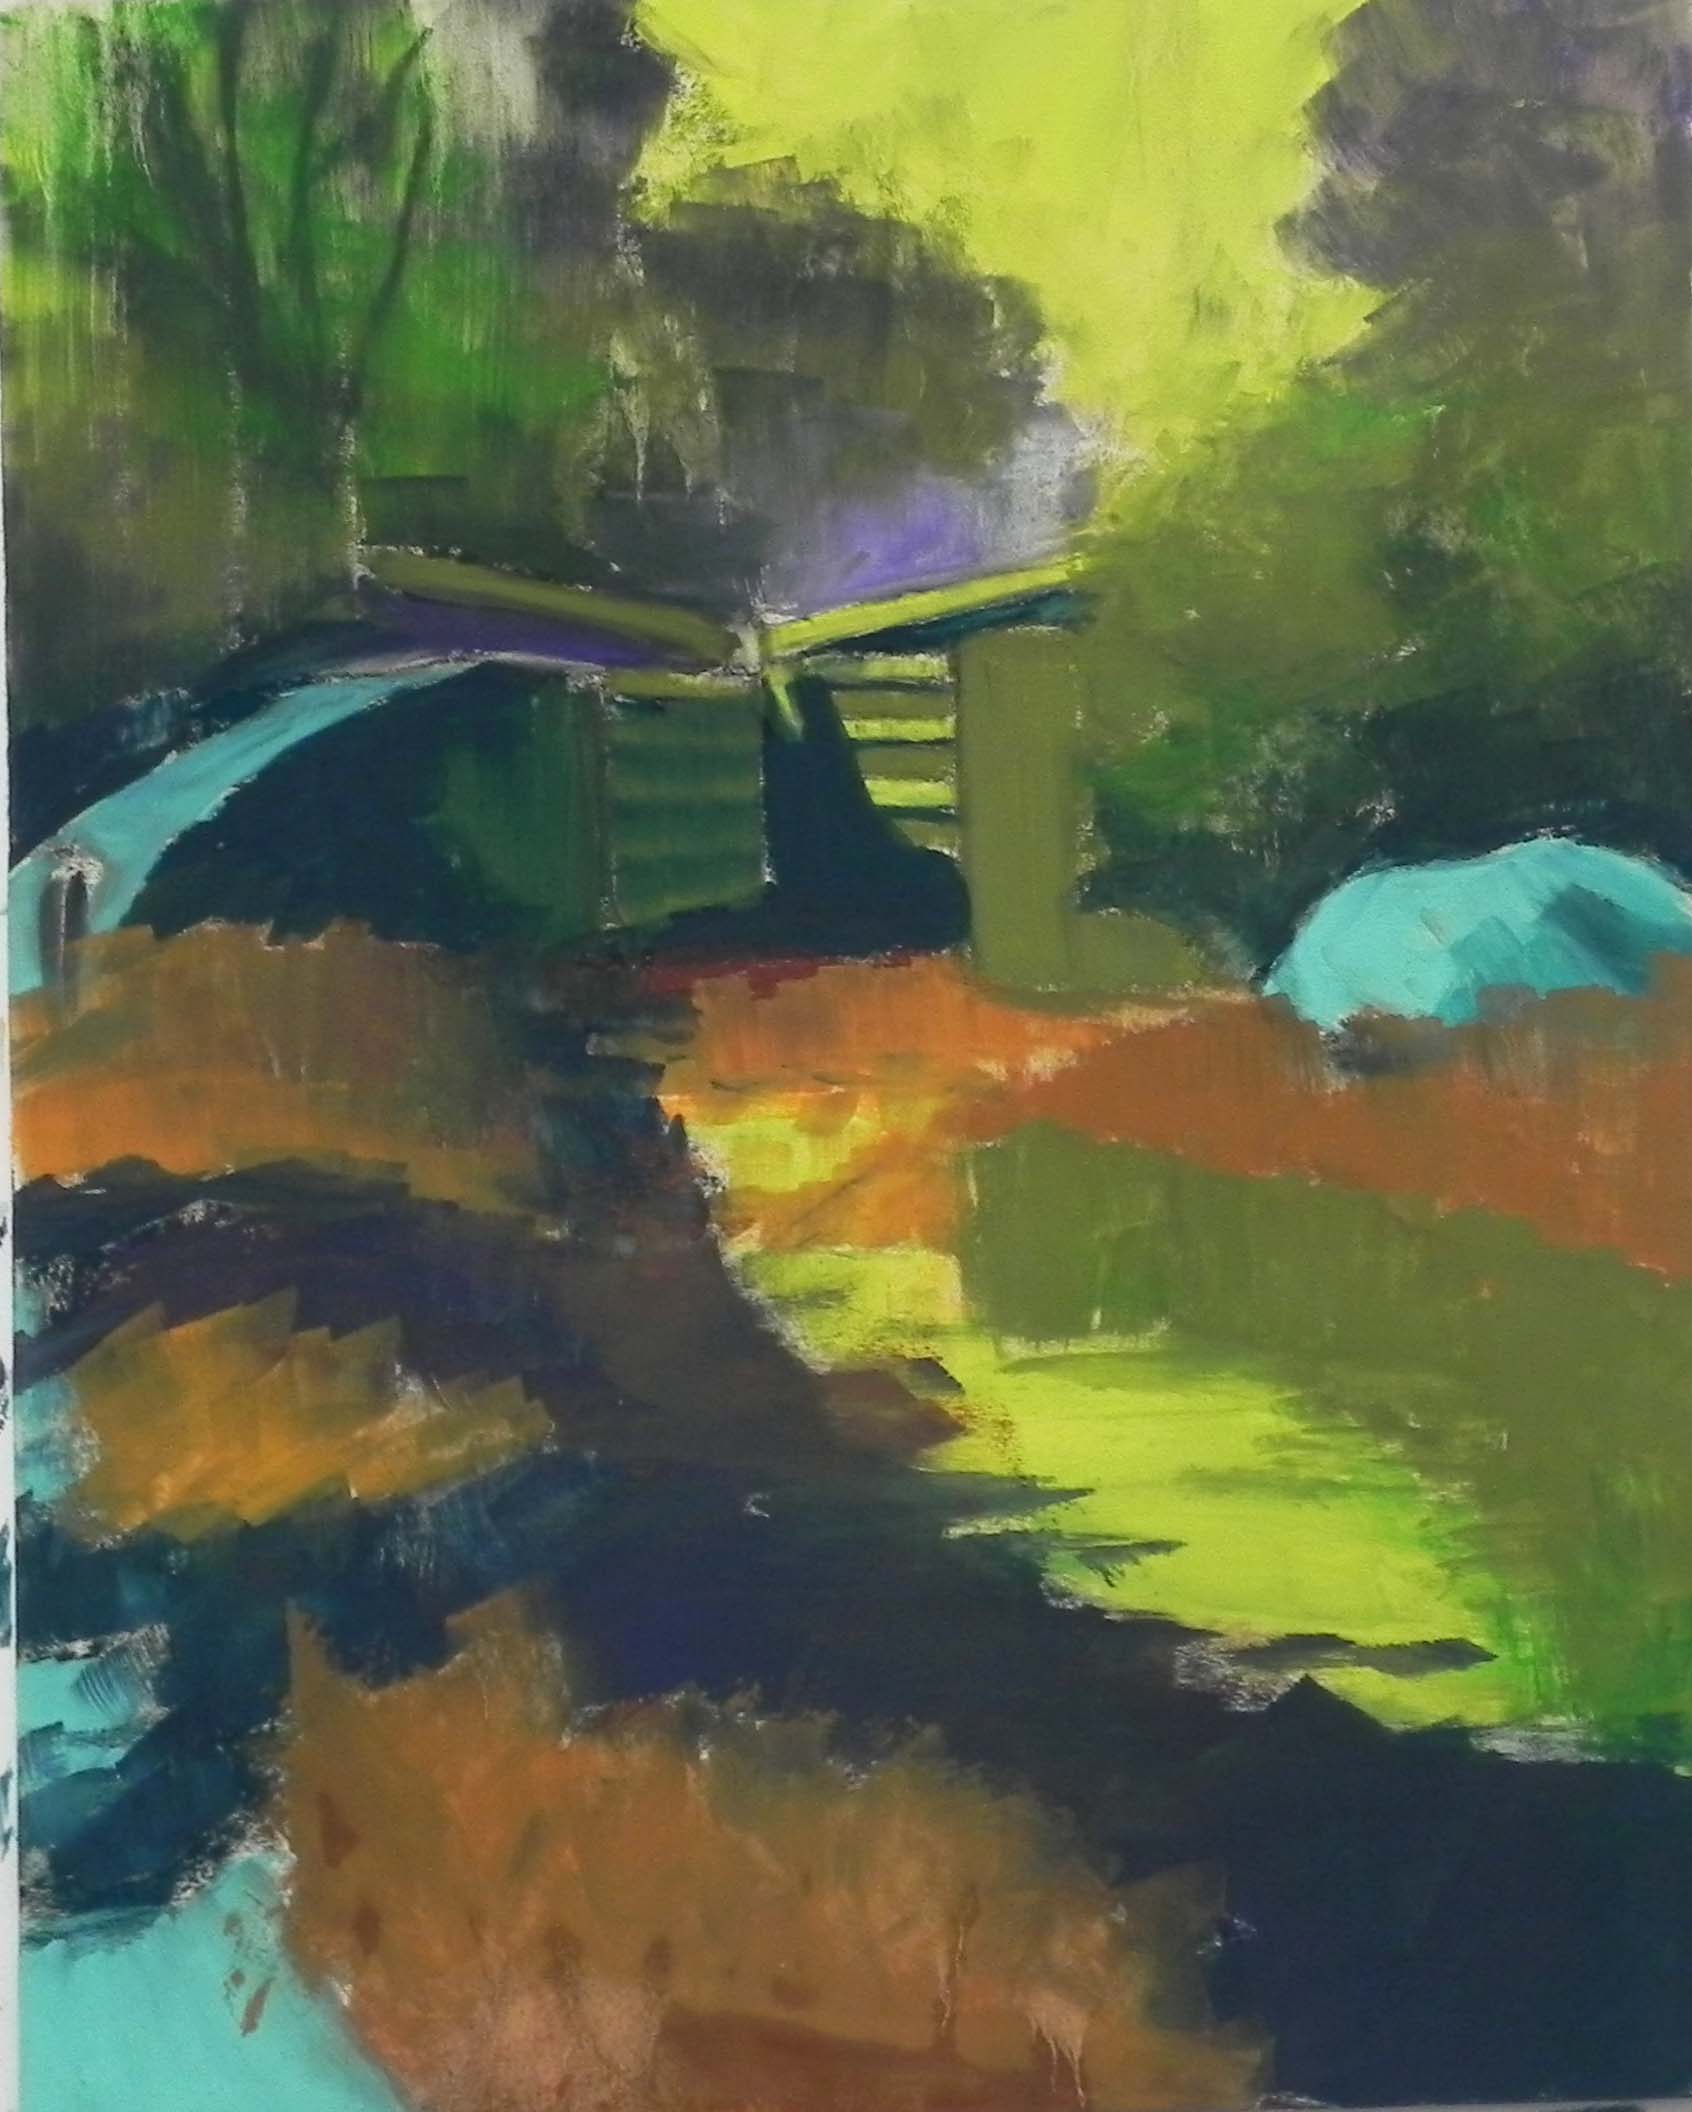
Underpainting, stage 1
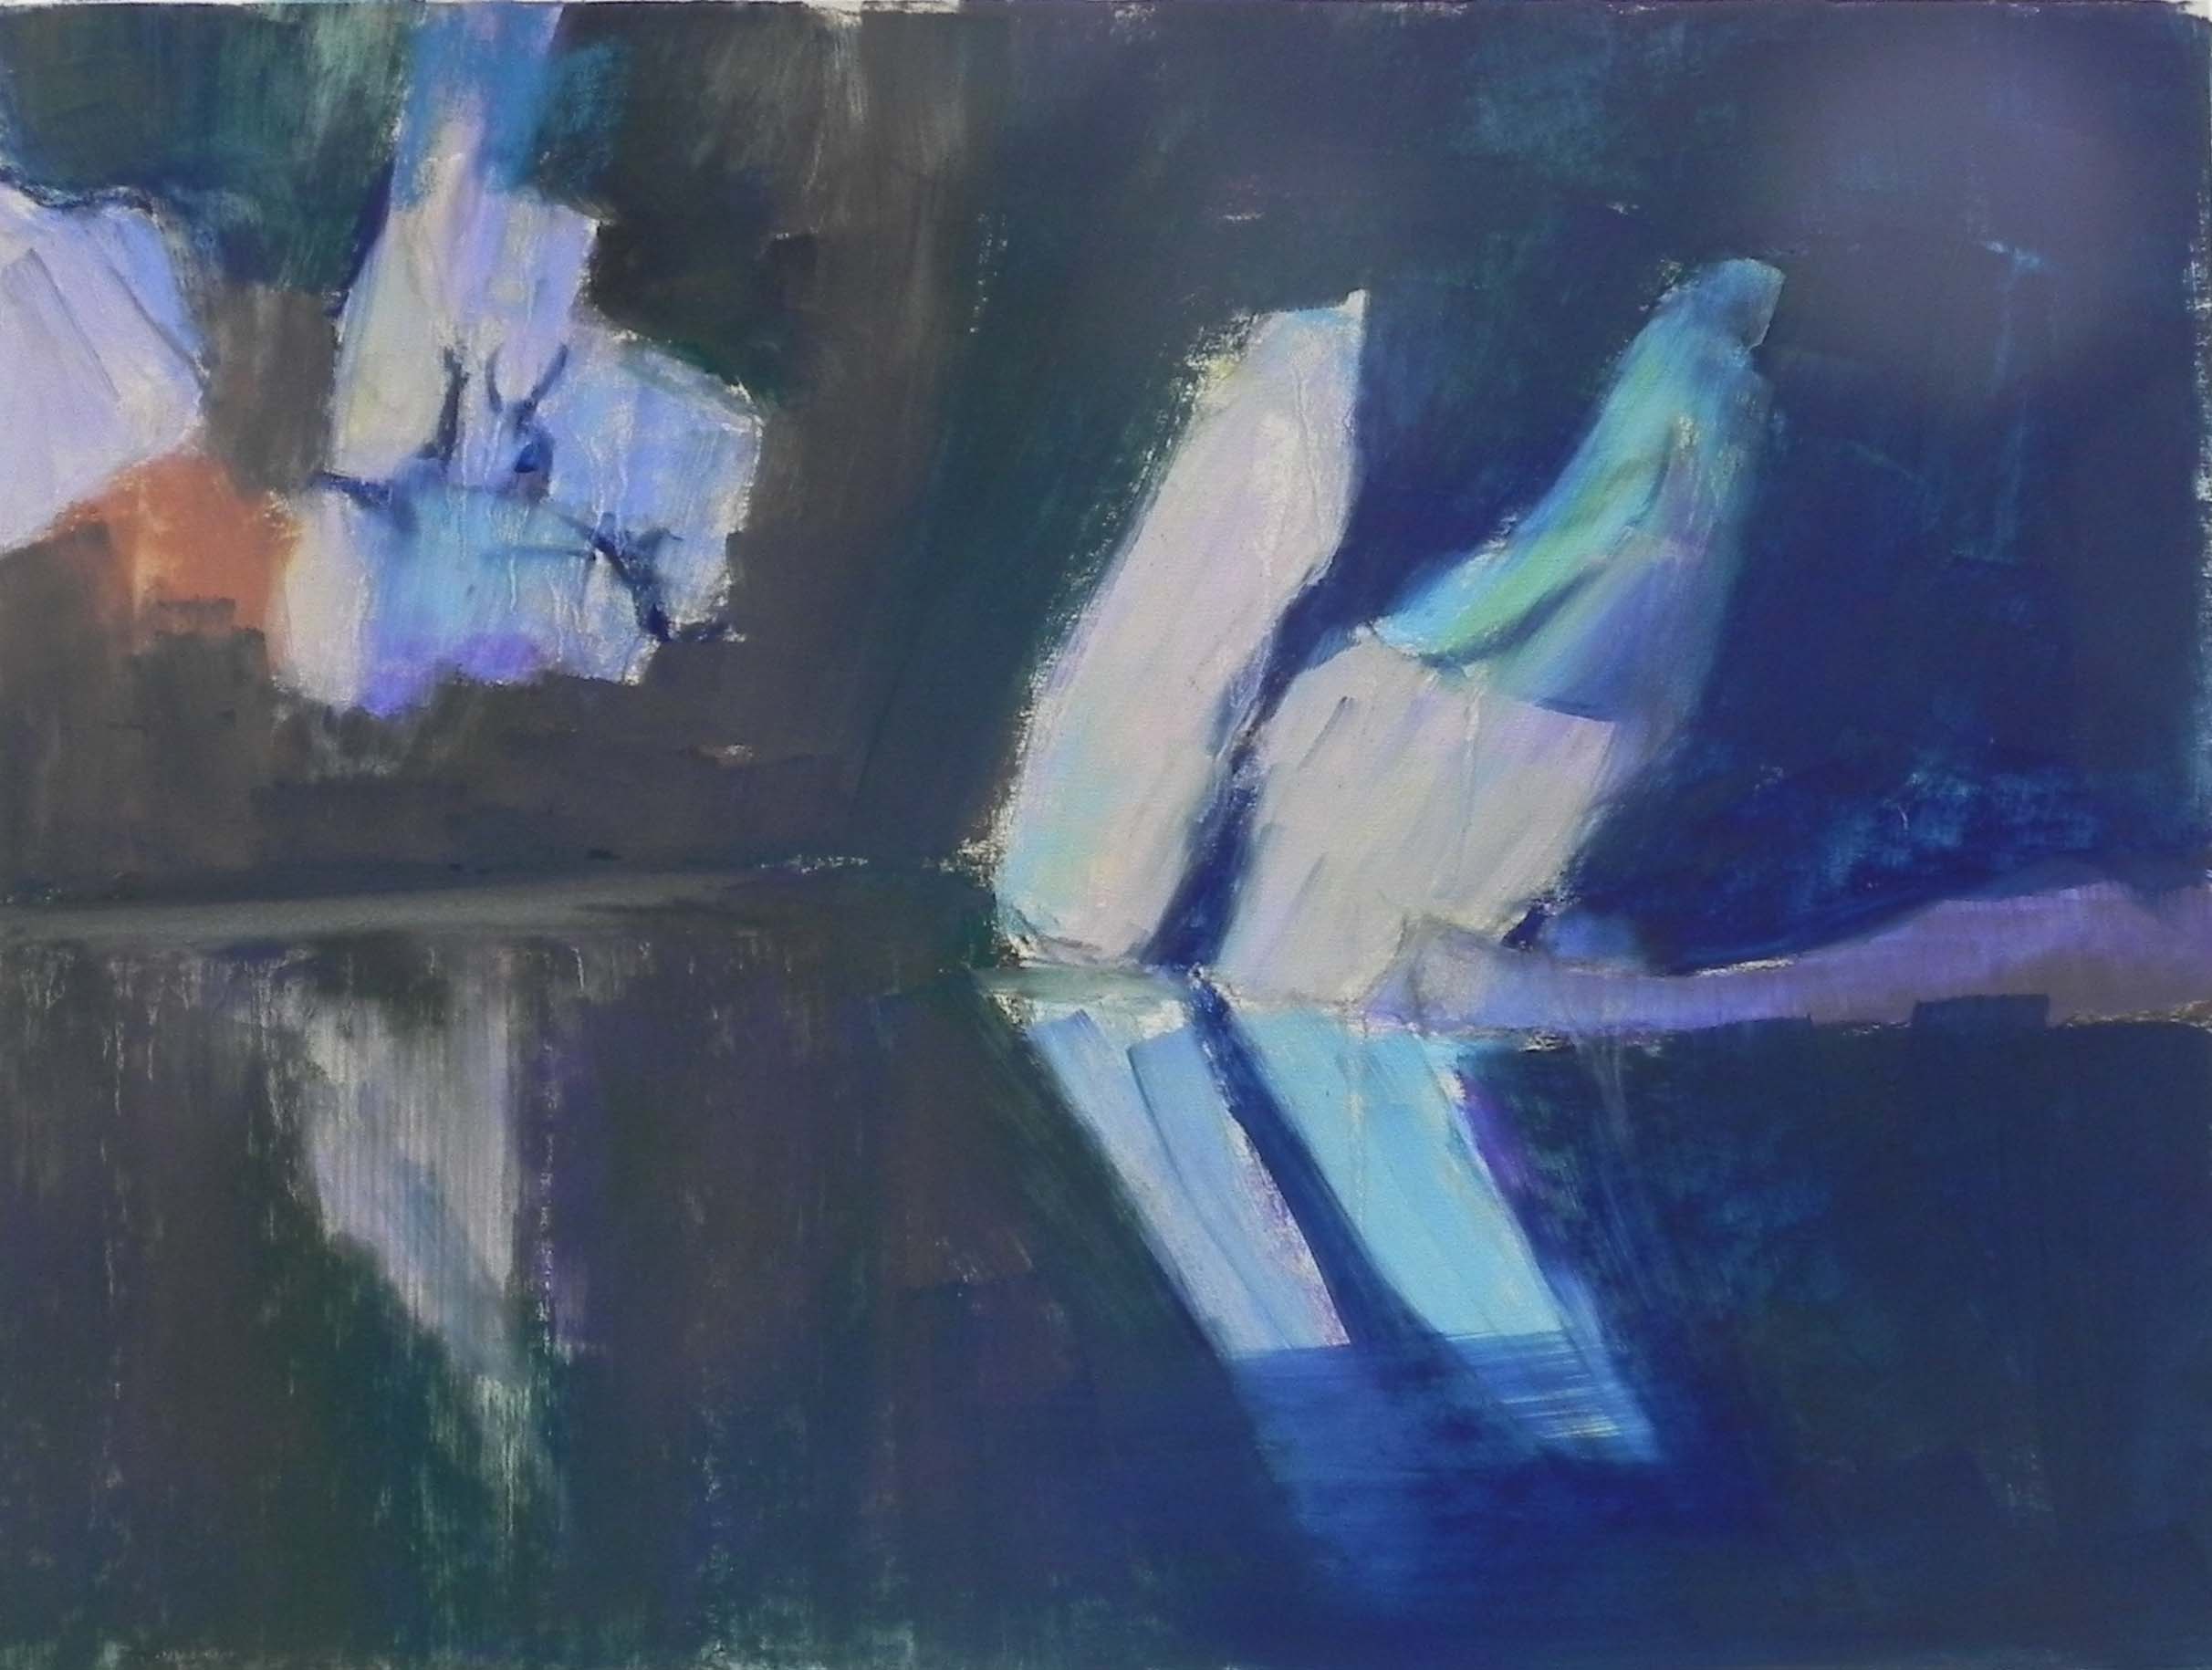
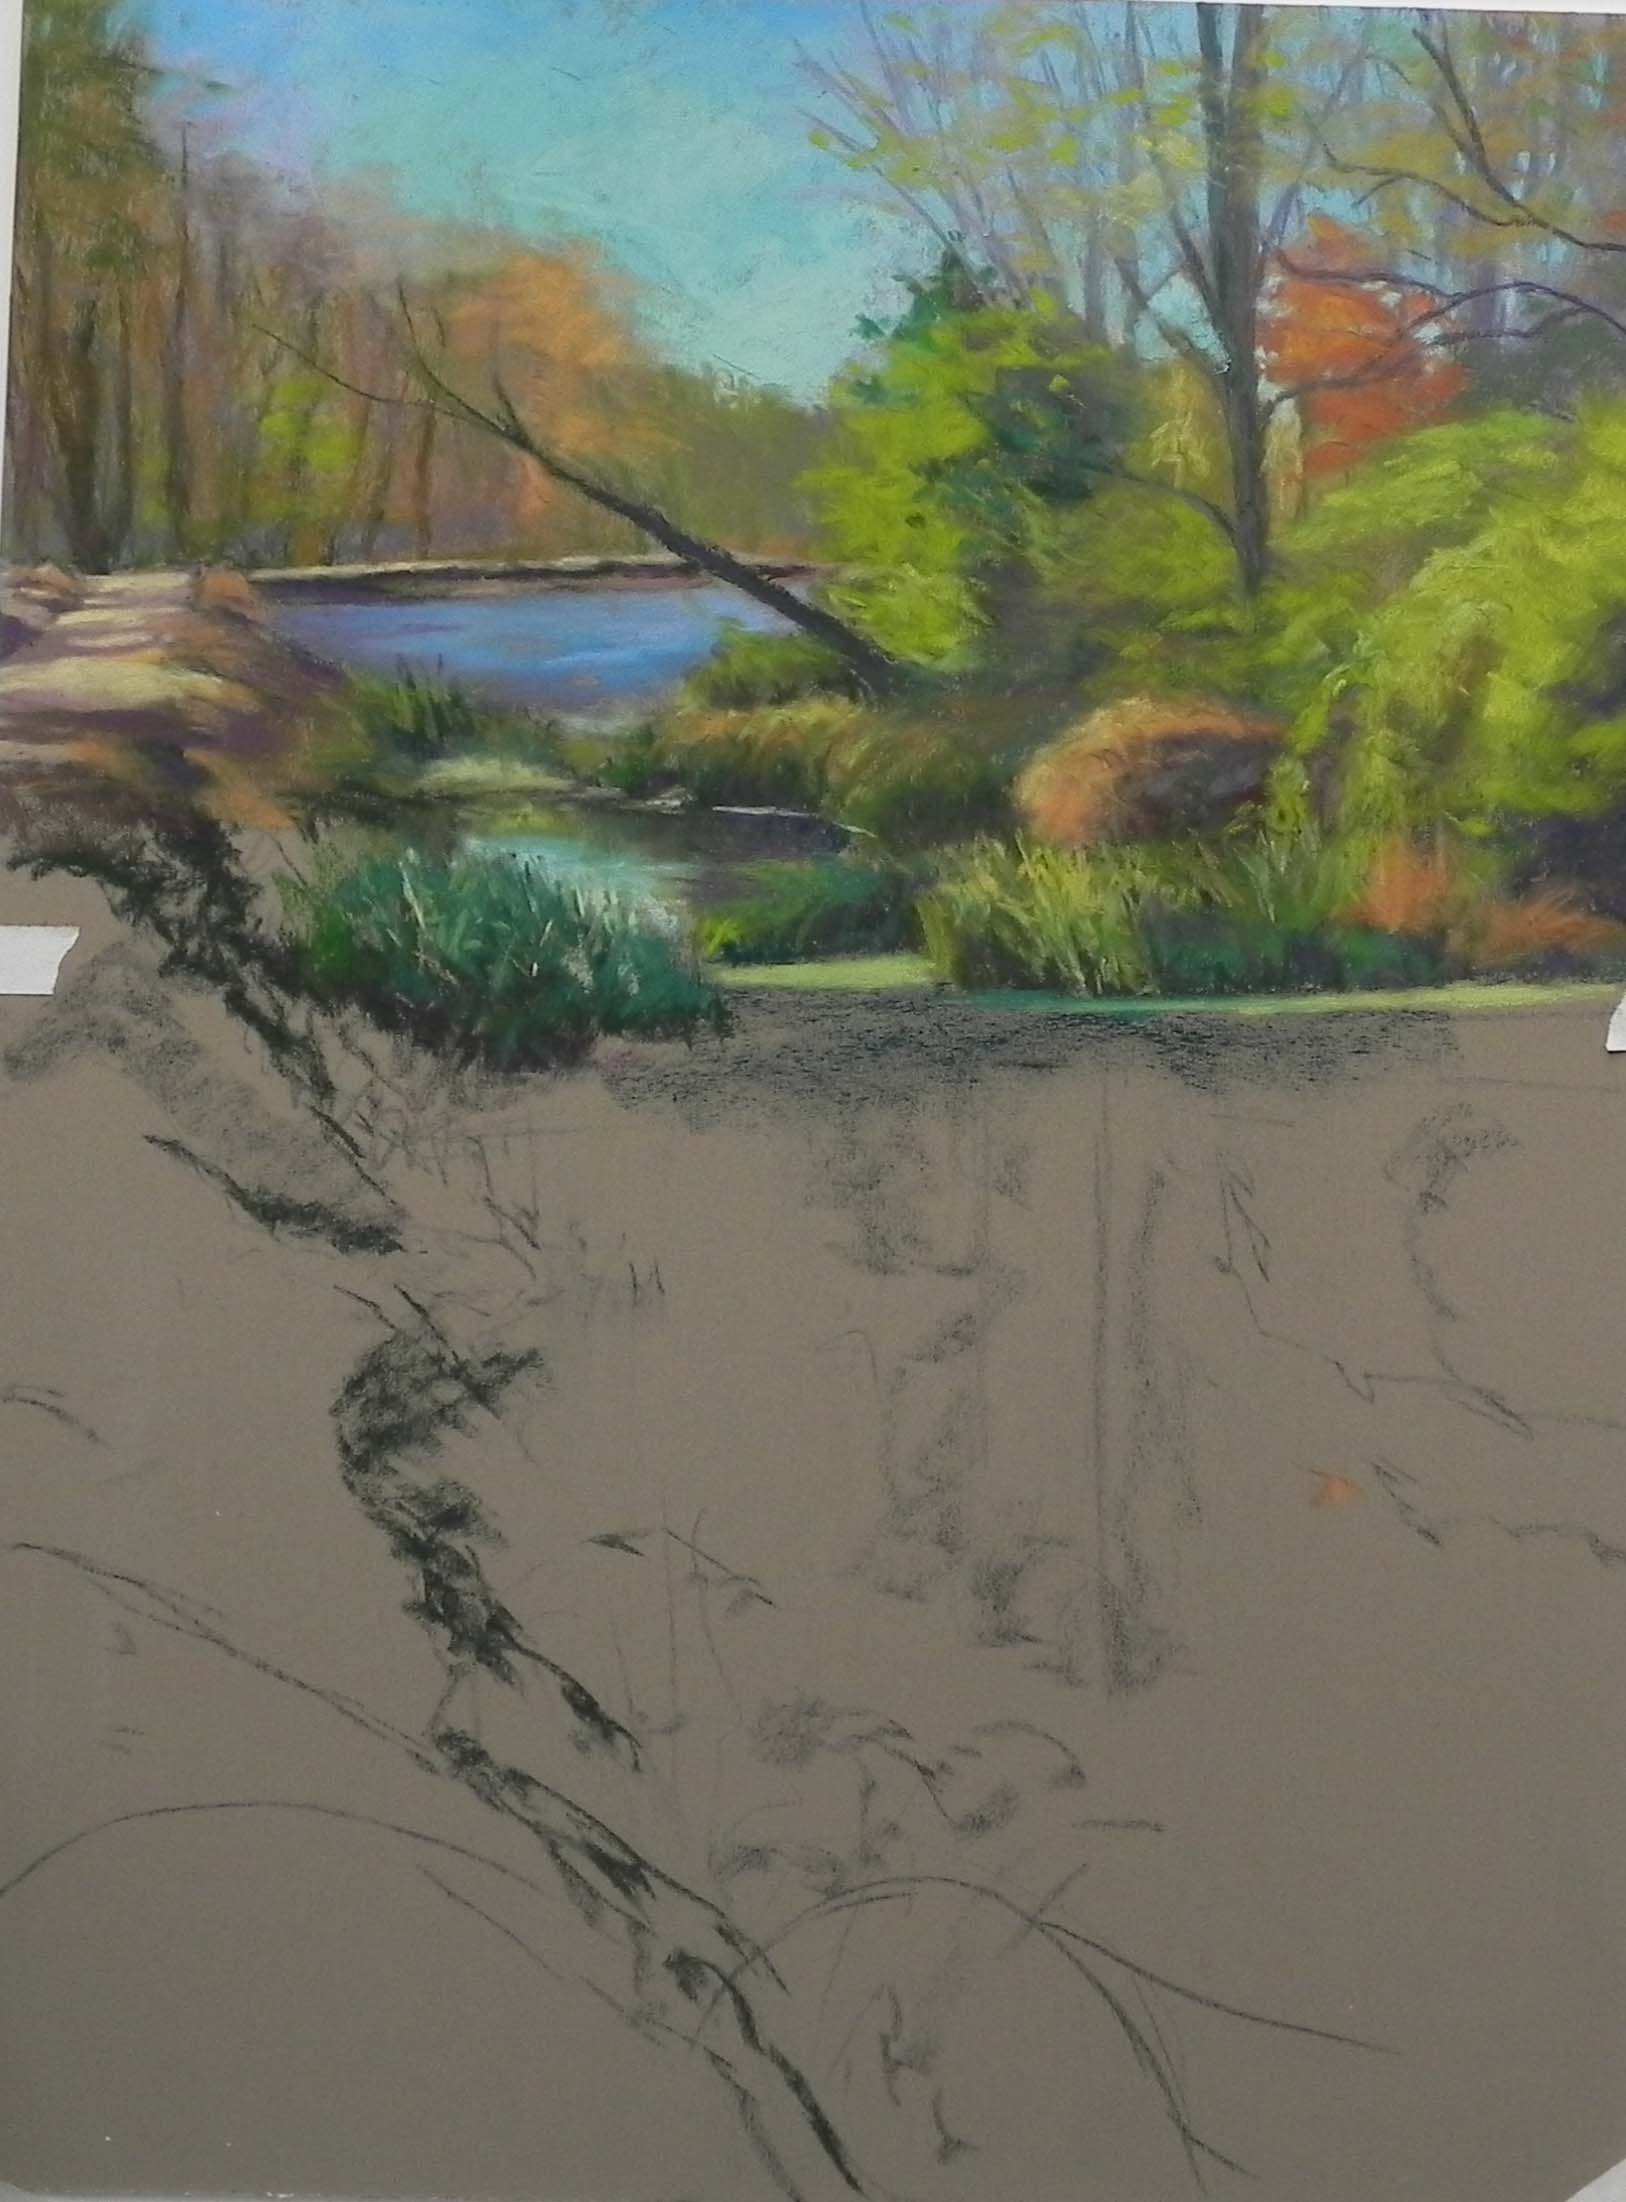
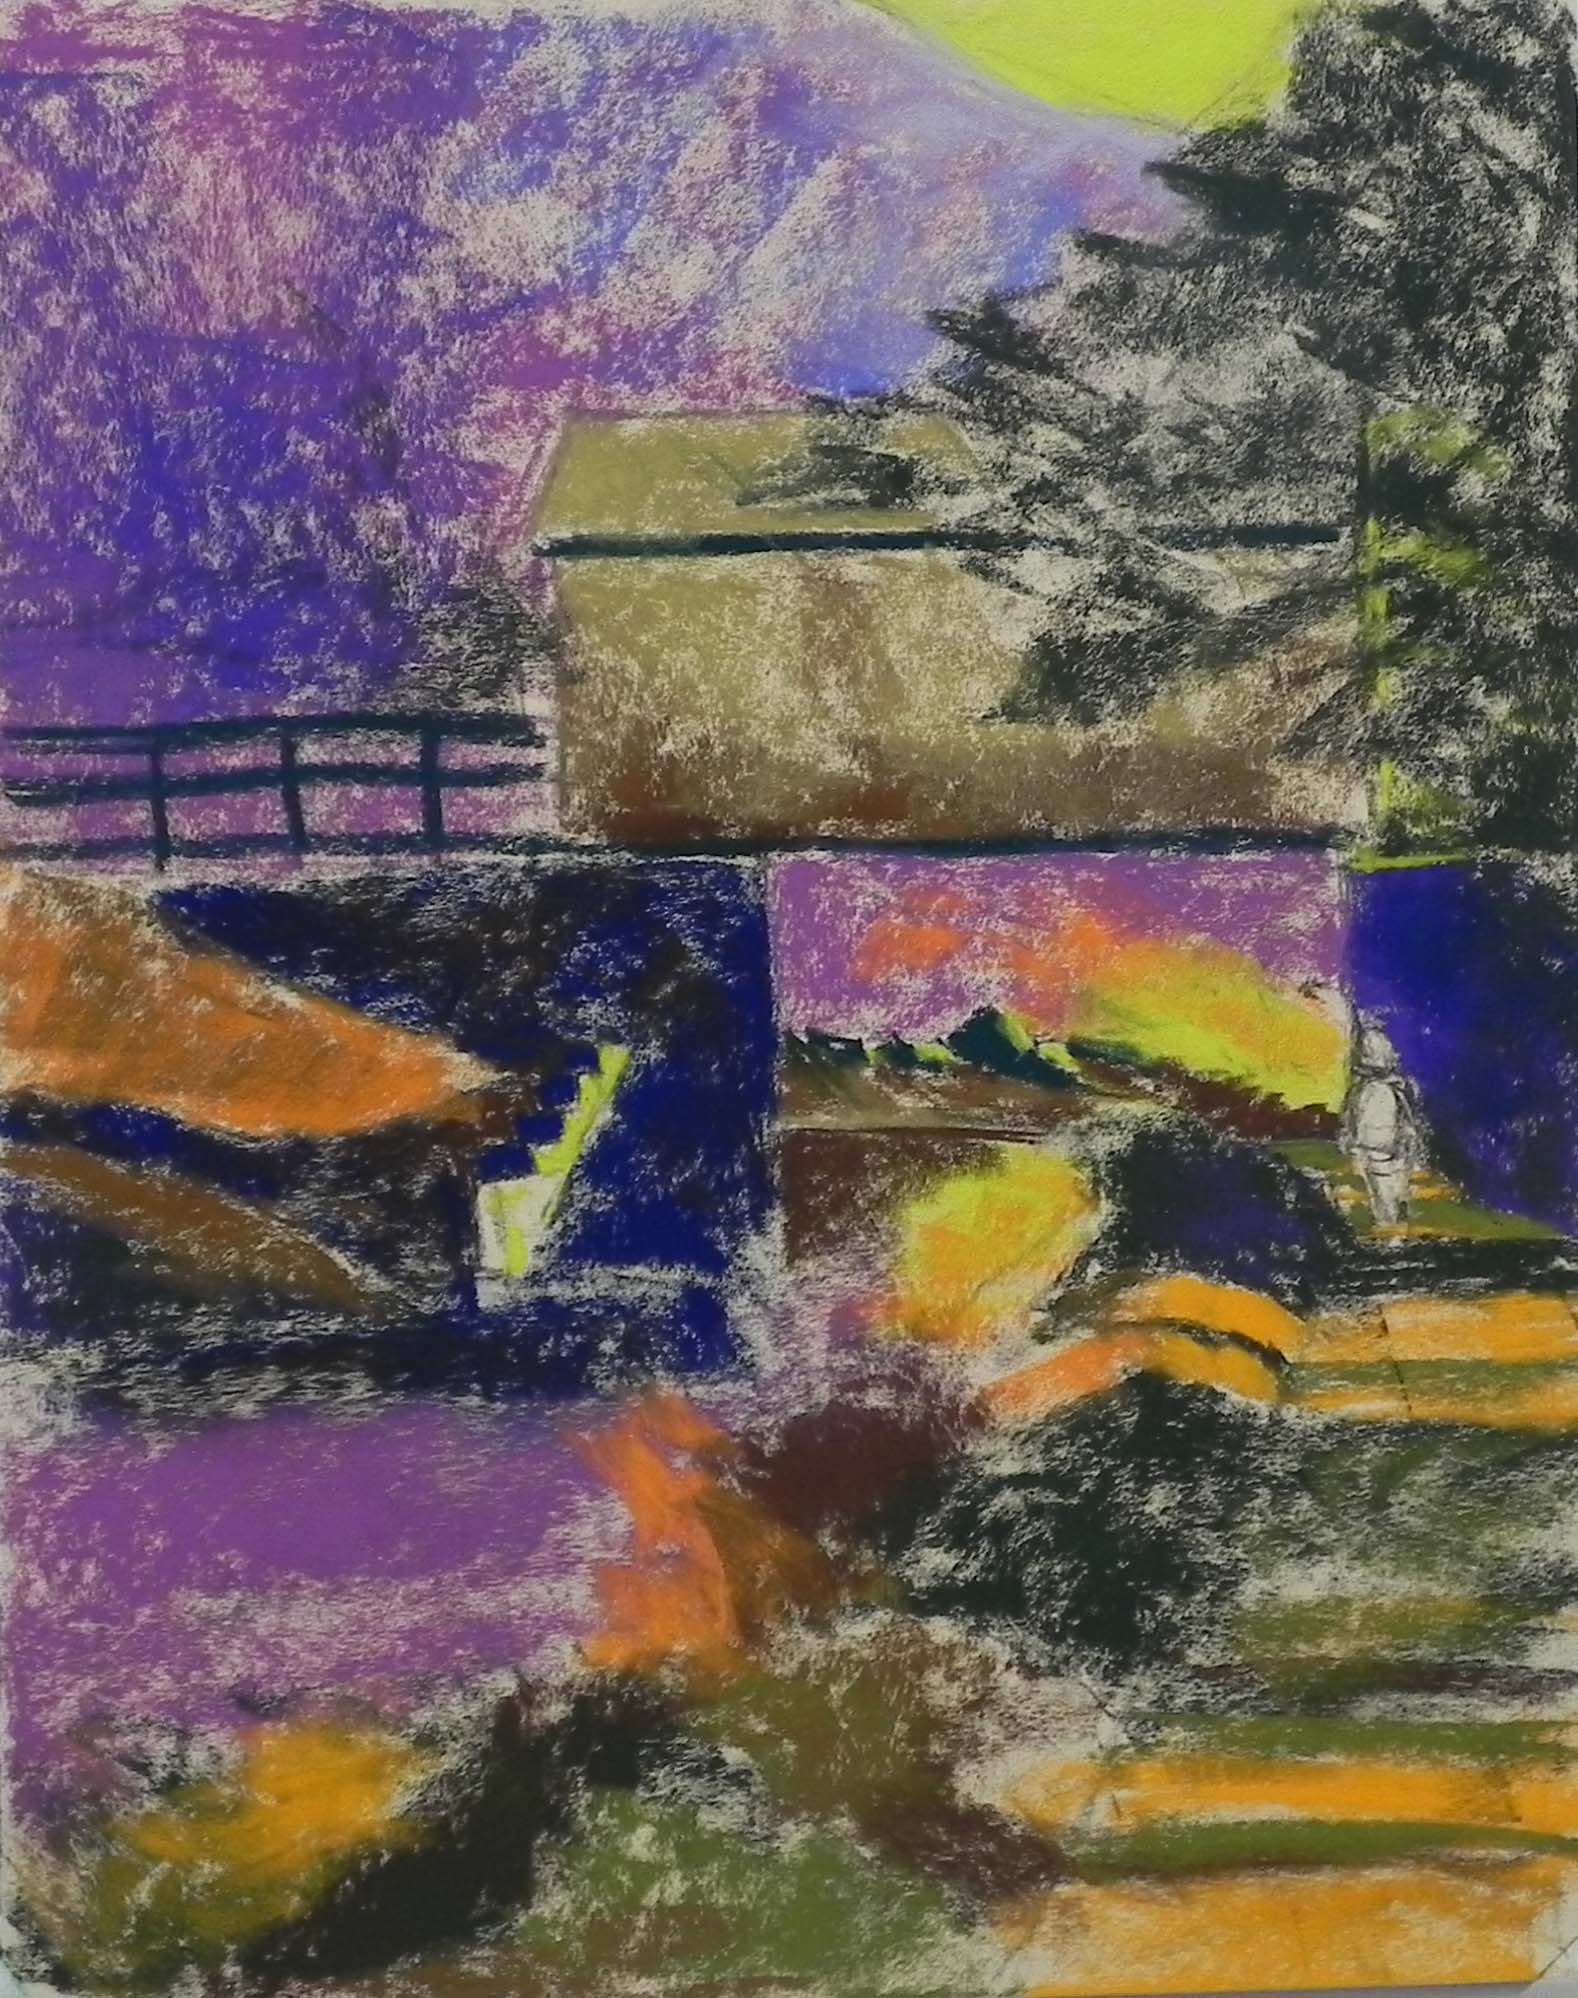
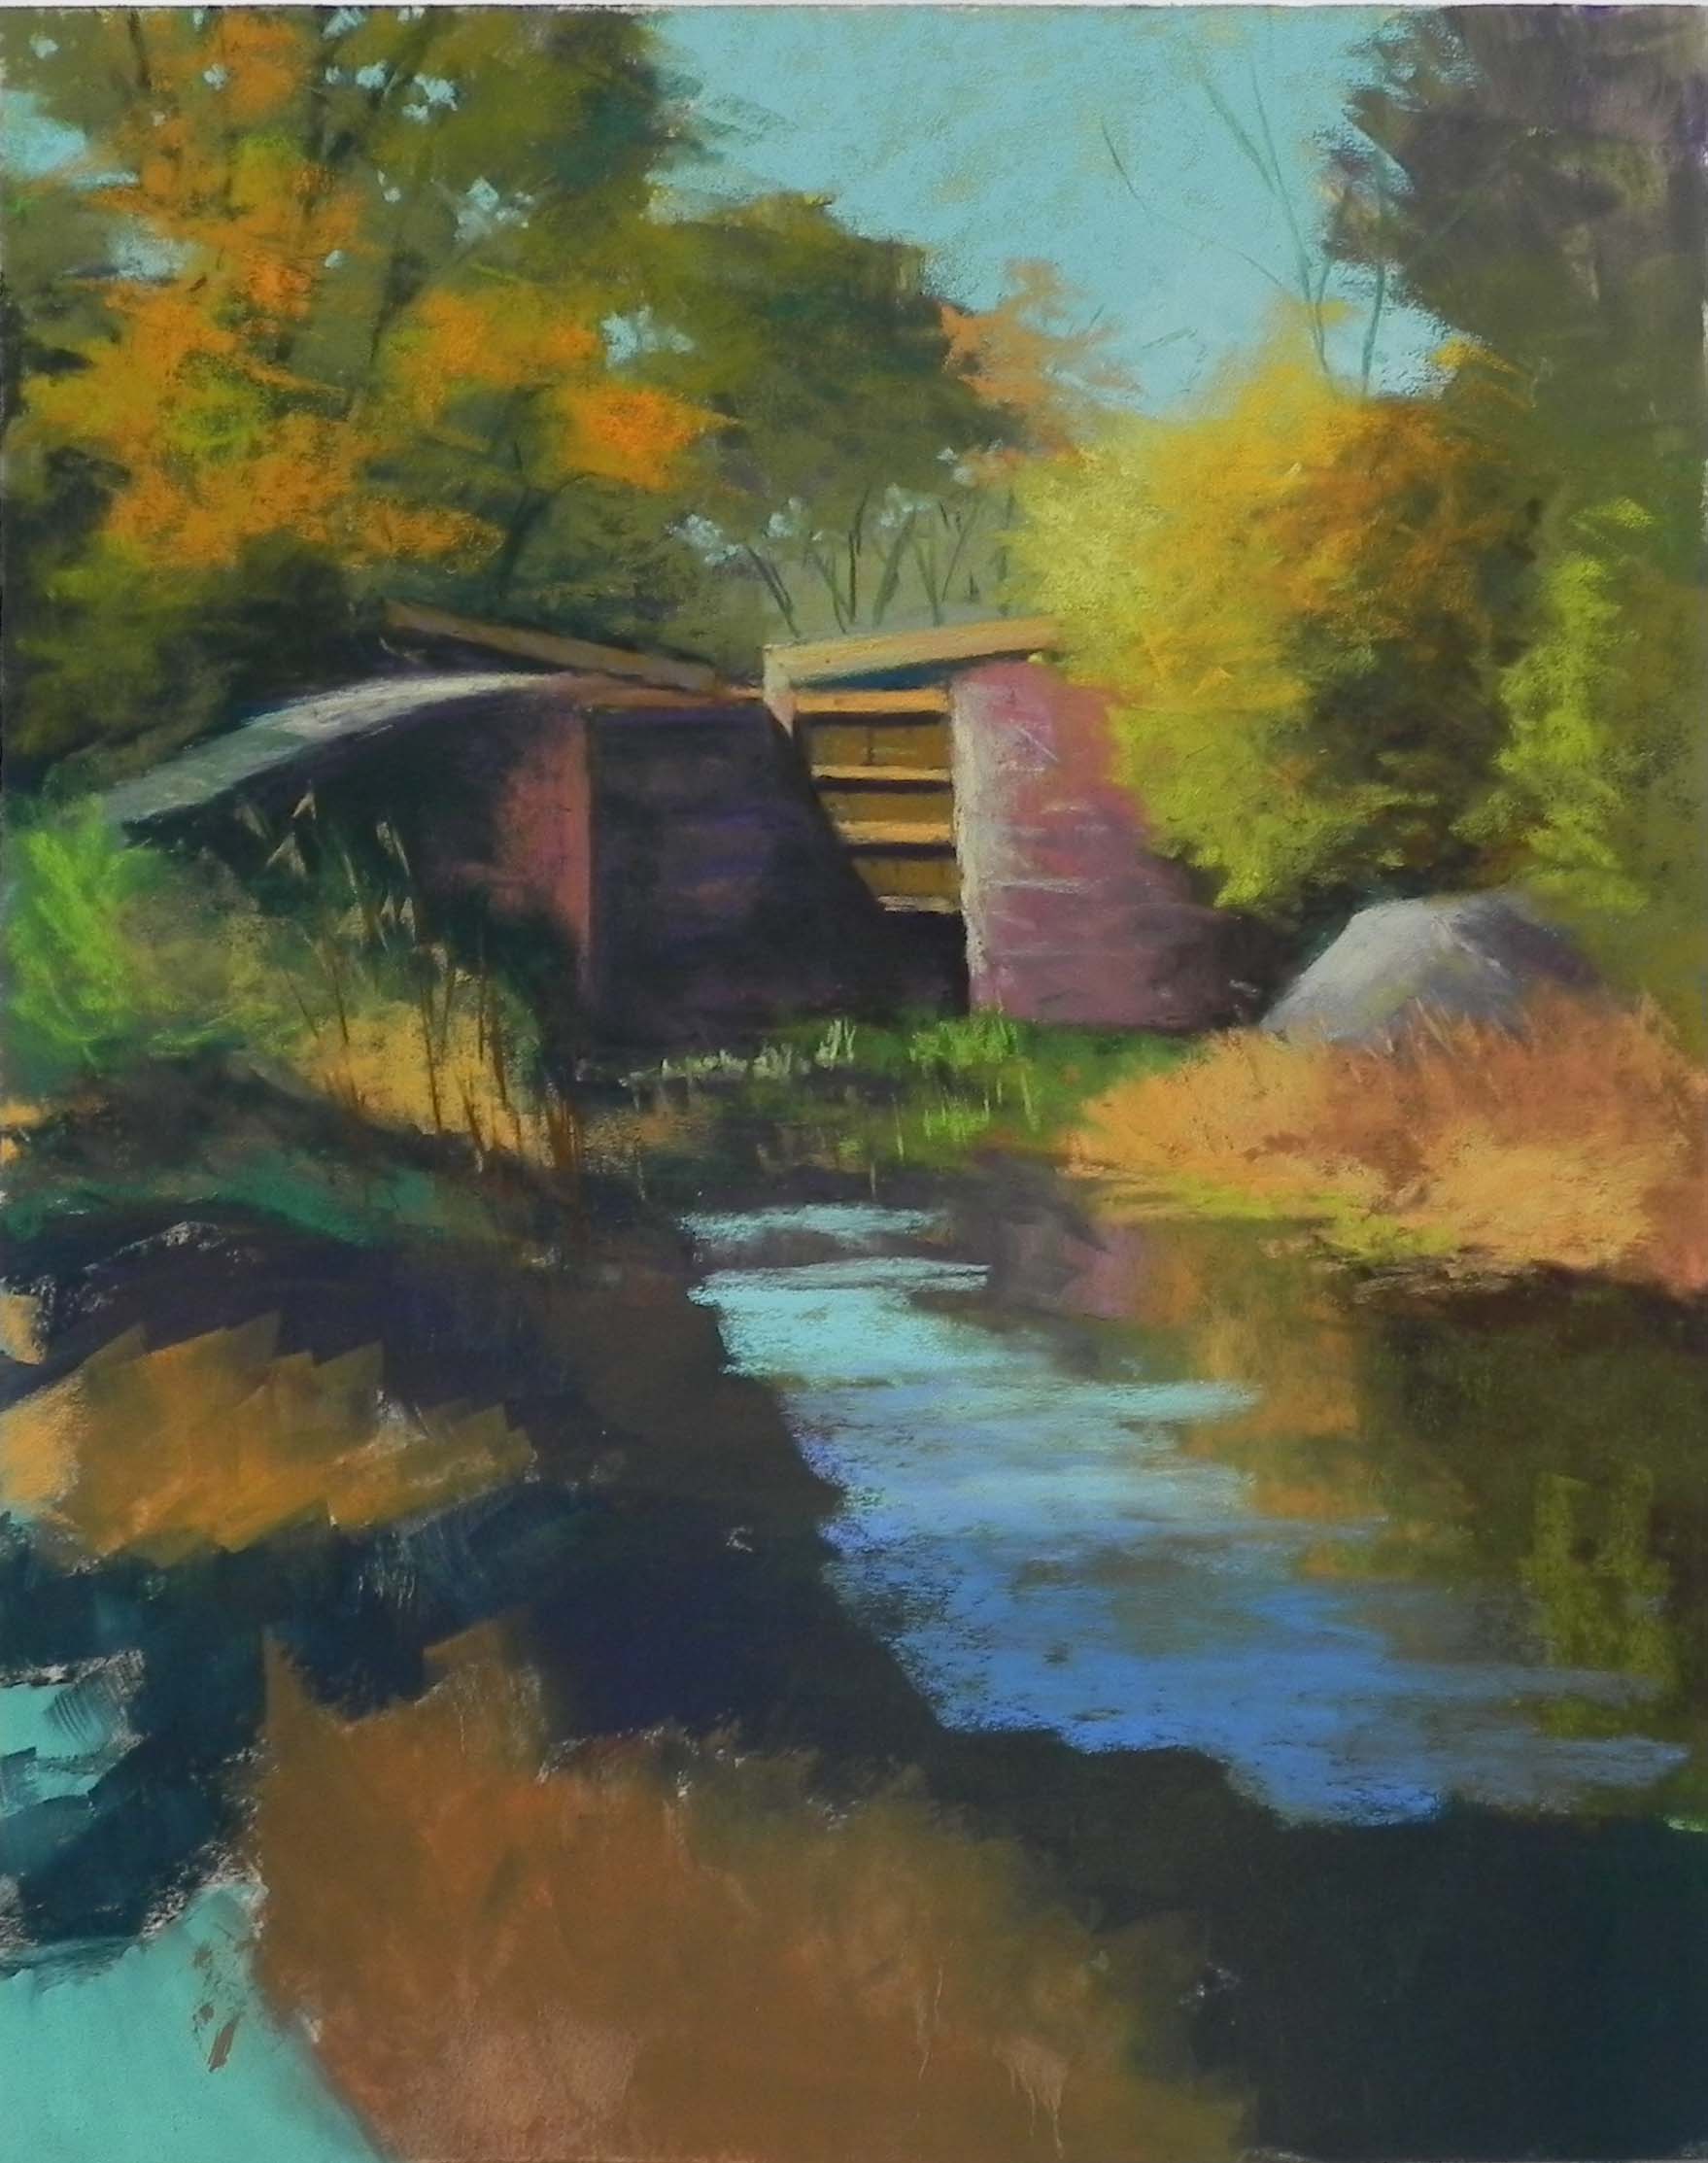
Underpainting, stage 2
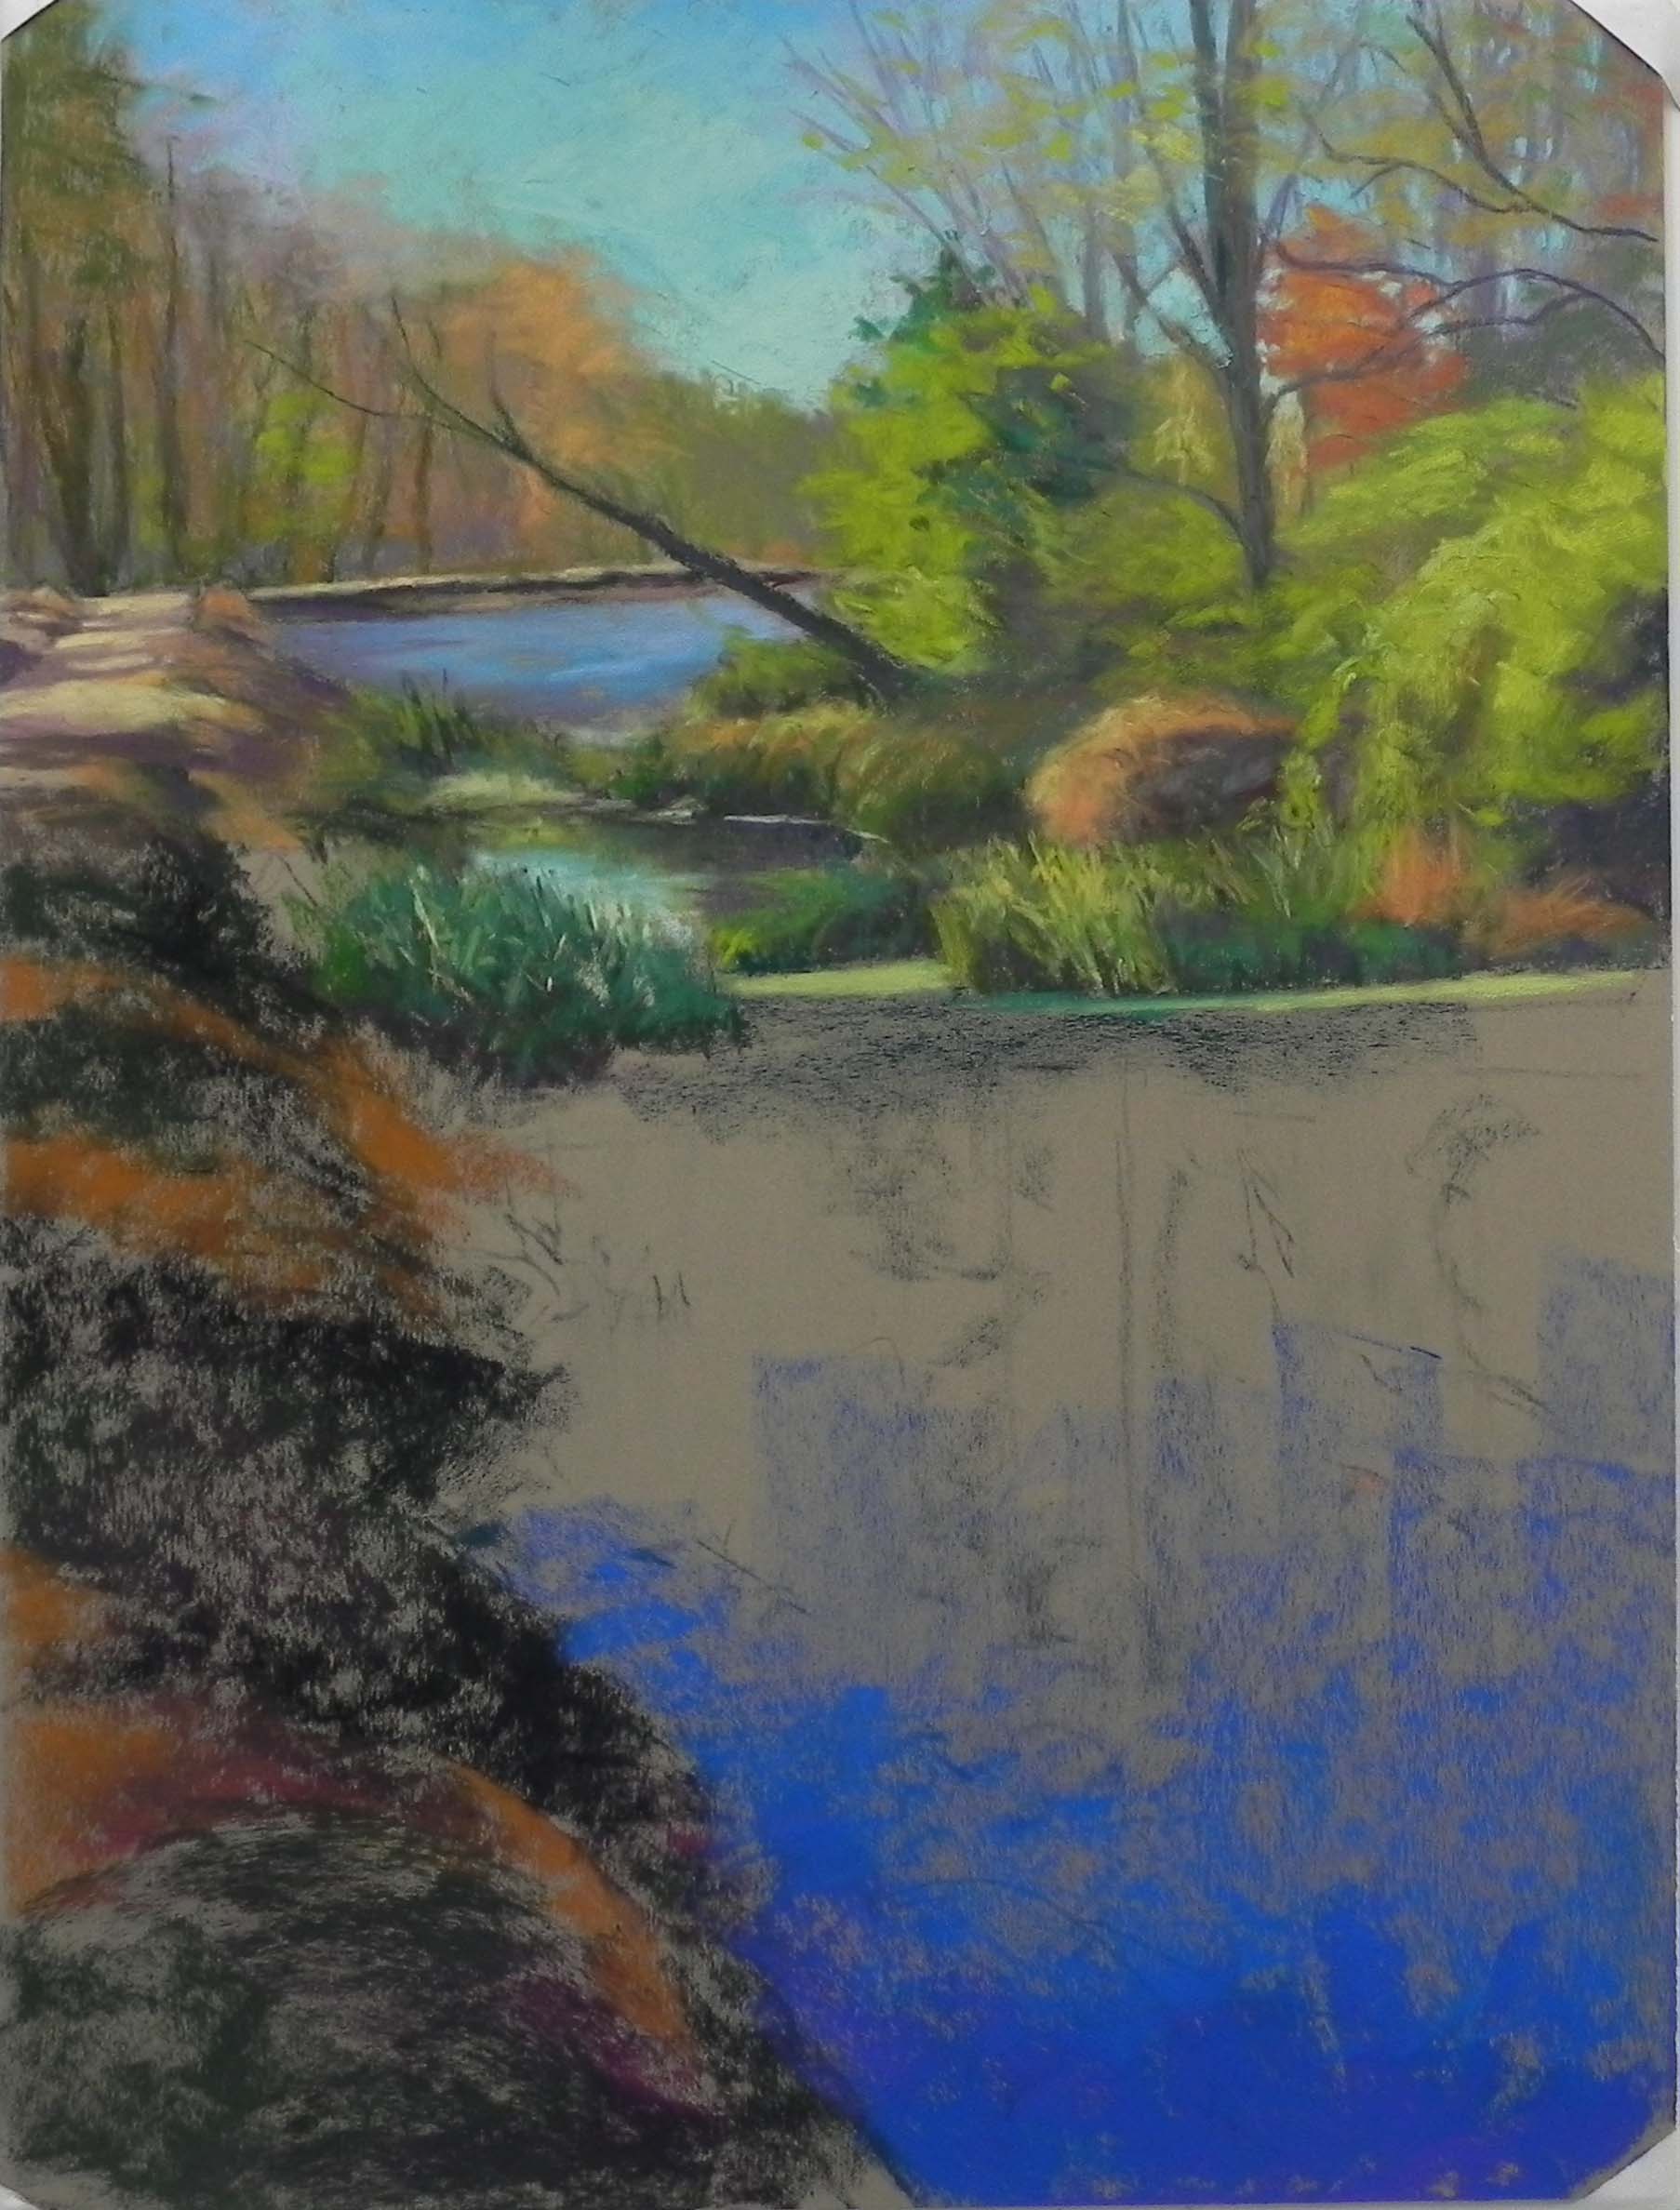
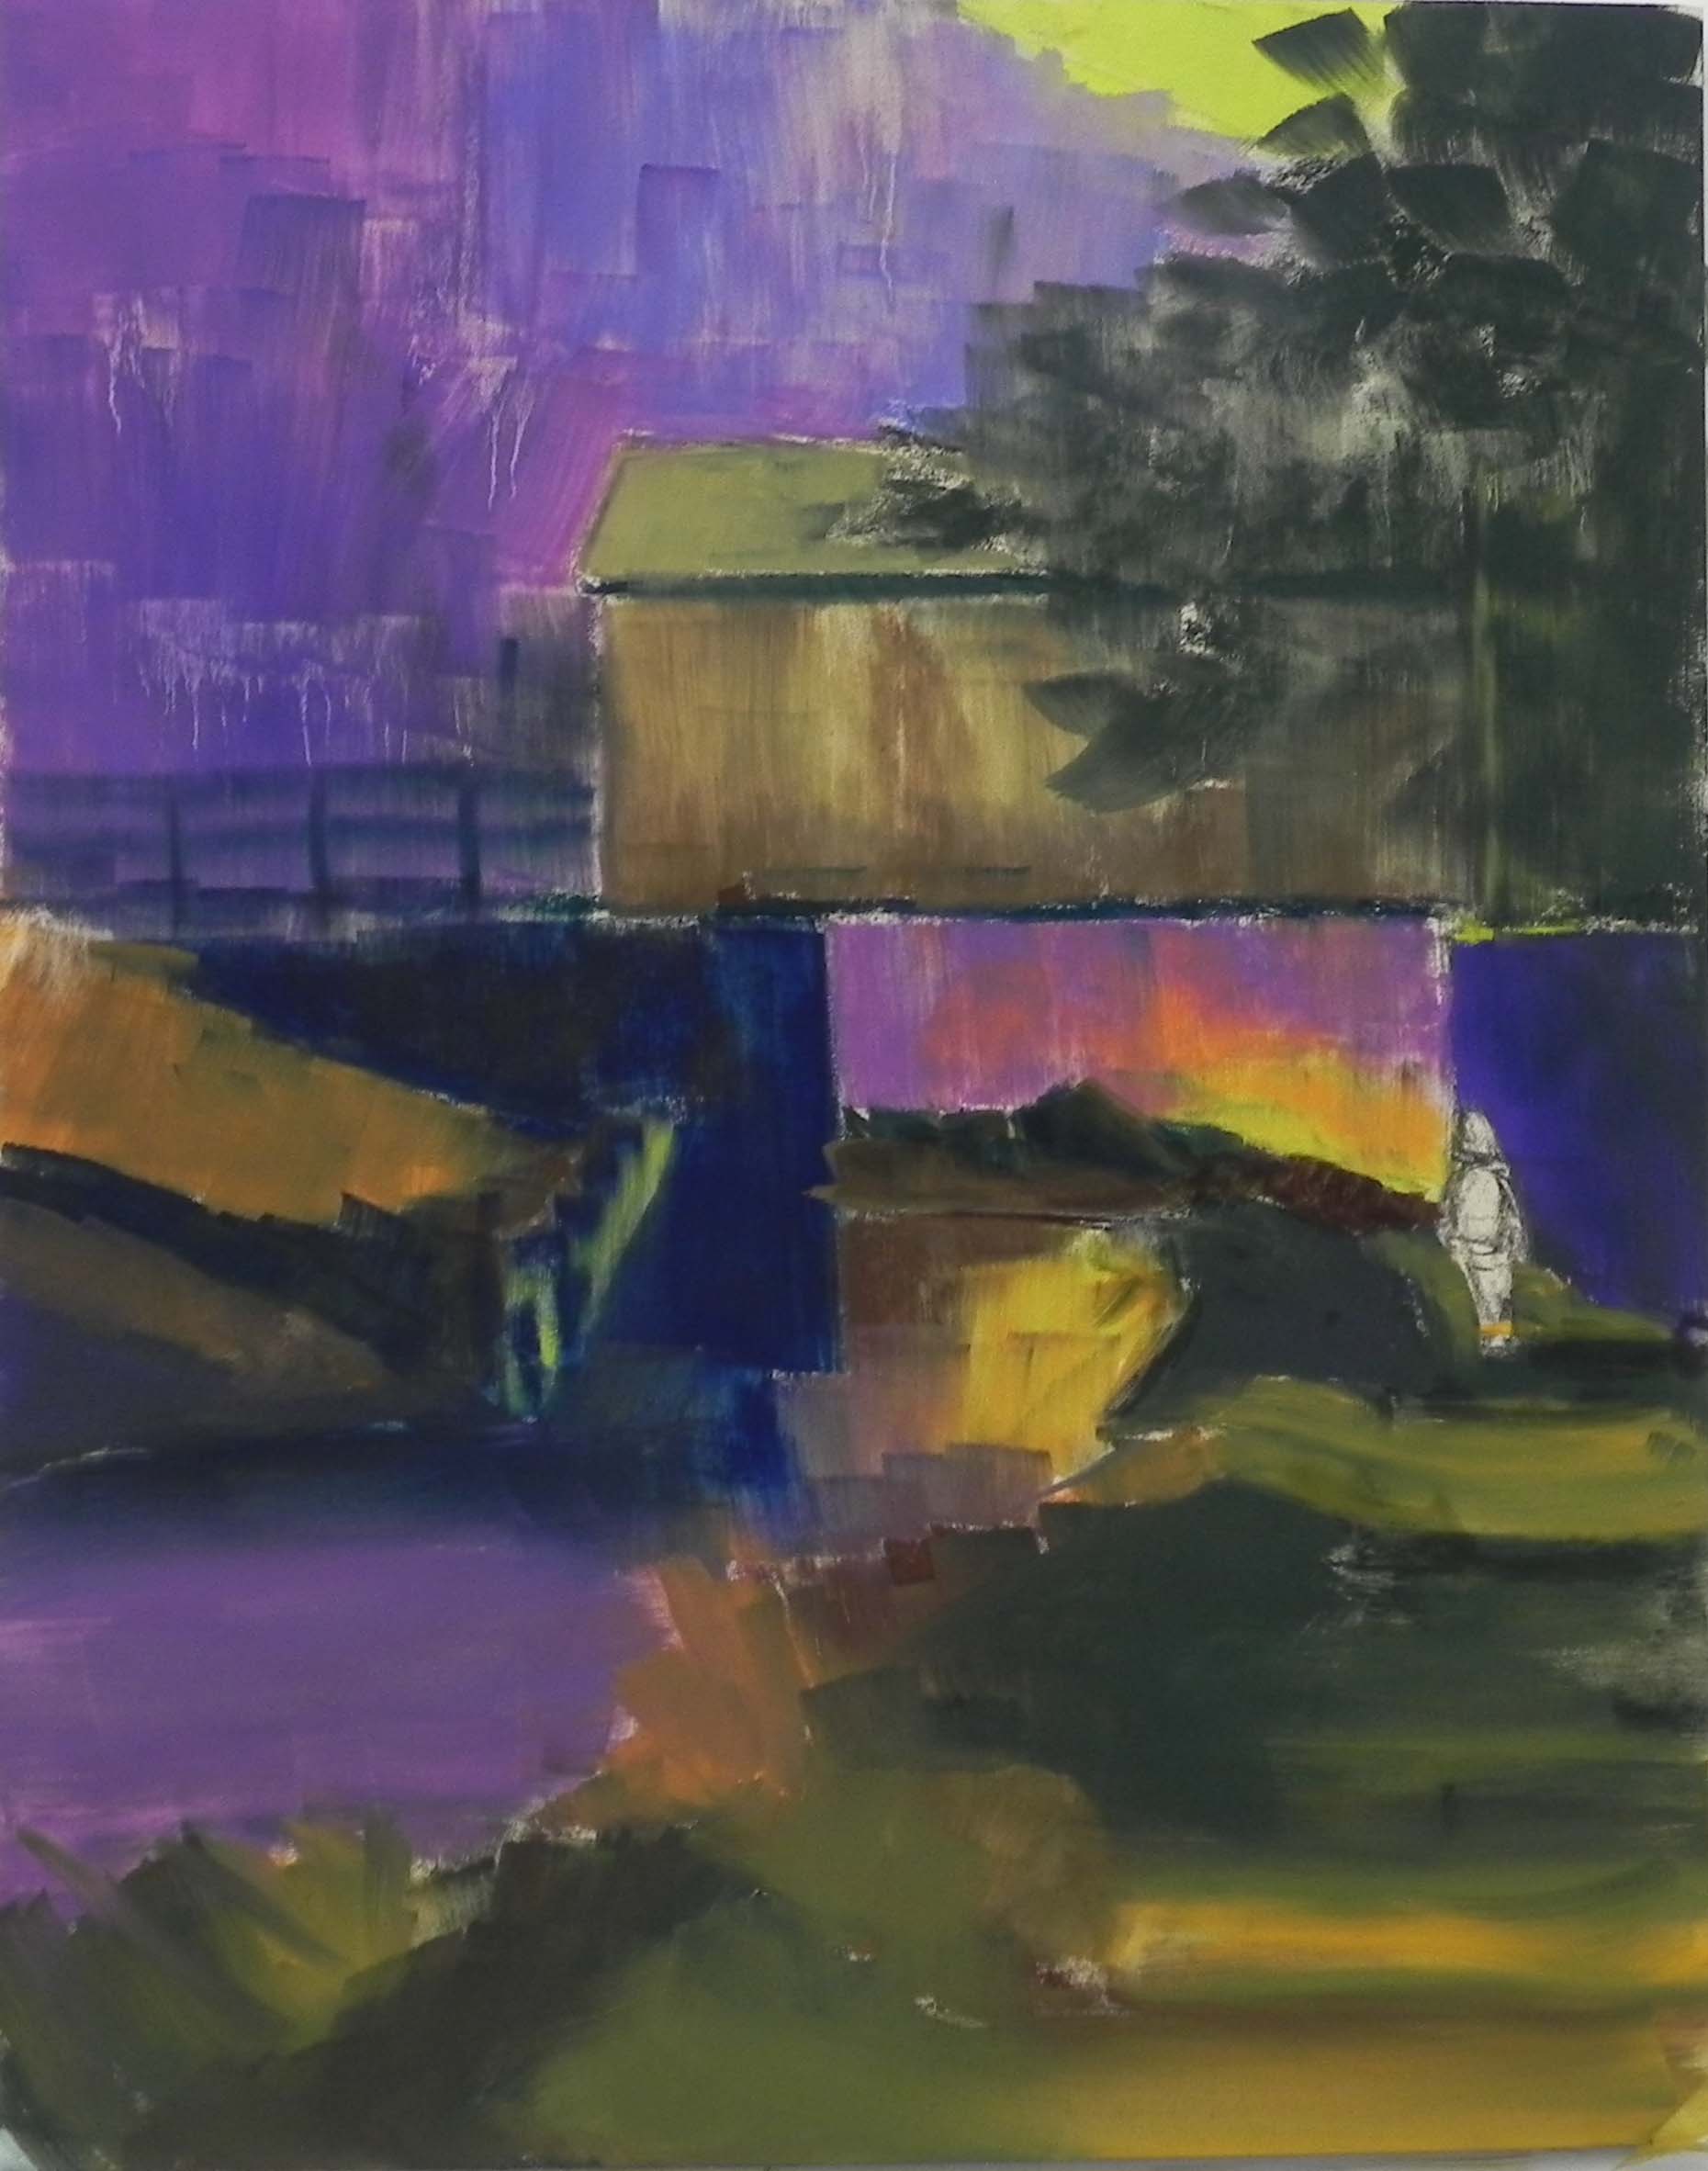
Hello Friends. It’s a lovely sunny and warm day here in the DC area just before Thanksgiving. I’ve been continuing with my C&O Canal series and have another 24 x 18 on the easel to finish in December. I finished this 12 x 16 intimate rock scene this past week and wanted to share it with you. With this painting, I made a decision: if the underpainting is going to be 80% or more of dark color–use dark paper!!! Black UART would have been perfect for this painting. But I don’t generally like to work on black and thus, I have none of it. So–lots of dark blue underpainting instead.
A challenge of this painting was to produce the stretch of light leading from the left over to the large rocks. I didn’t really accomplish that with the underpainting, but paid a lot of attention to it as I was adding in the small twigs and such.
I really enjoyed doing the rocks on the left, playing with subtle colors of blues, violets, and peach colors. I struggled with the color on the larger rocks, however. I used a soft very light cool green and some yellow, along with violets and blue greens in the shadowed areas.
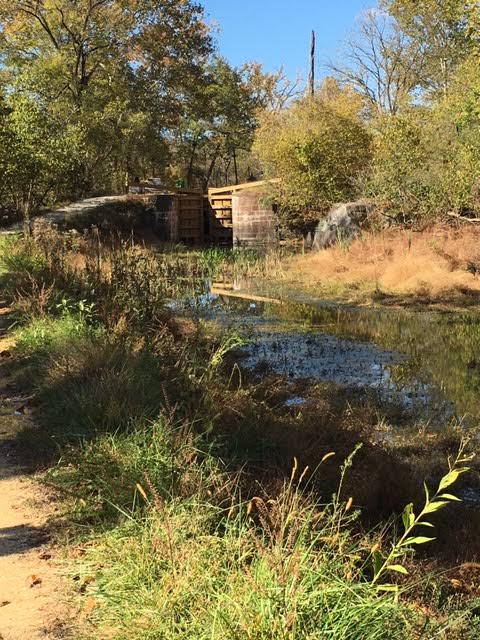
The photo is all pretty much grays with only a few very dark red leaves. I added more–my prerogative and had fun adding in the little bright yellow leaves on the right. As I’m writing this, I’m thinking that a floating red leaf might be a very nice addition. Perhaps something to consider.
The water and reflections were more of a challenge than normal and I redid it several times, focusing on the rock reflections. I used a lot of greens, from a very dark warm green and some Ludwig violet then various values of yellow green on the top.
I like this intimate view of rocks and autumn foliage. It’s a real change from the larger paintings with more distance and punch to them. I’m looking for an opportunity to show these paintings. I’ve just been given a show at the Alexandria campus of NOVA (Northern Virginia Community Coll) in Sept. but not sure that’s the right venue. We’ll see.
Meanwhile, I wish you all a lovely Thanksgiving with family, friends, or whoever! We DO have much to be thankful for, despite the constant state of unease!!!