Bungalow Nocturne Blues

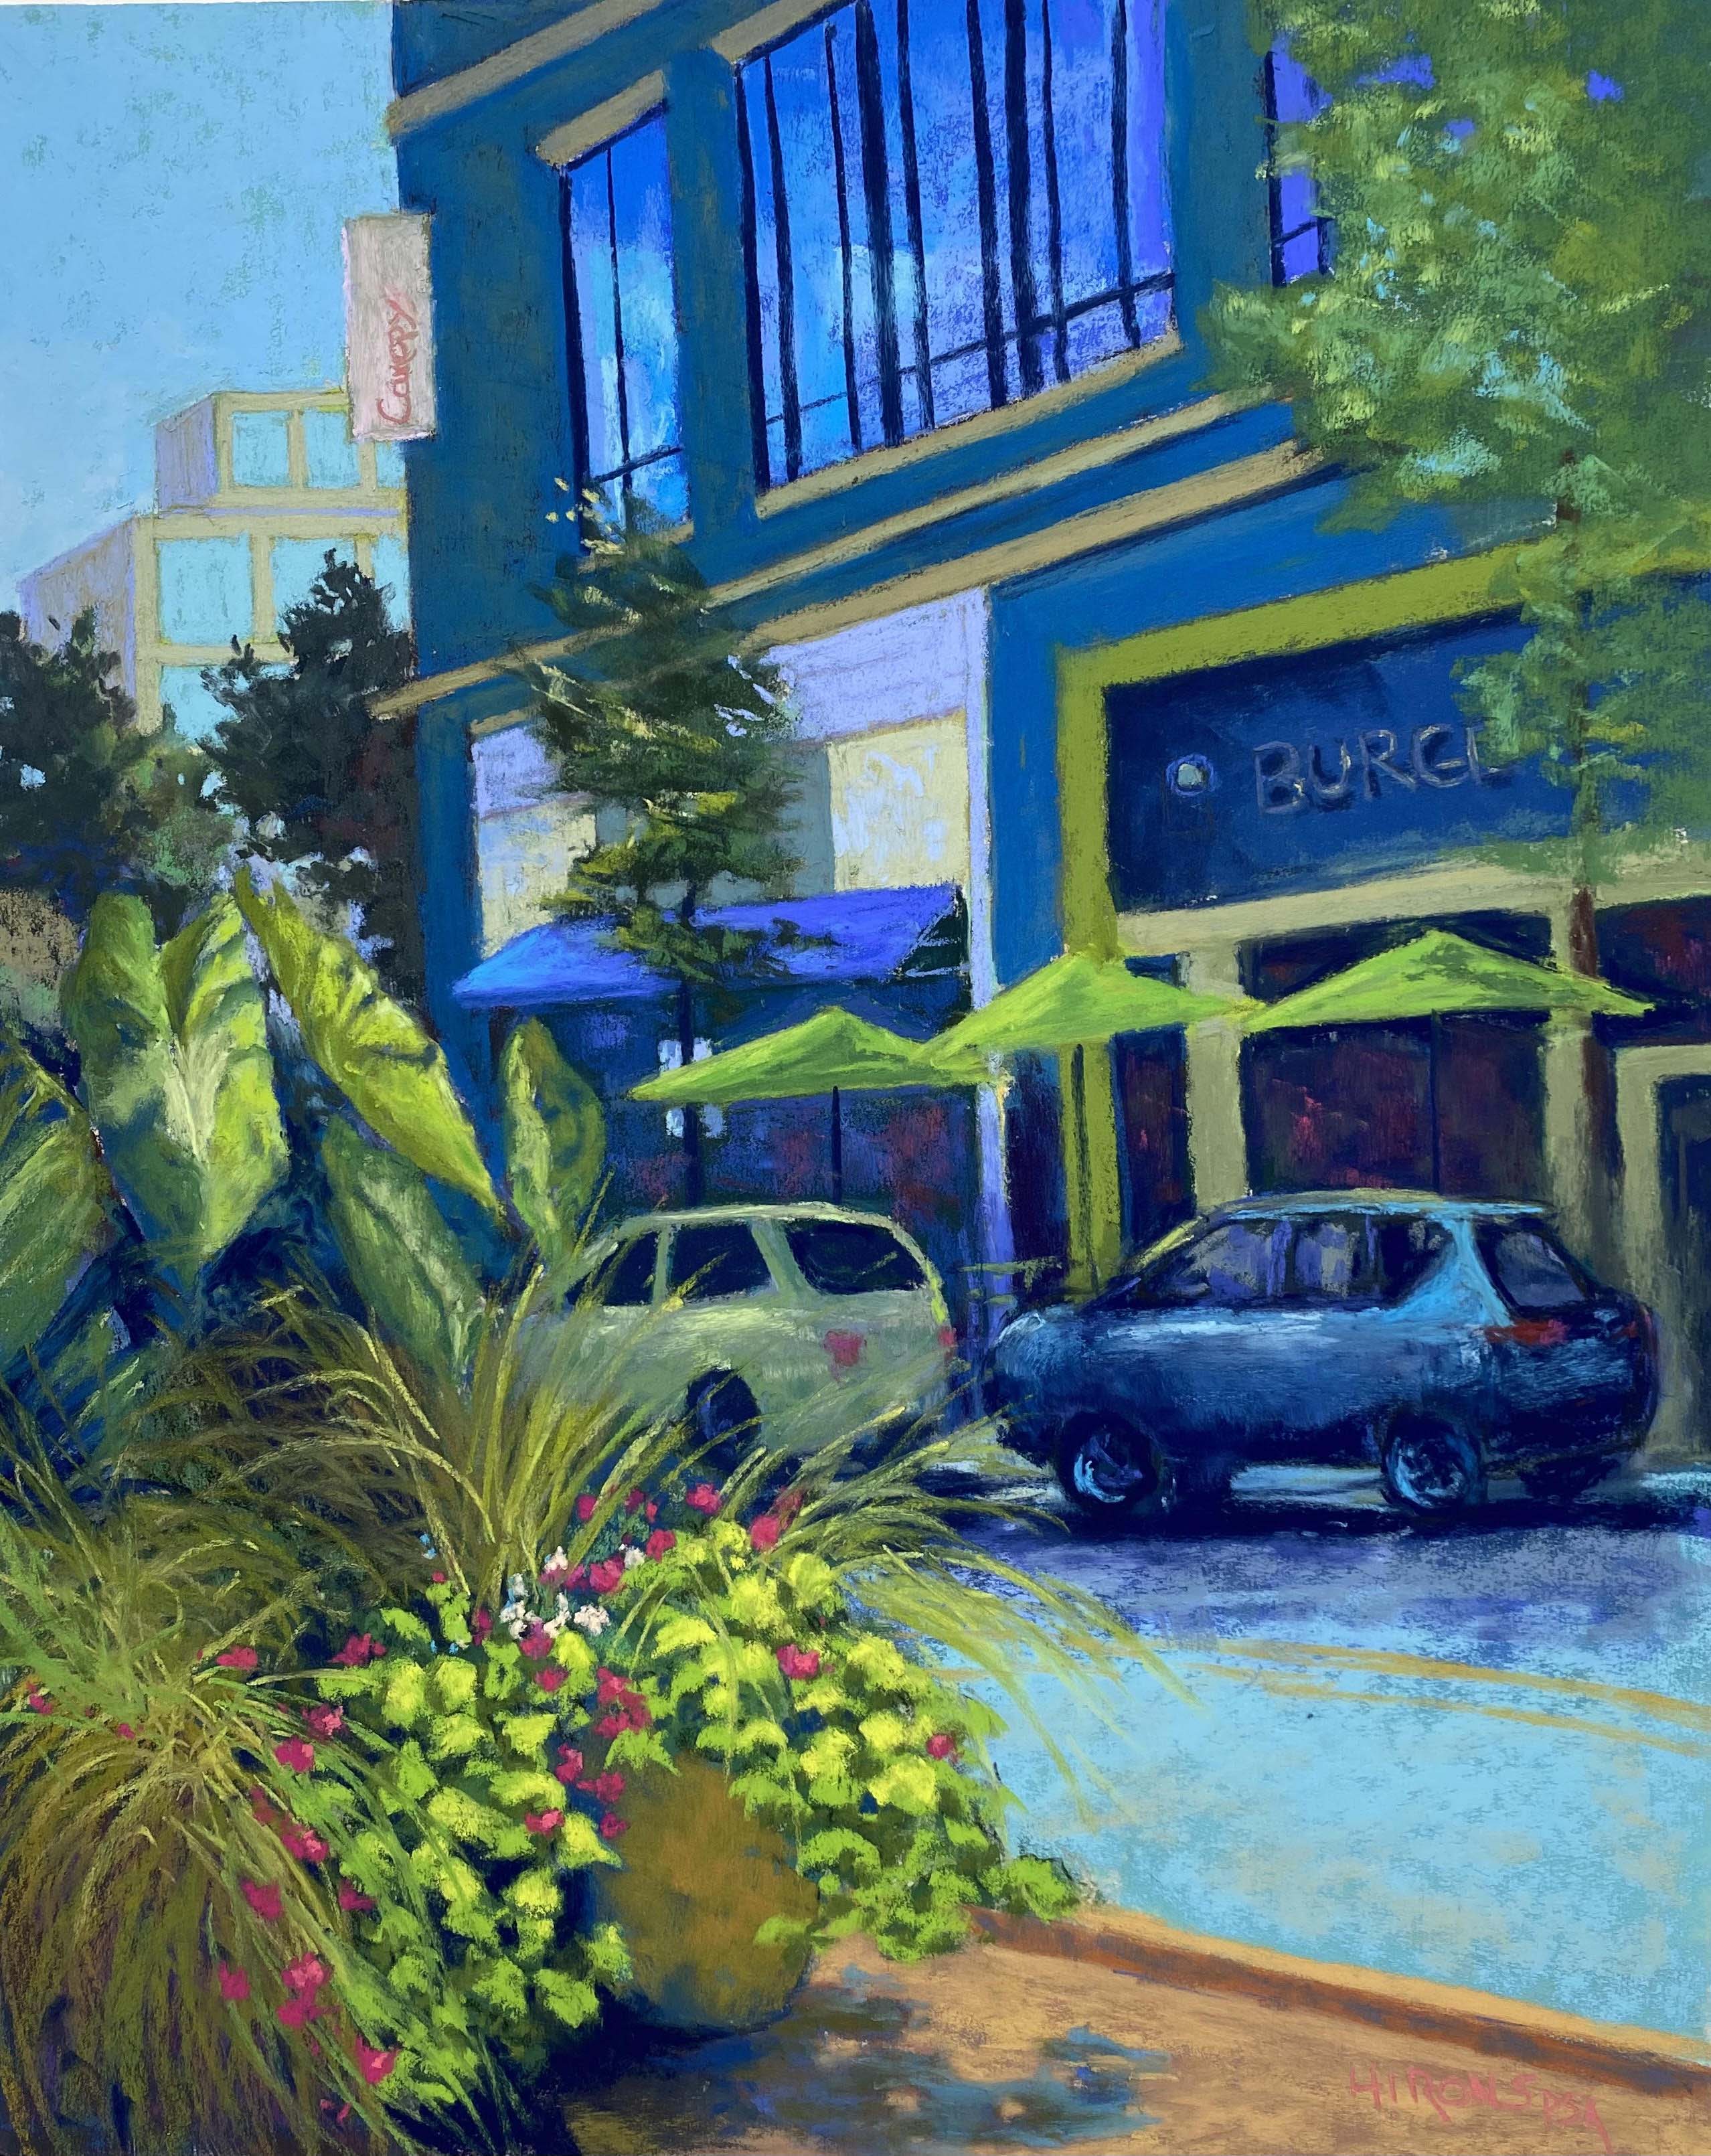
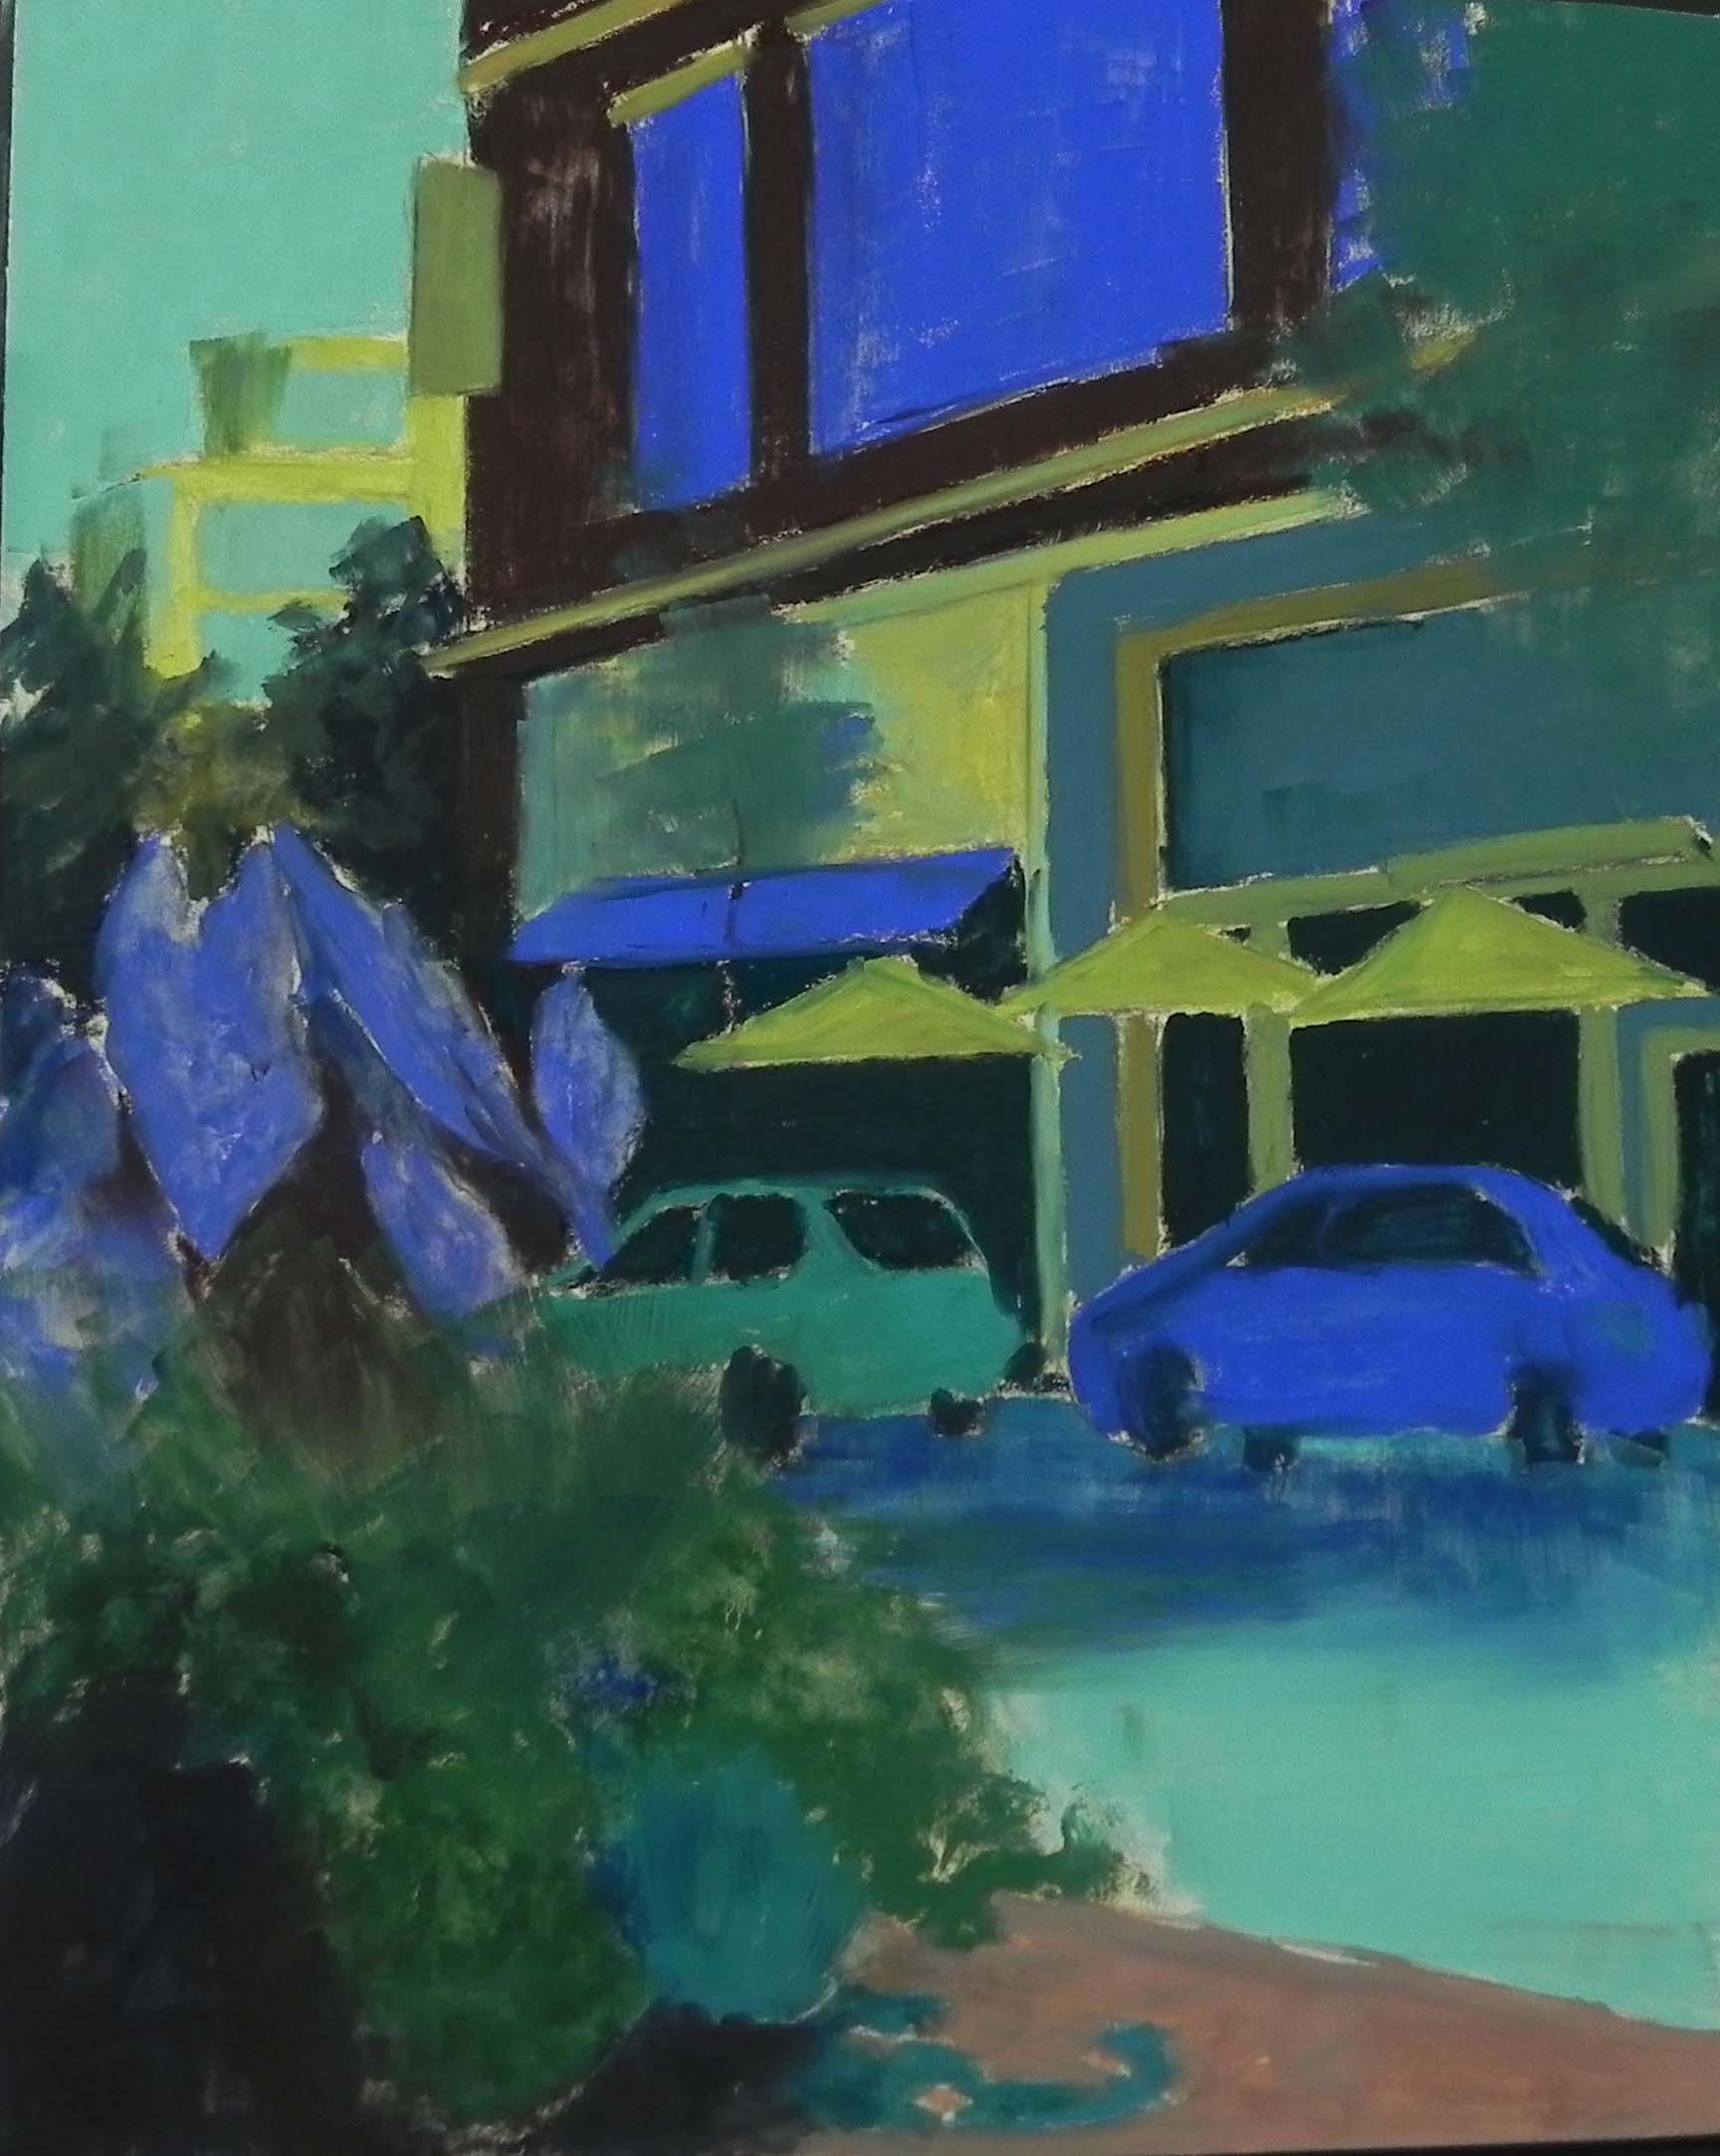
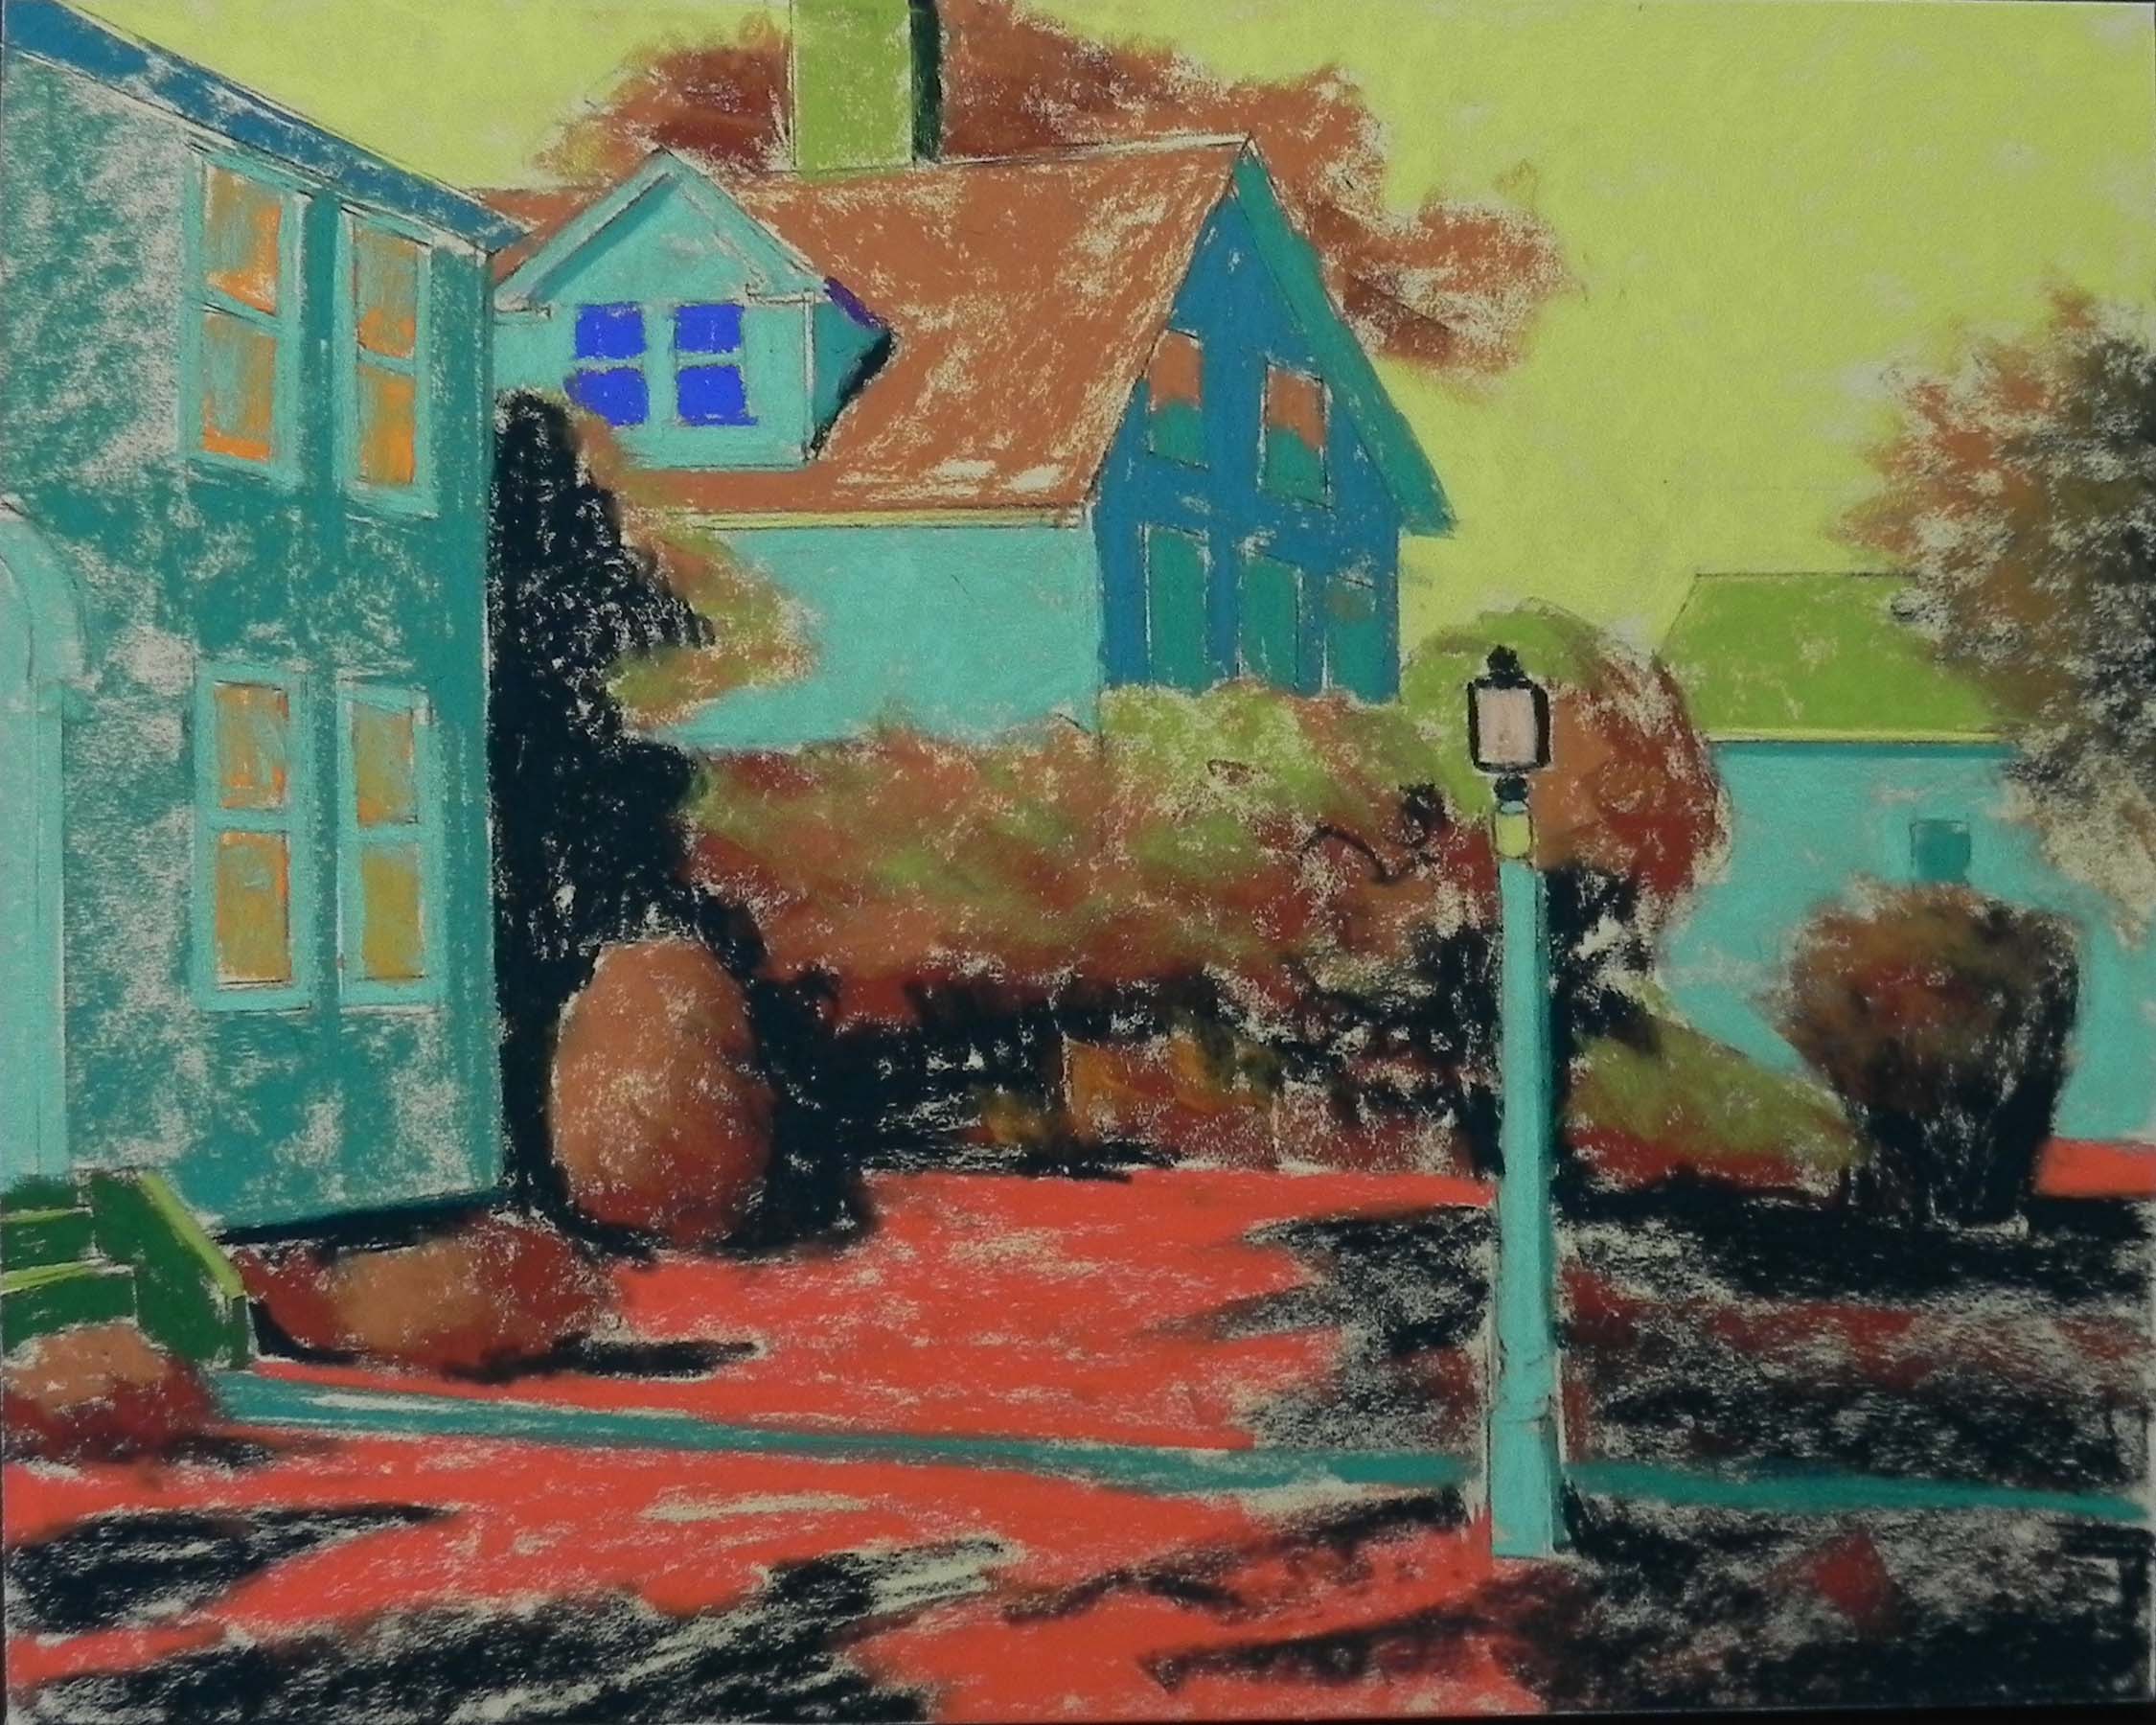
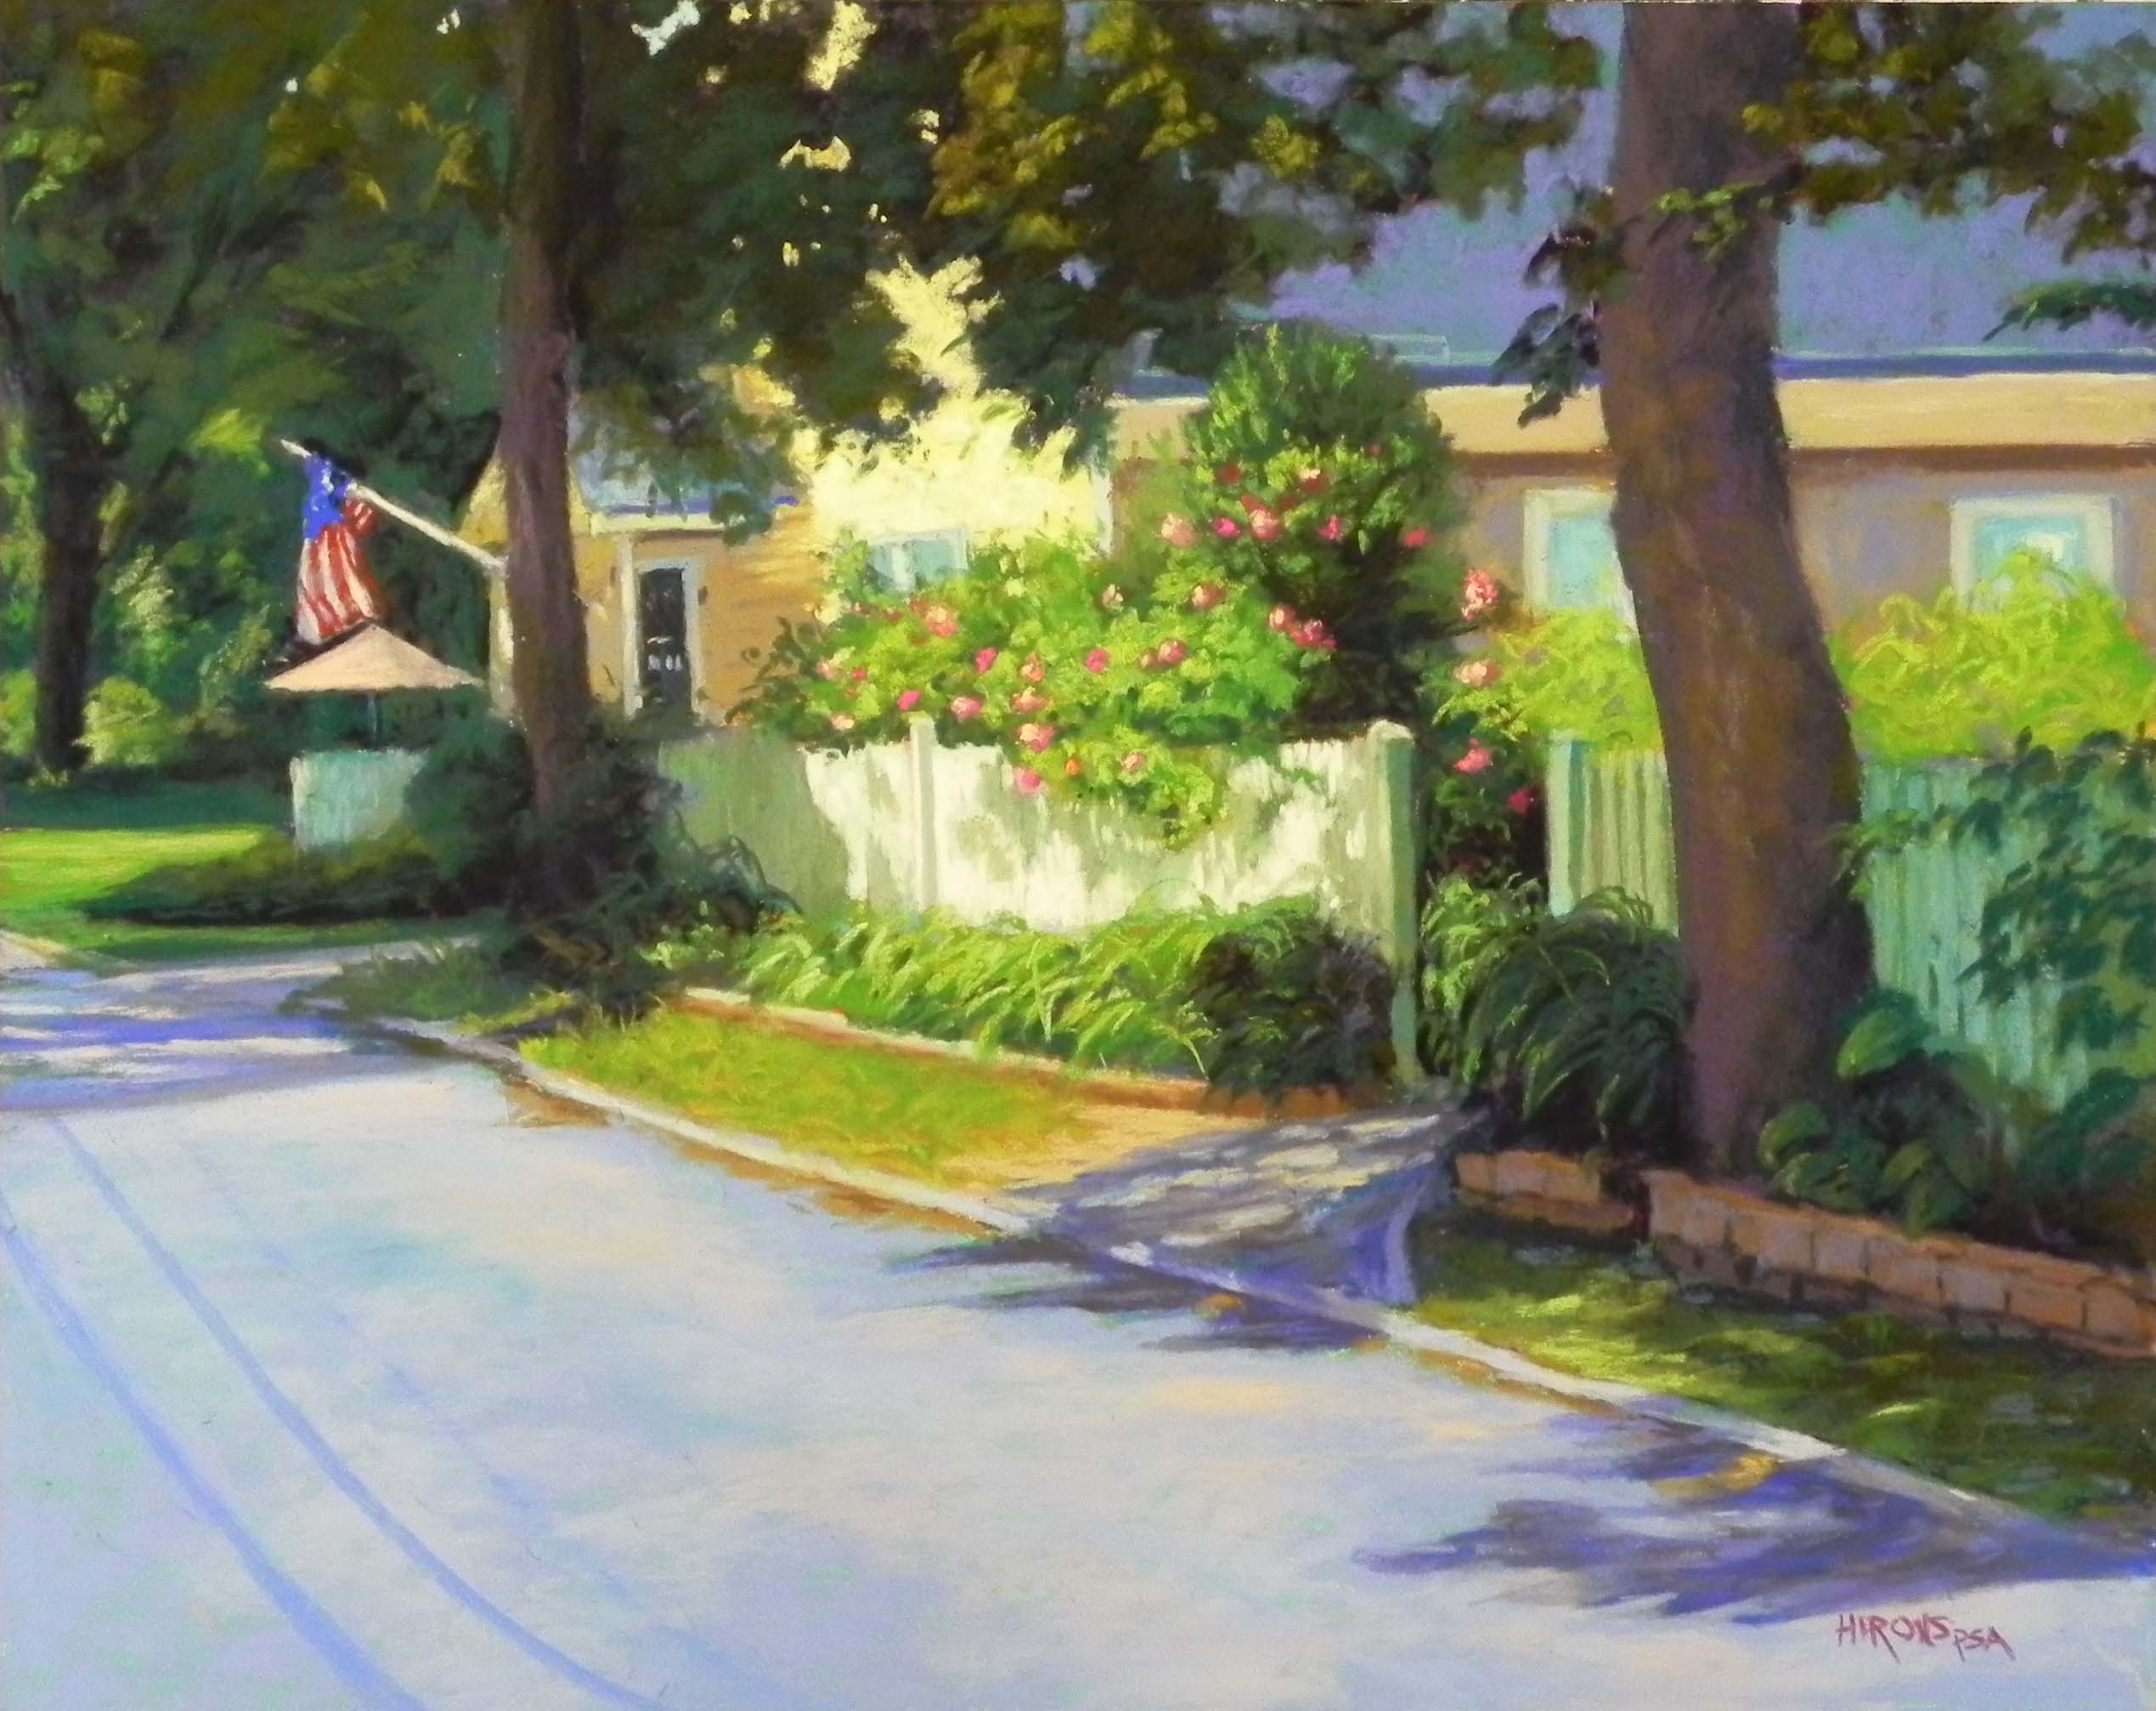
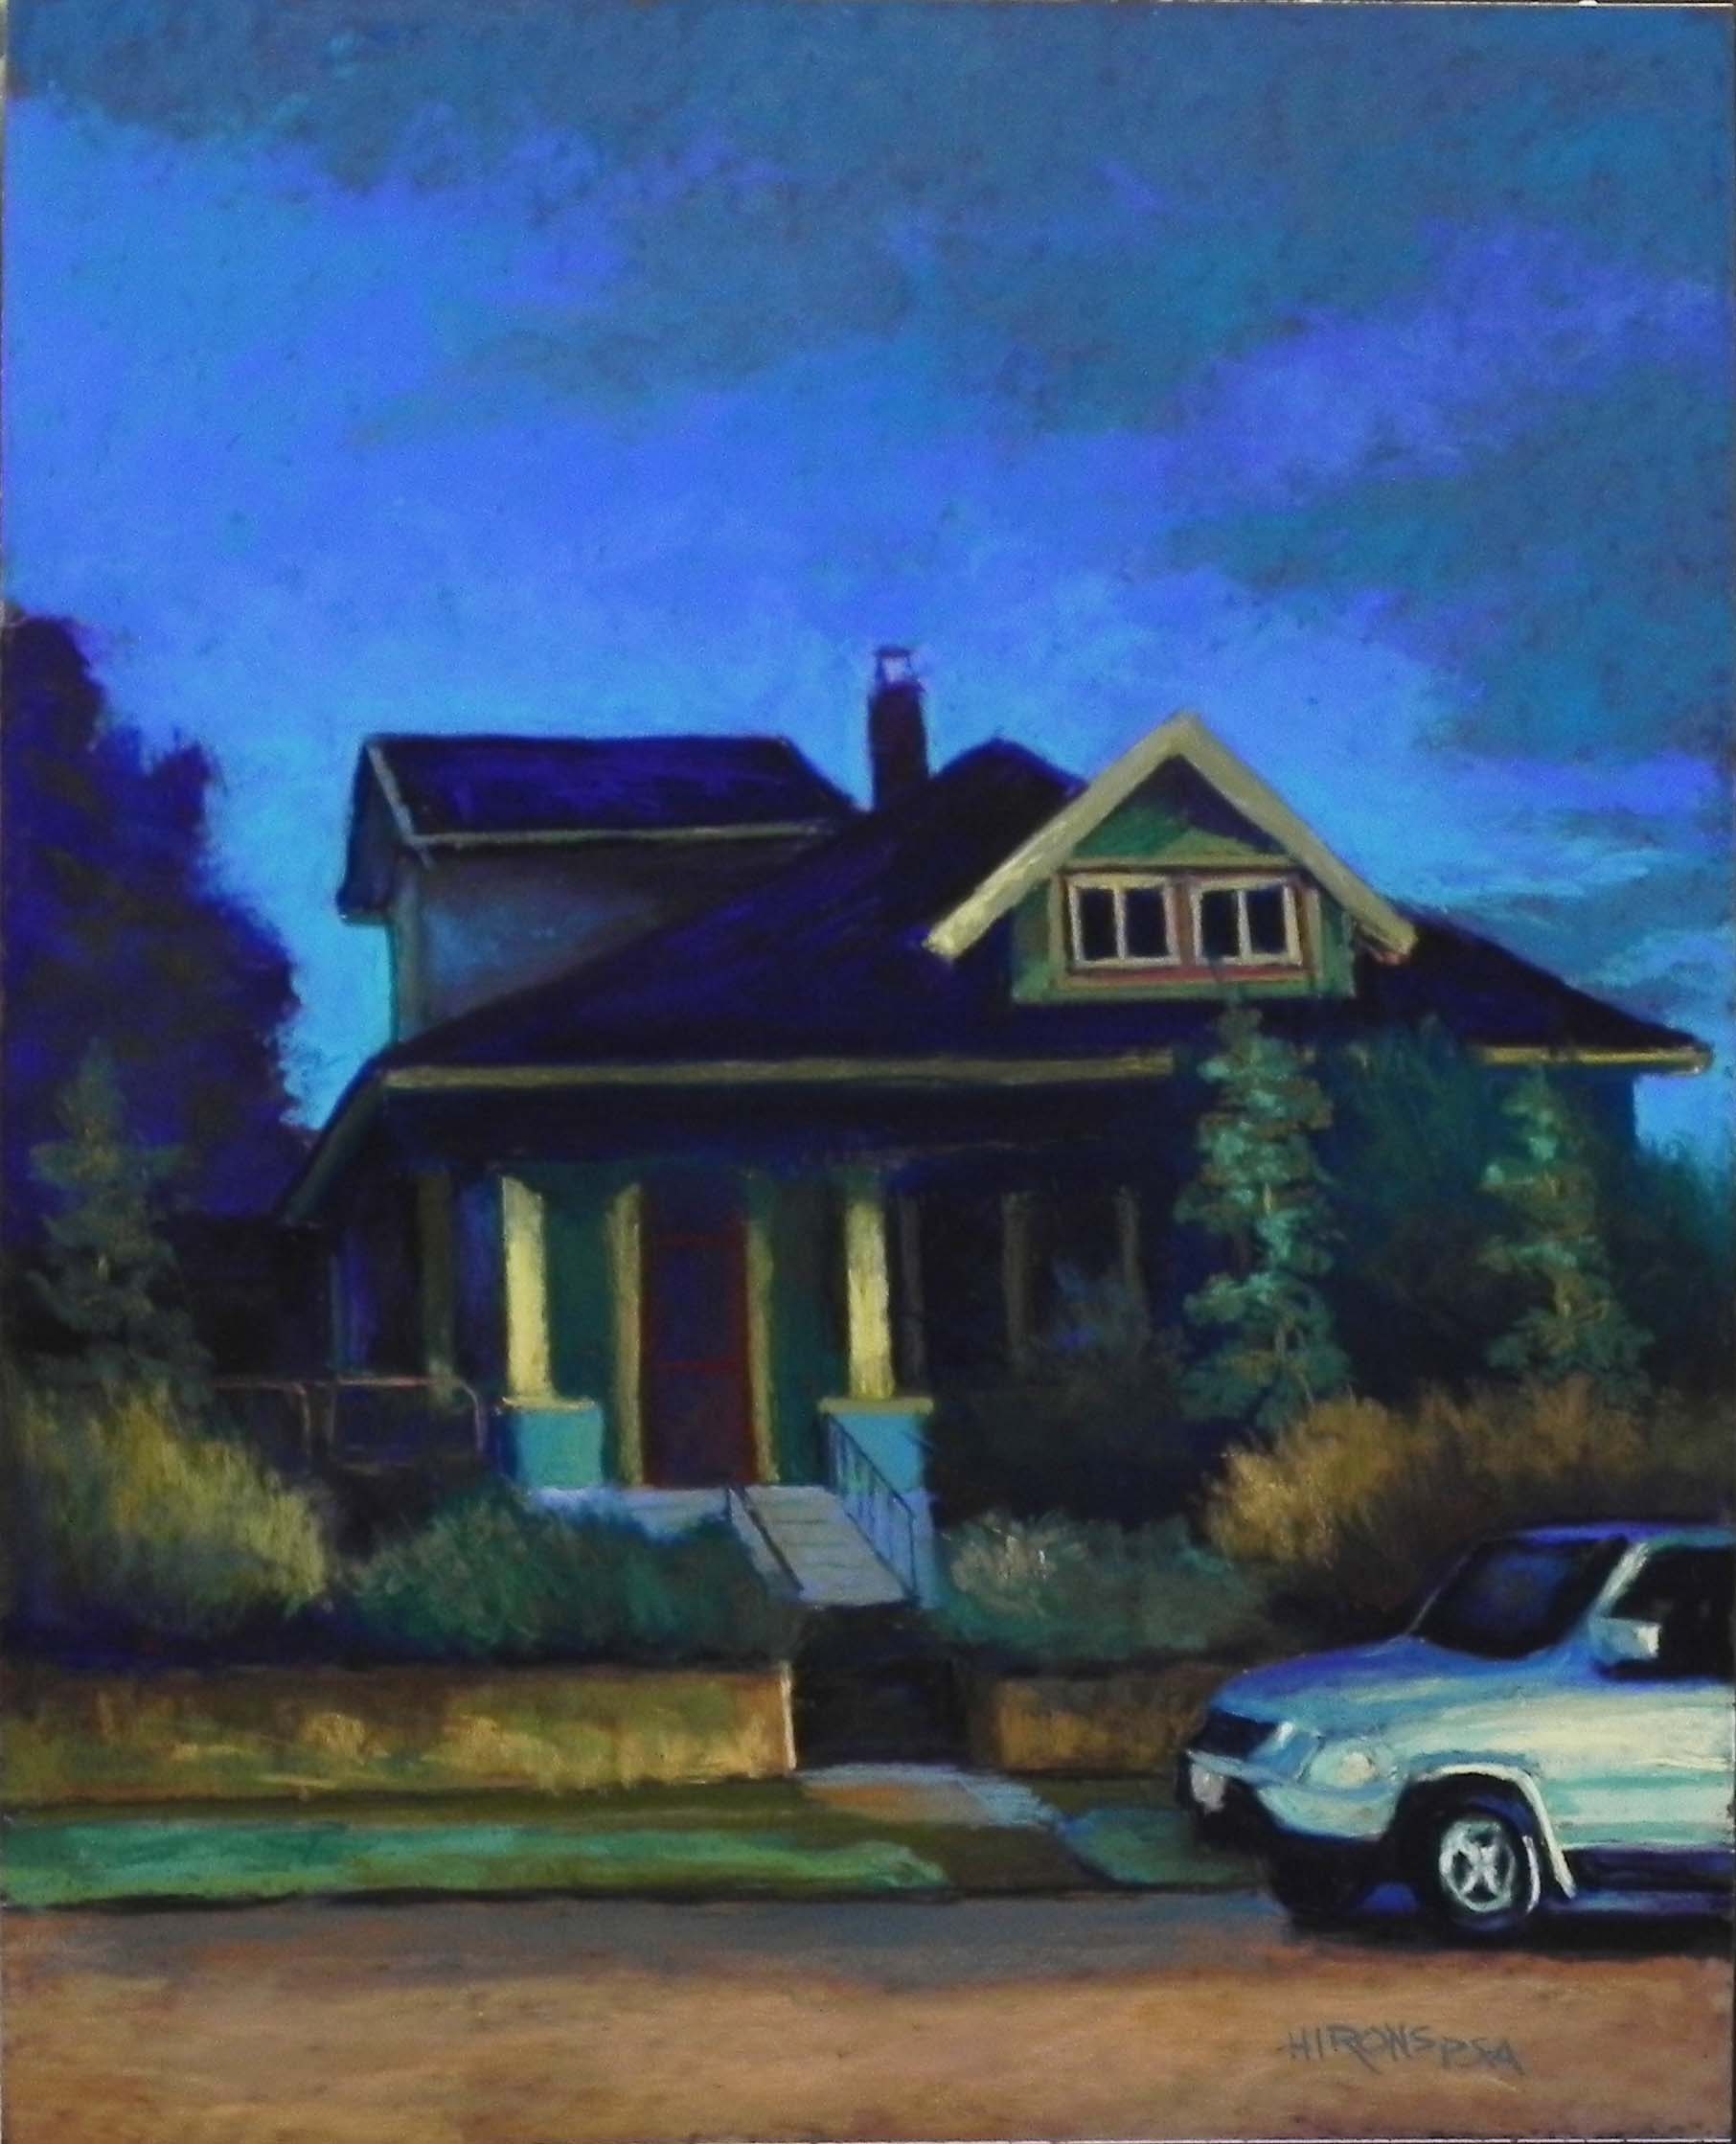
Bungalow Nocturne Blues, 20″ x 16″, UART 320 dark board

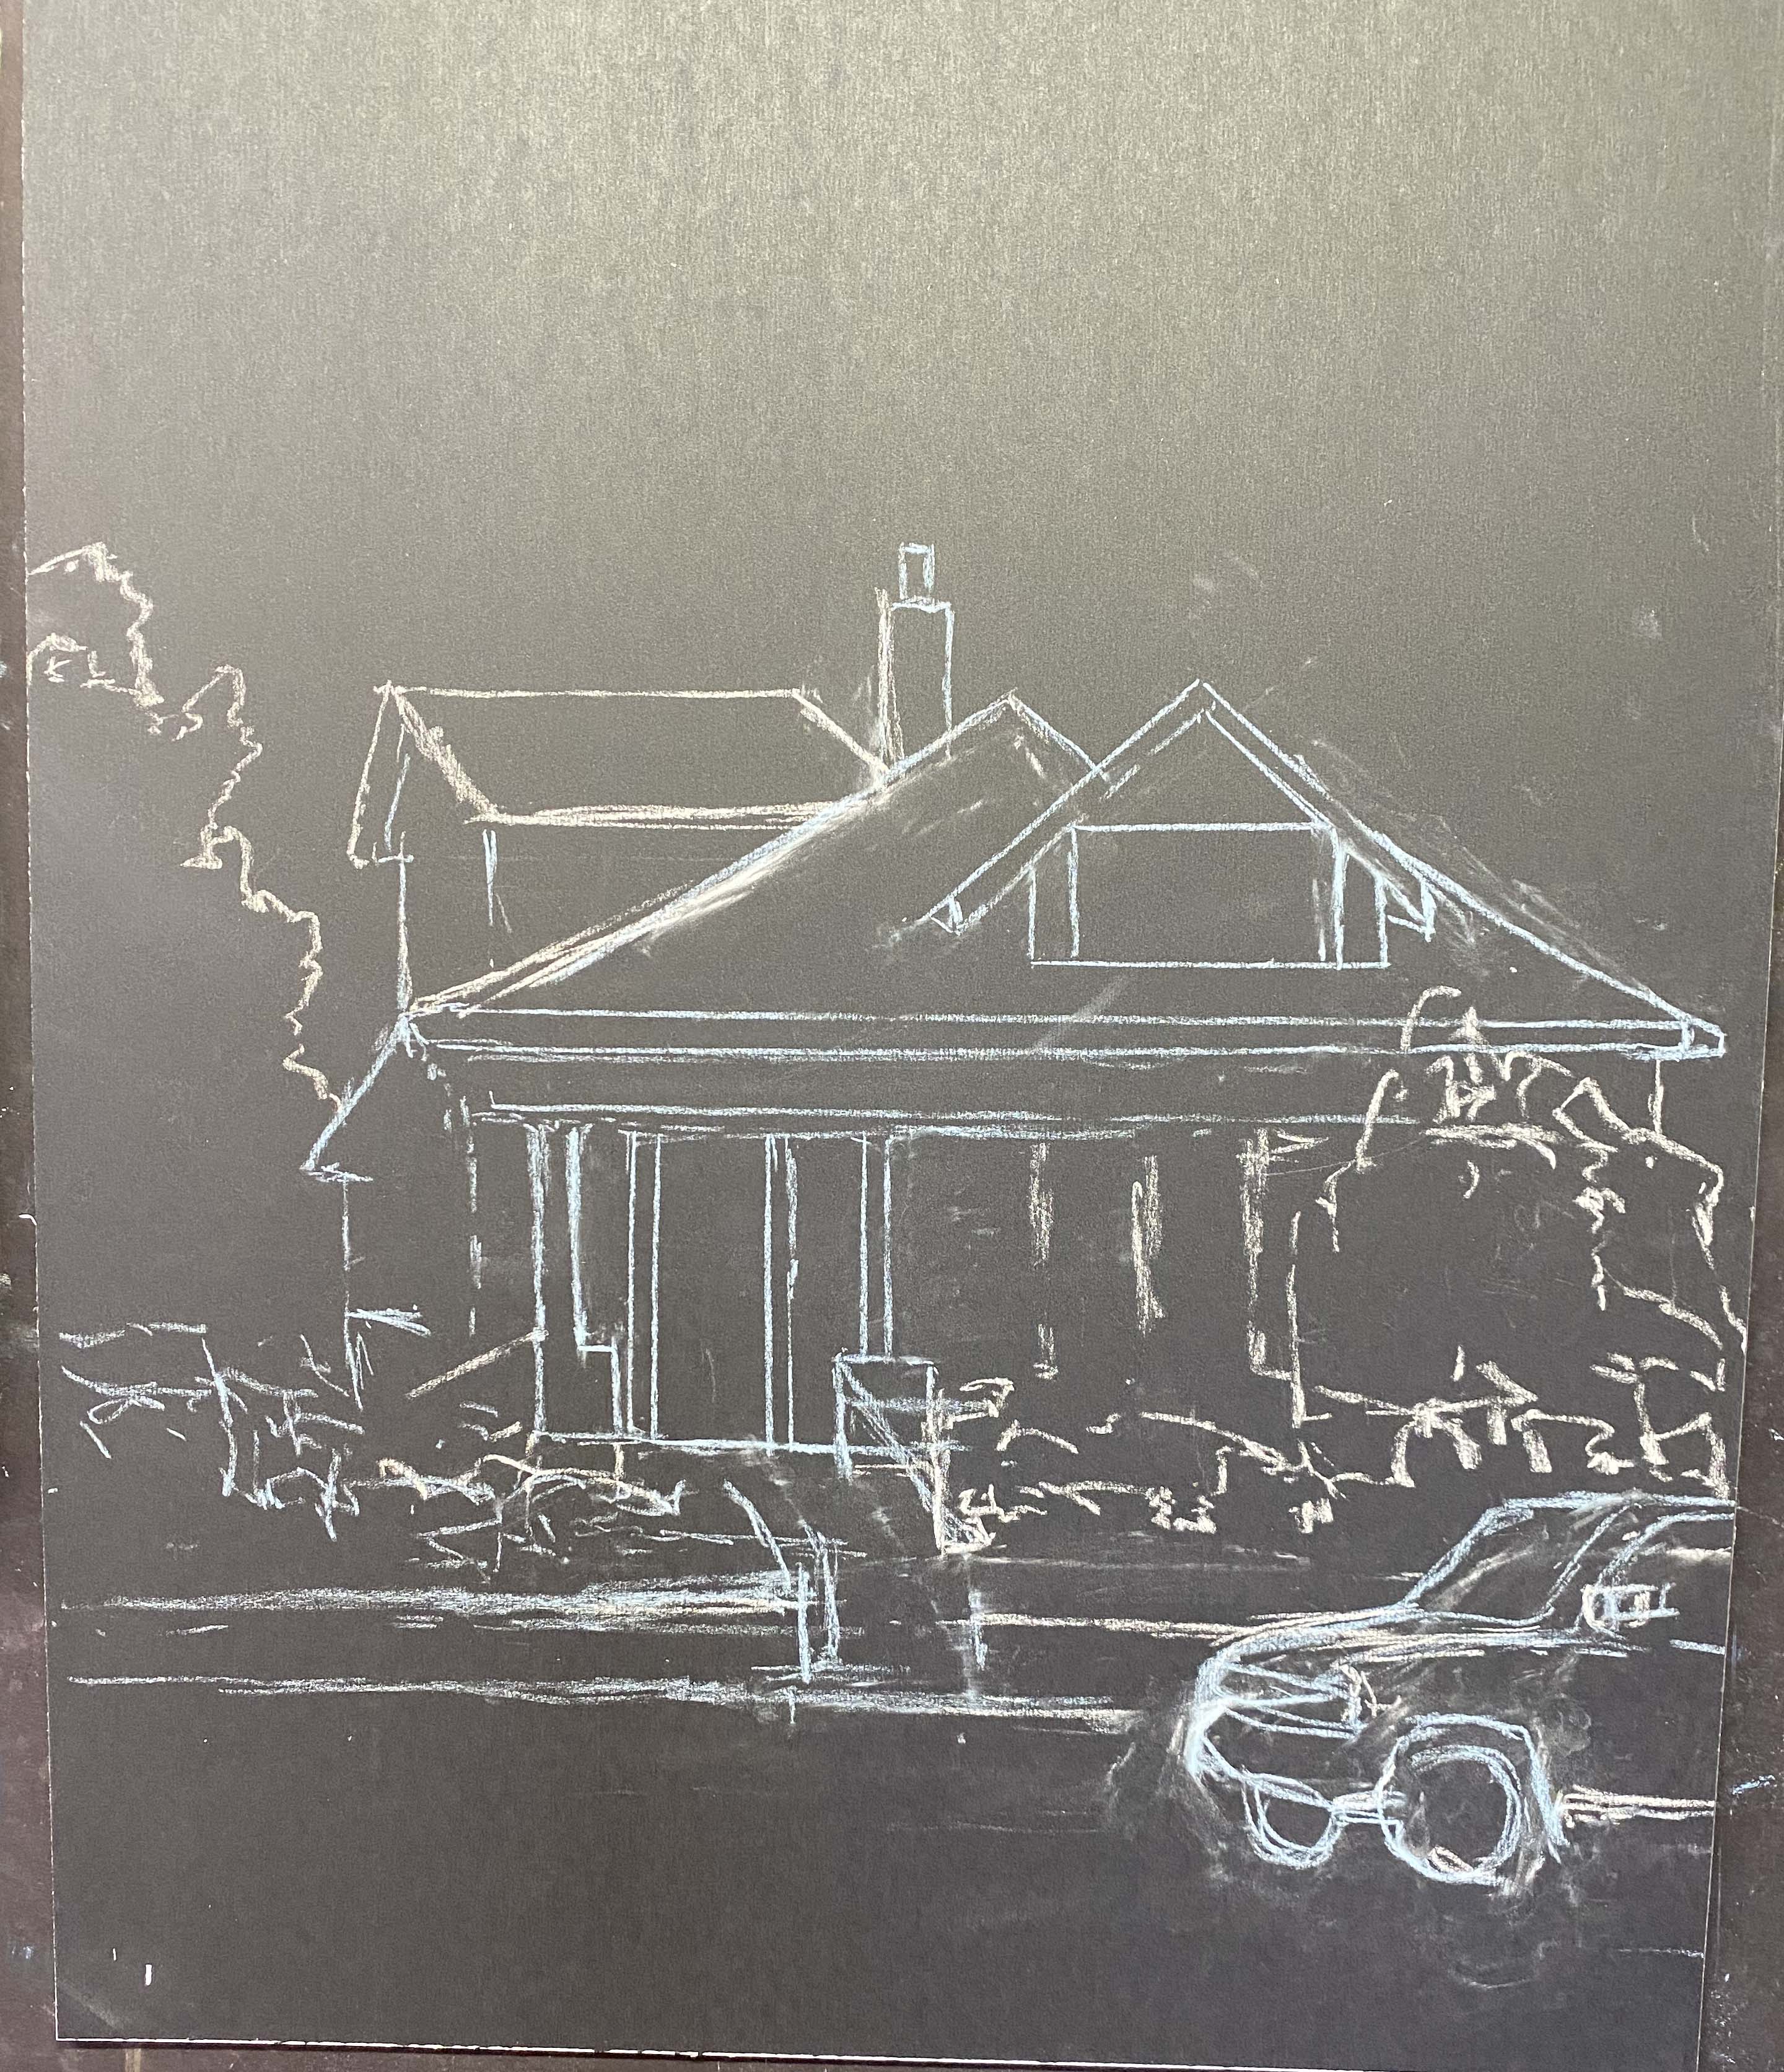
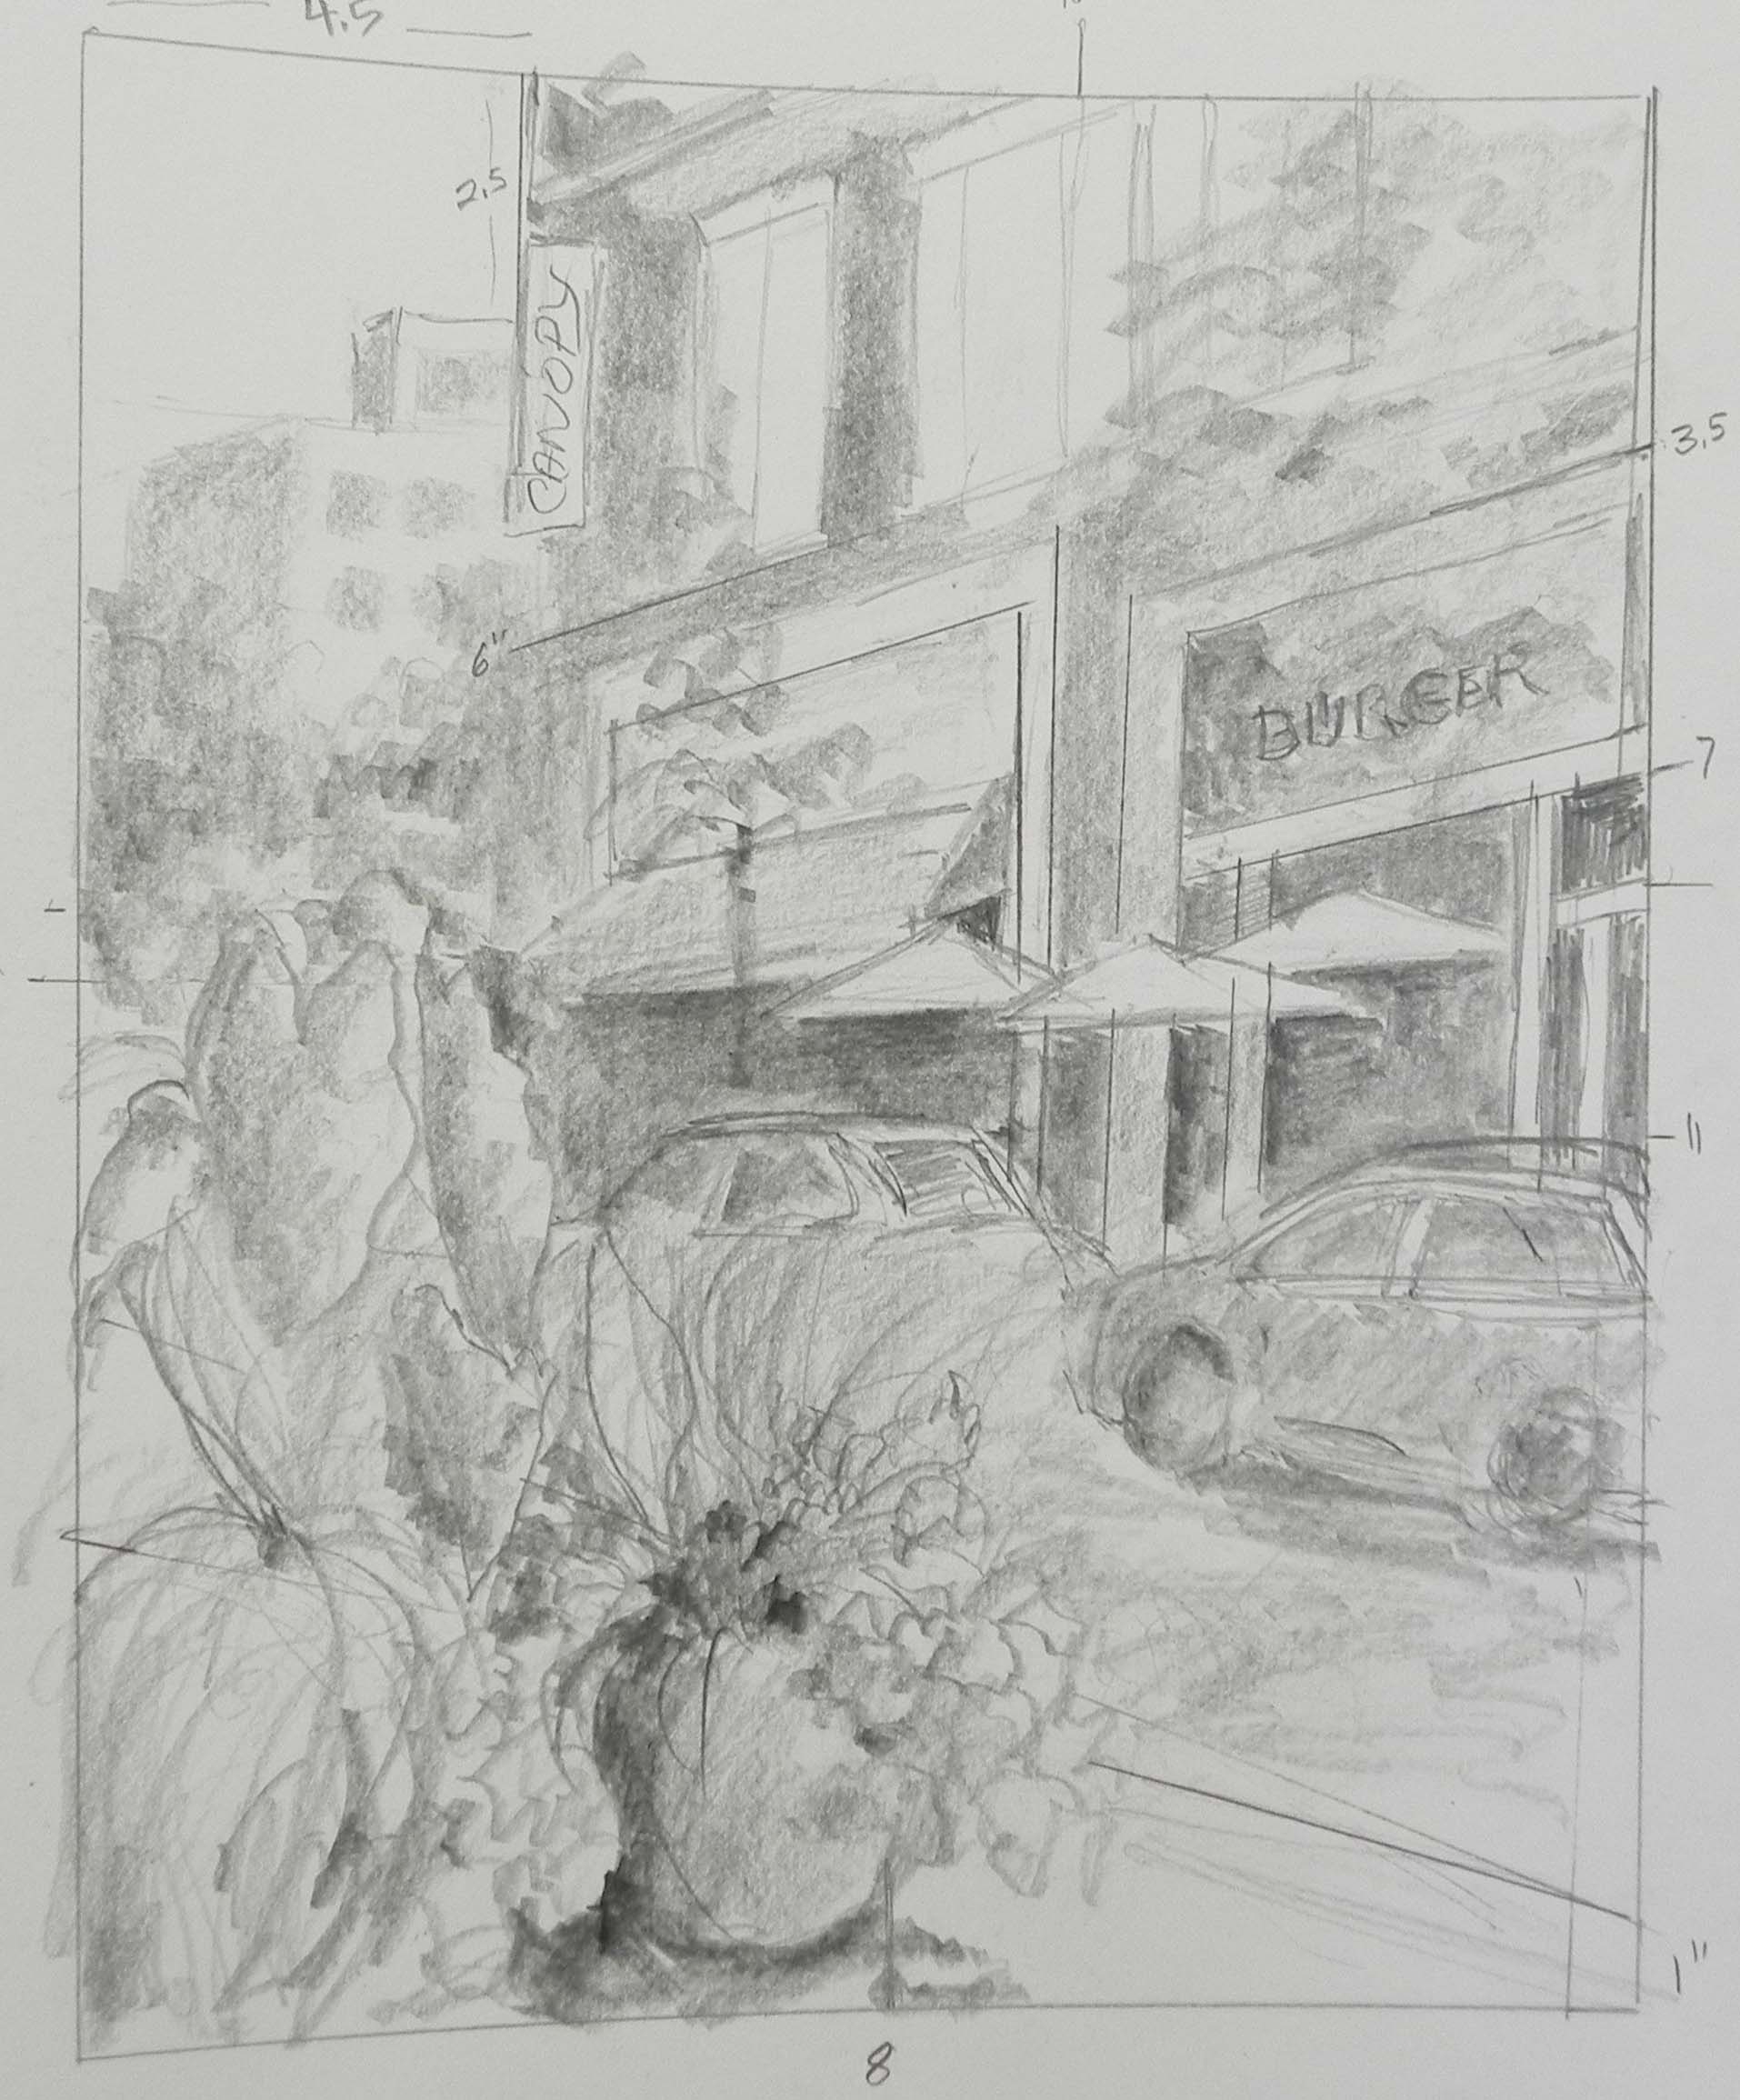
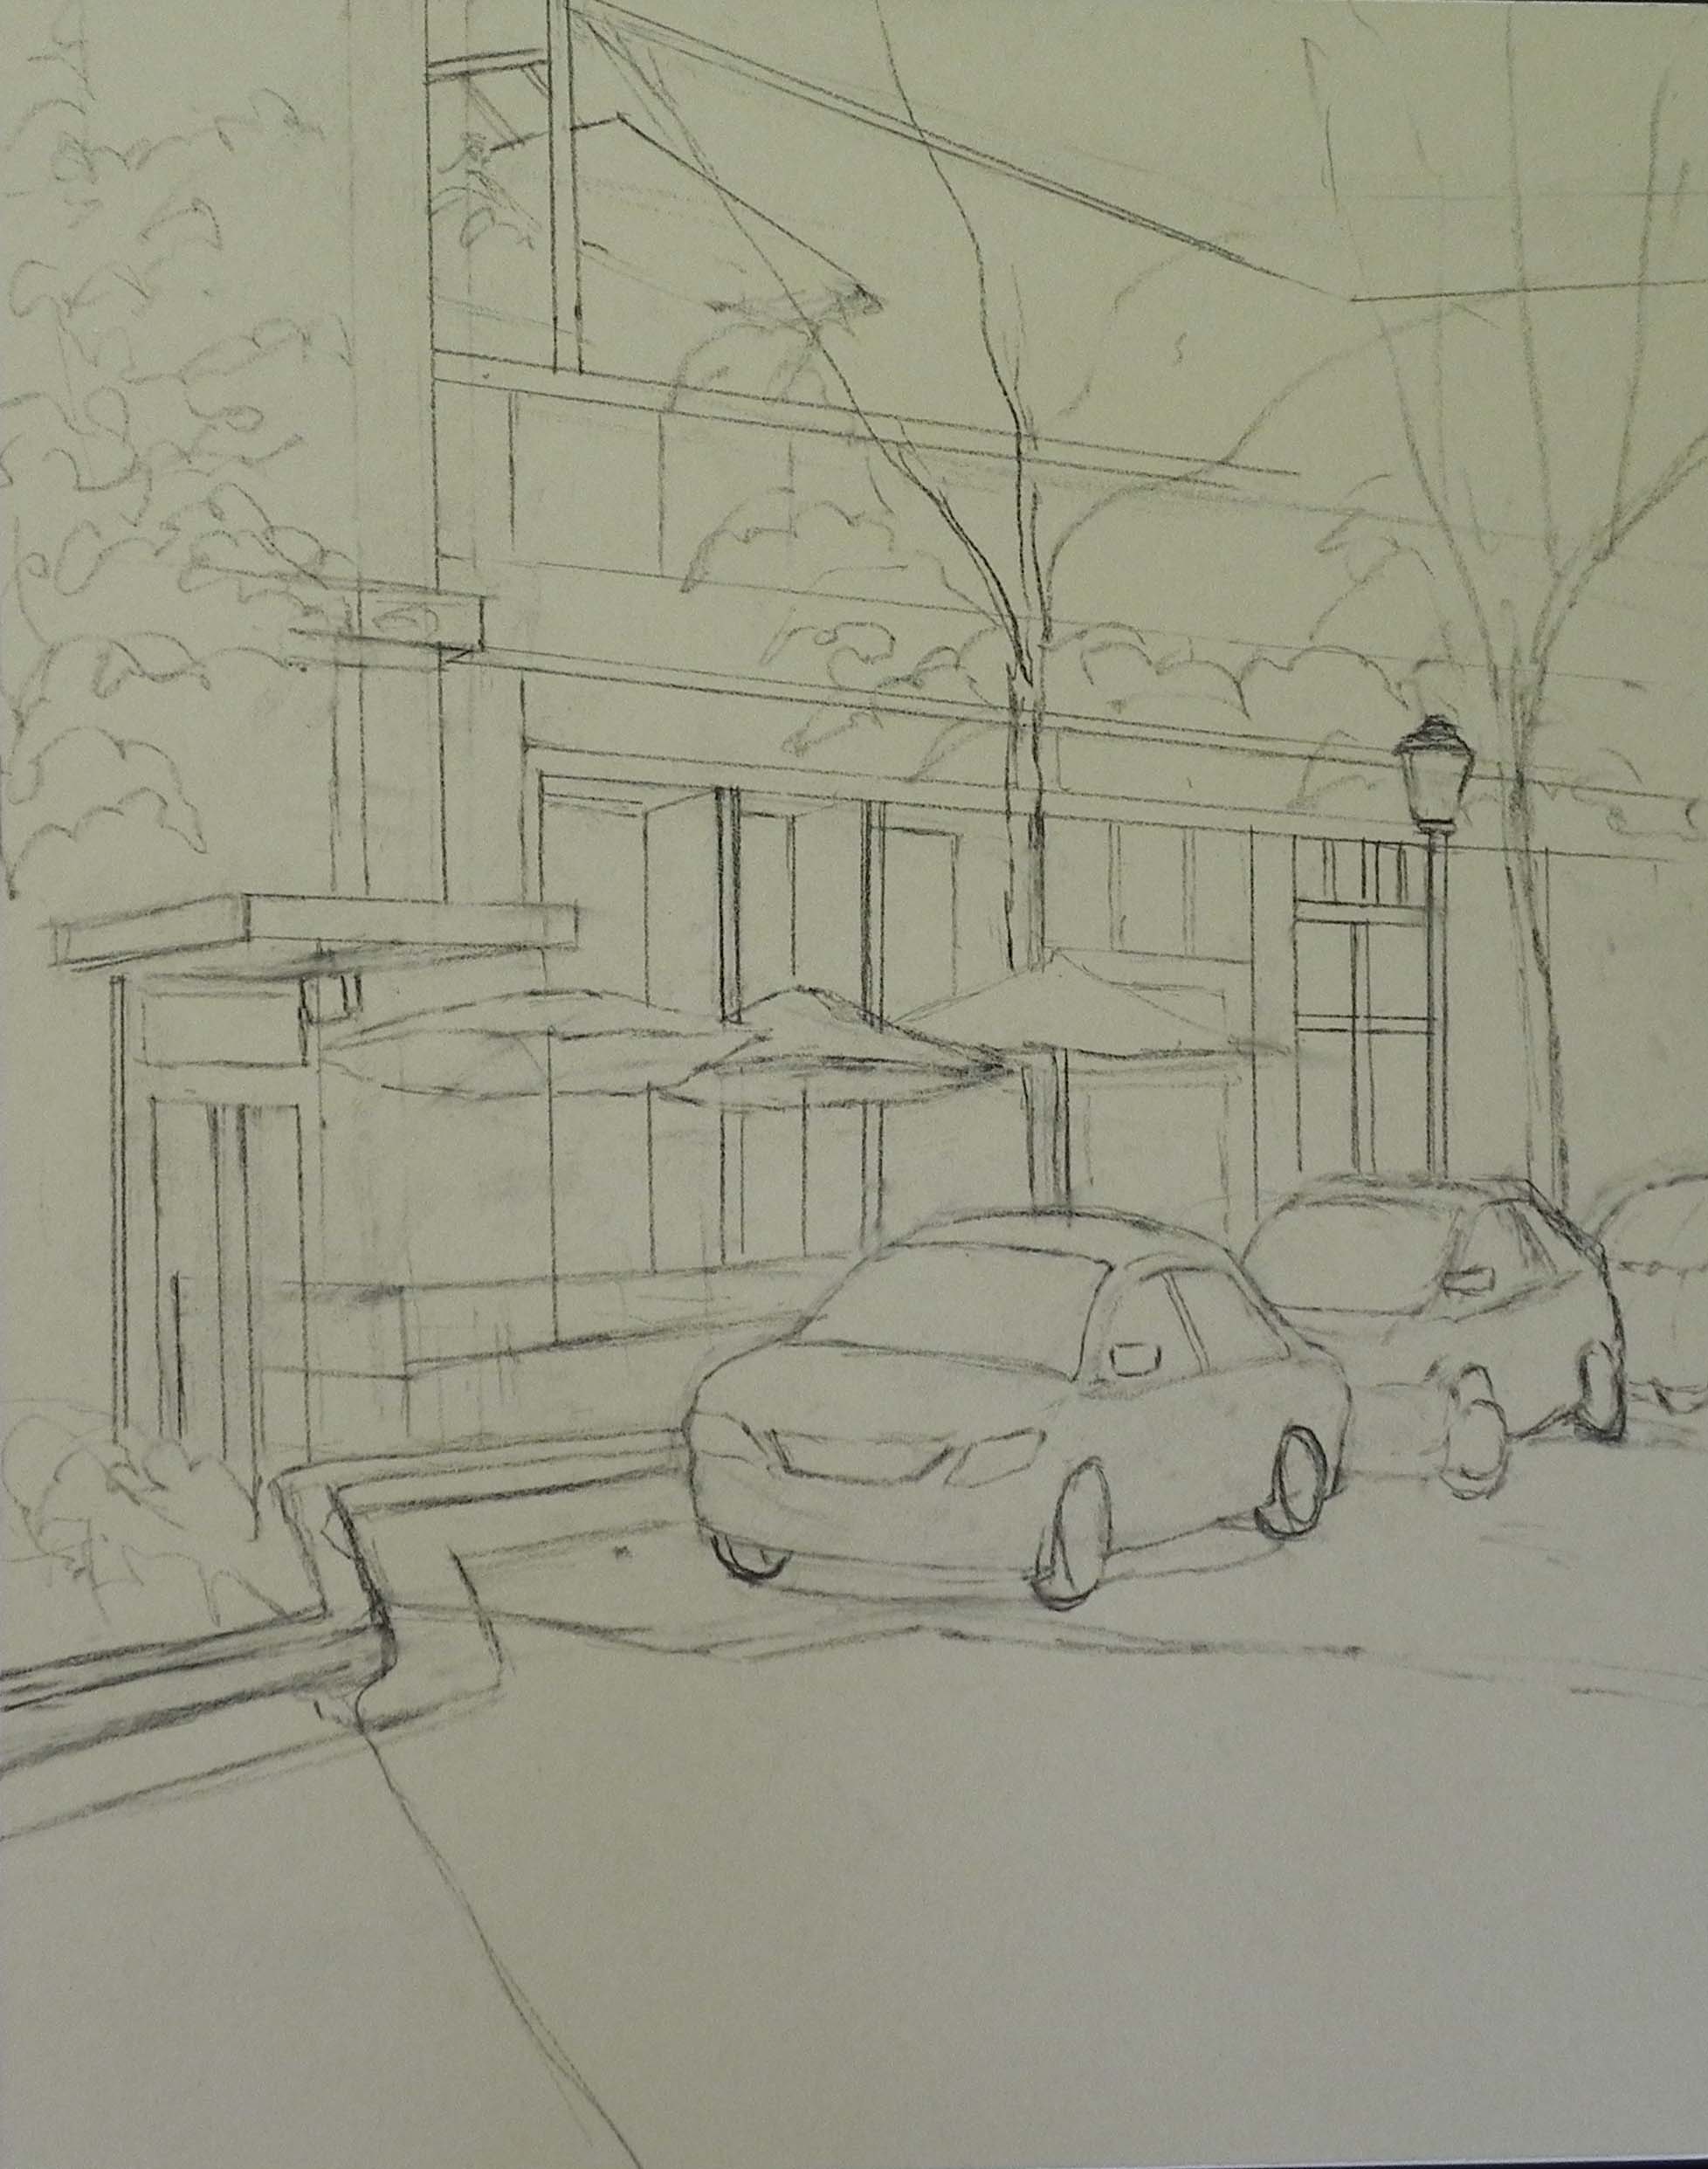
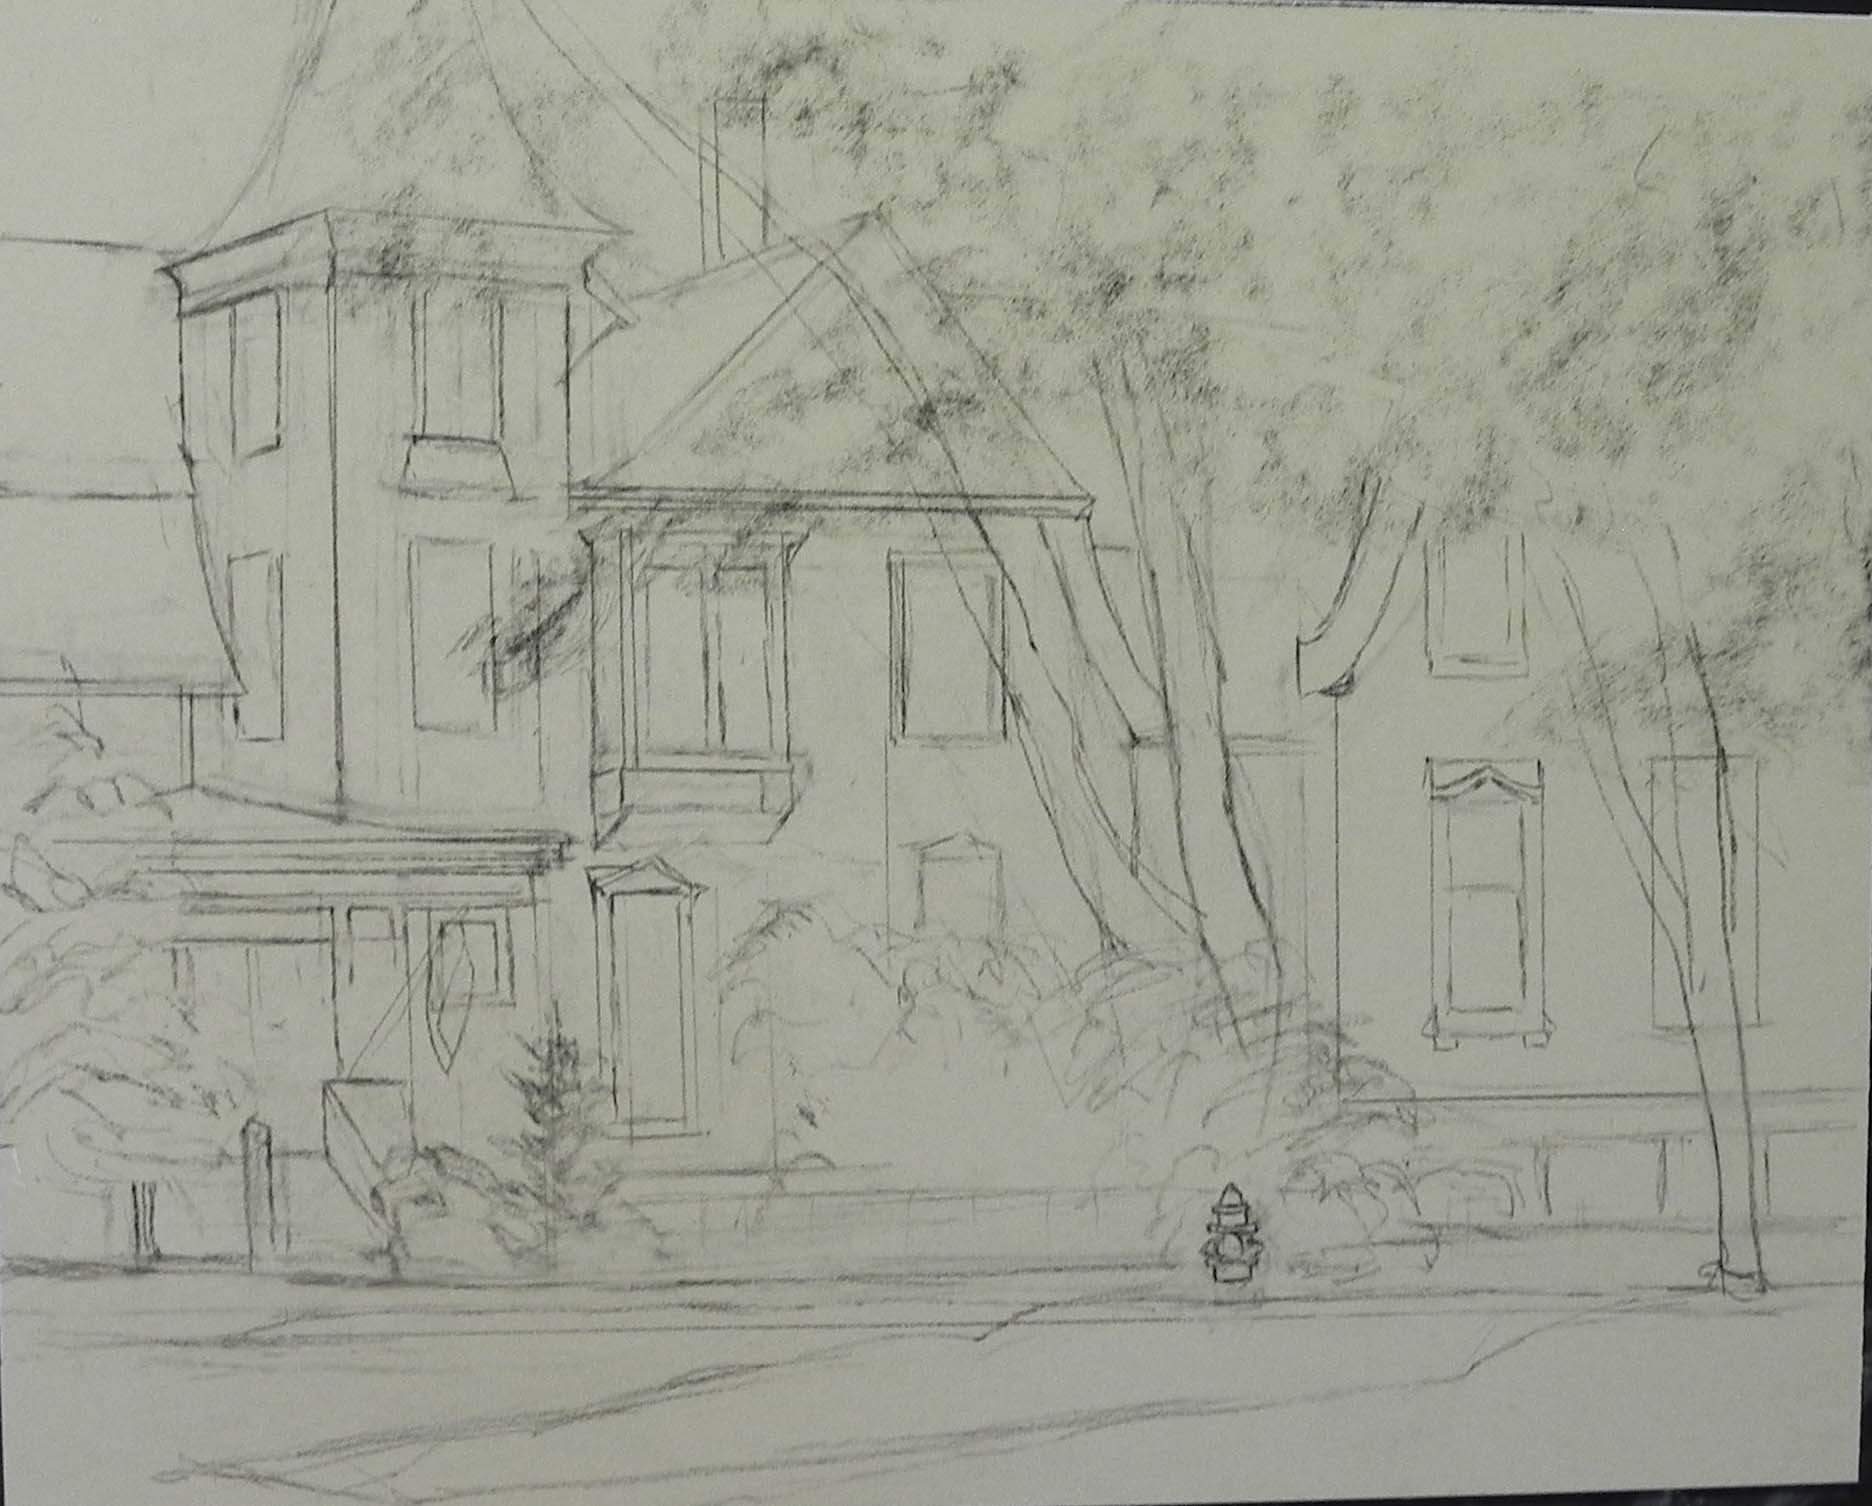
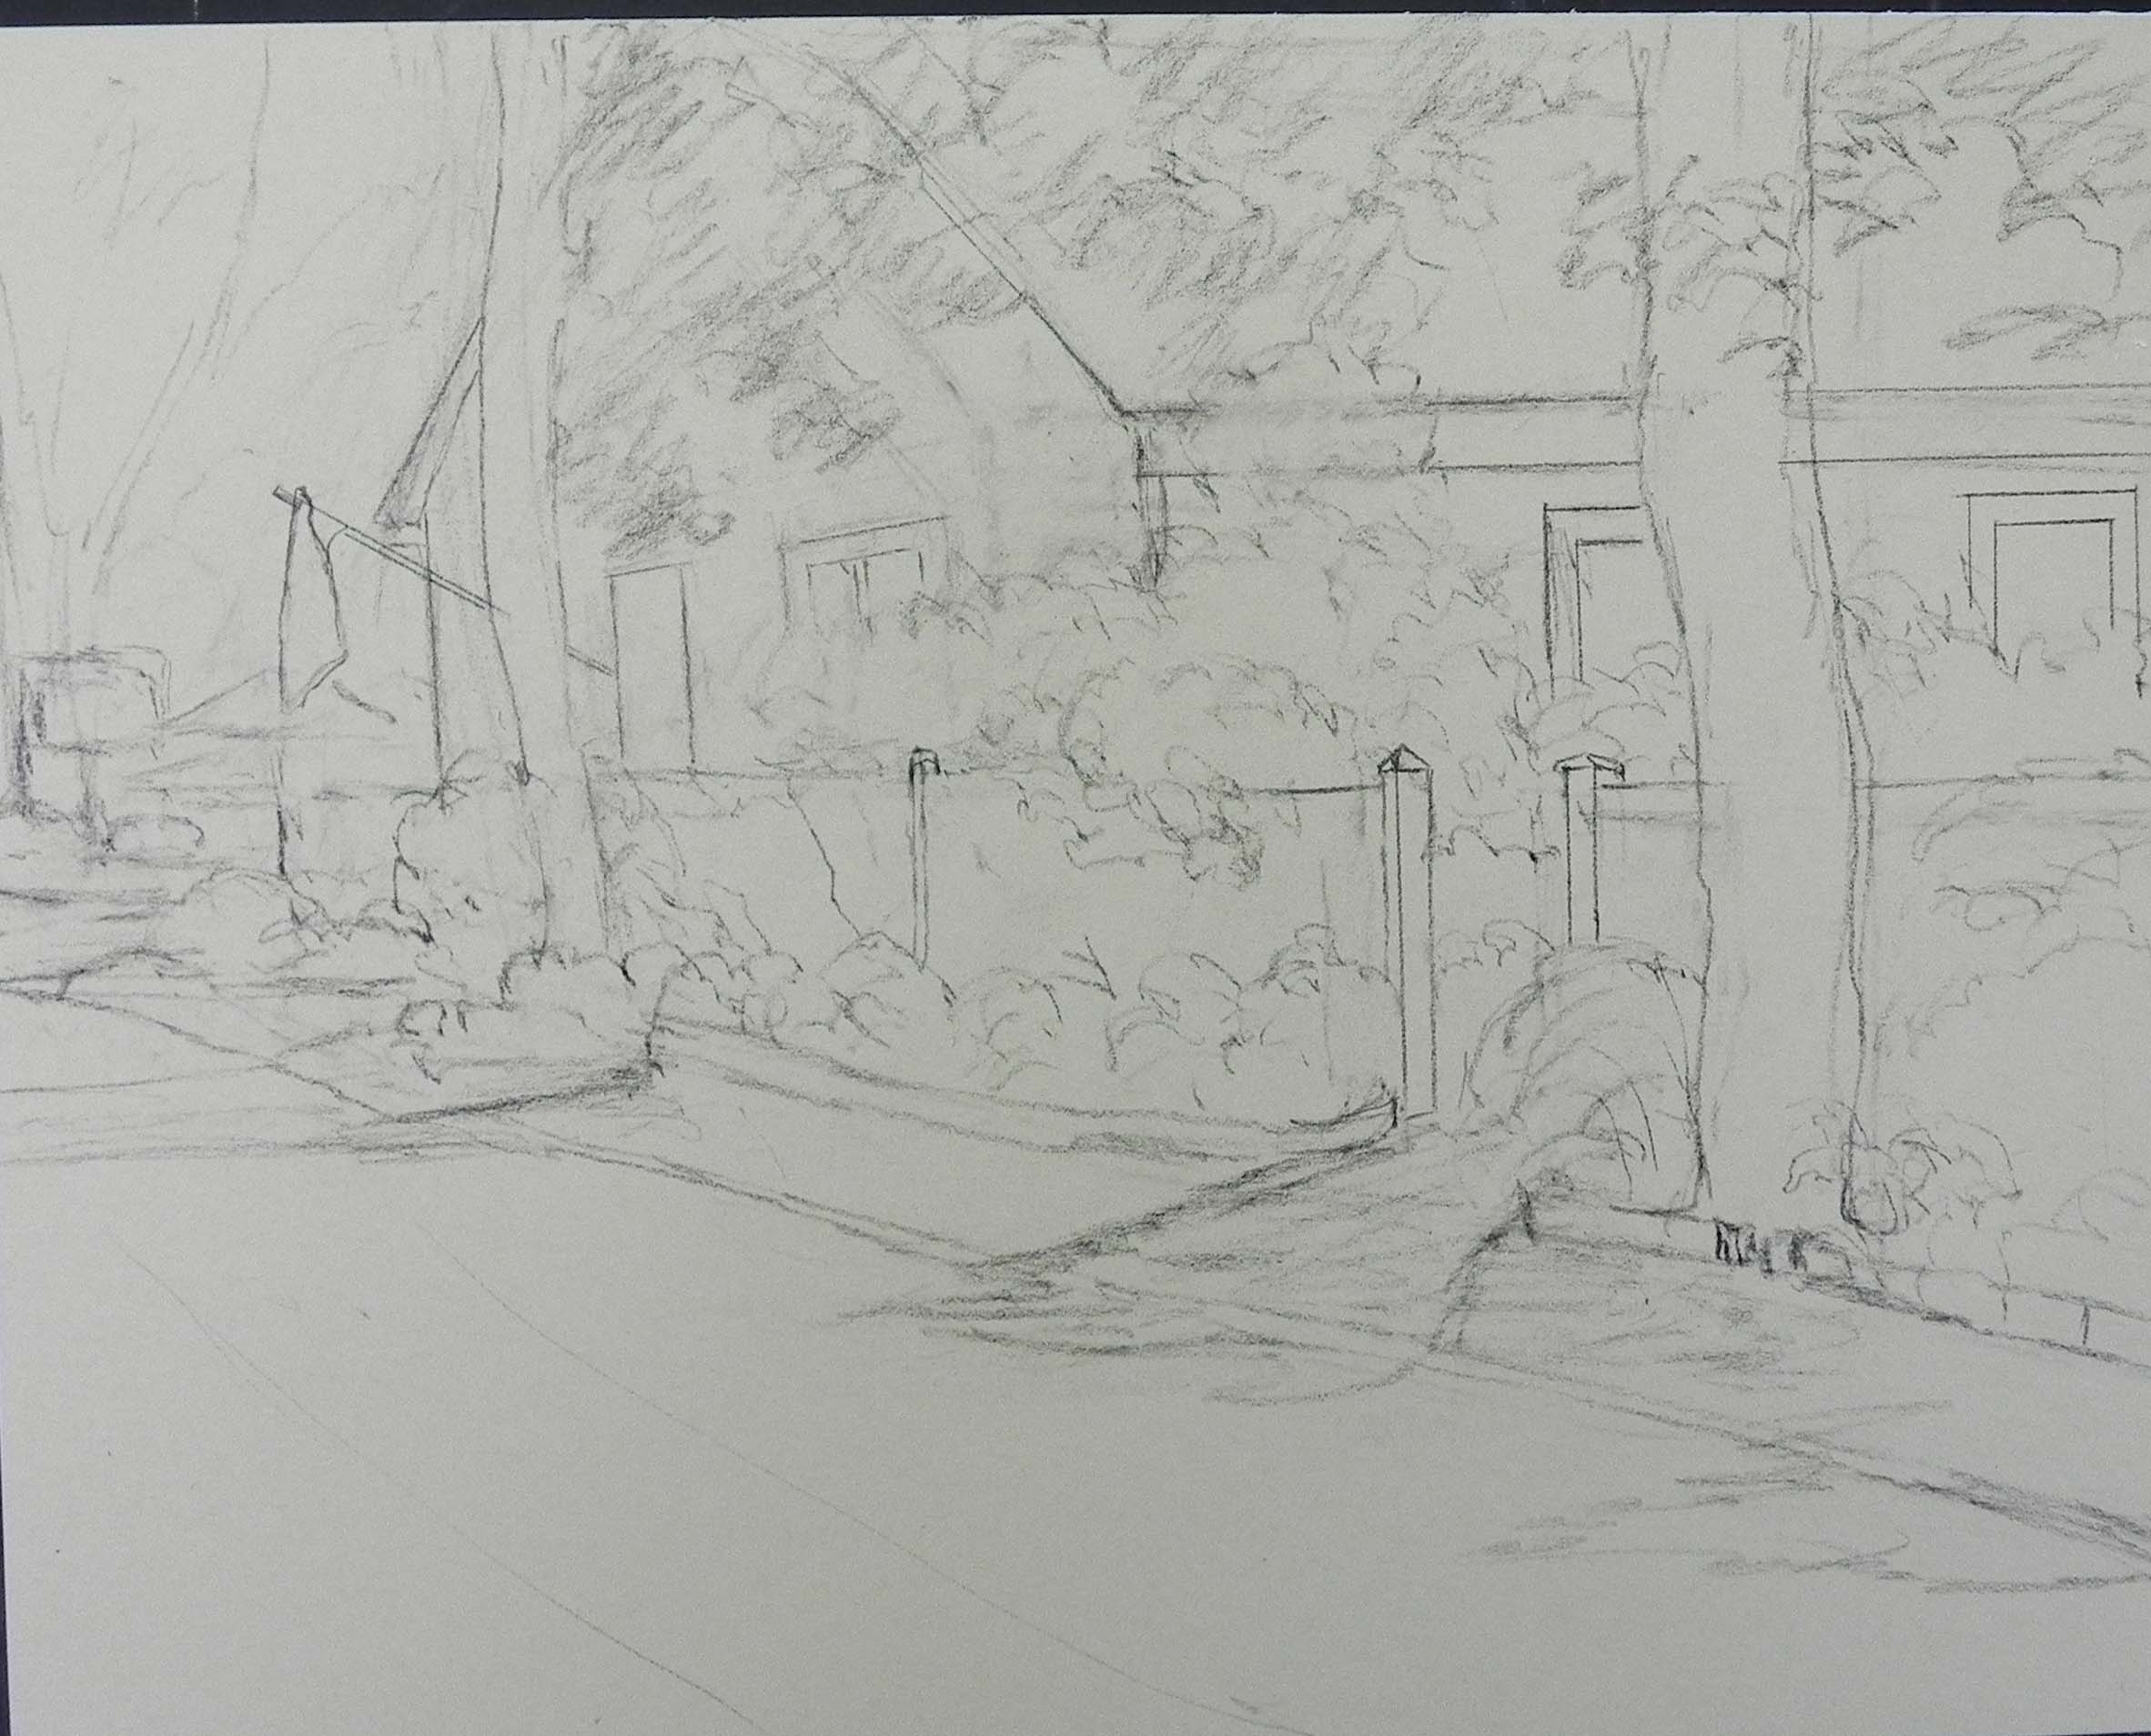
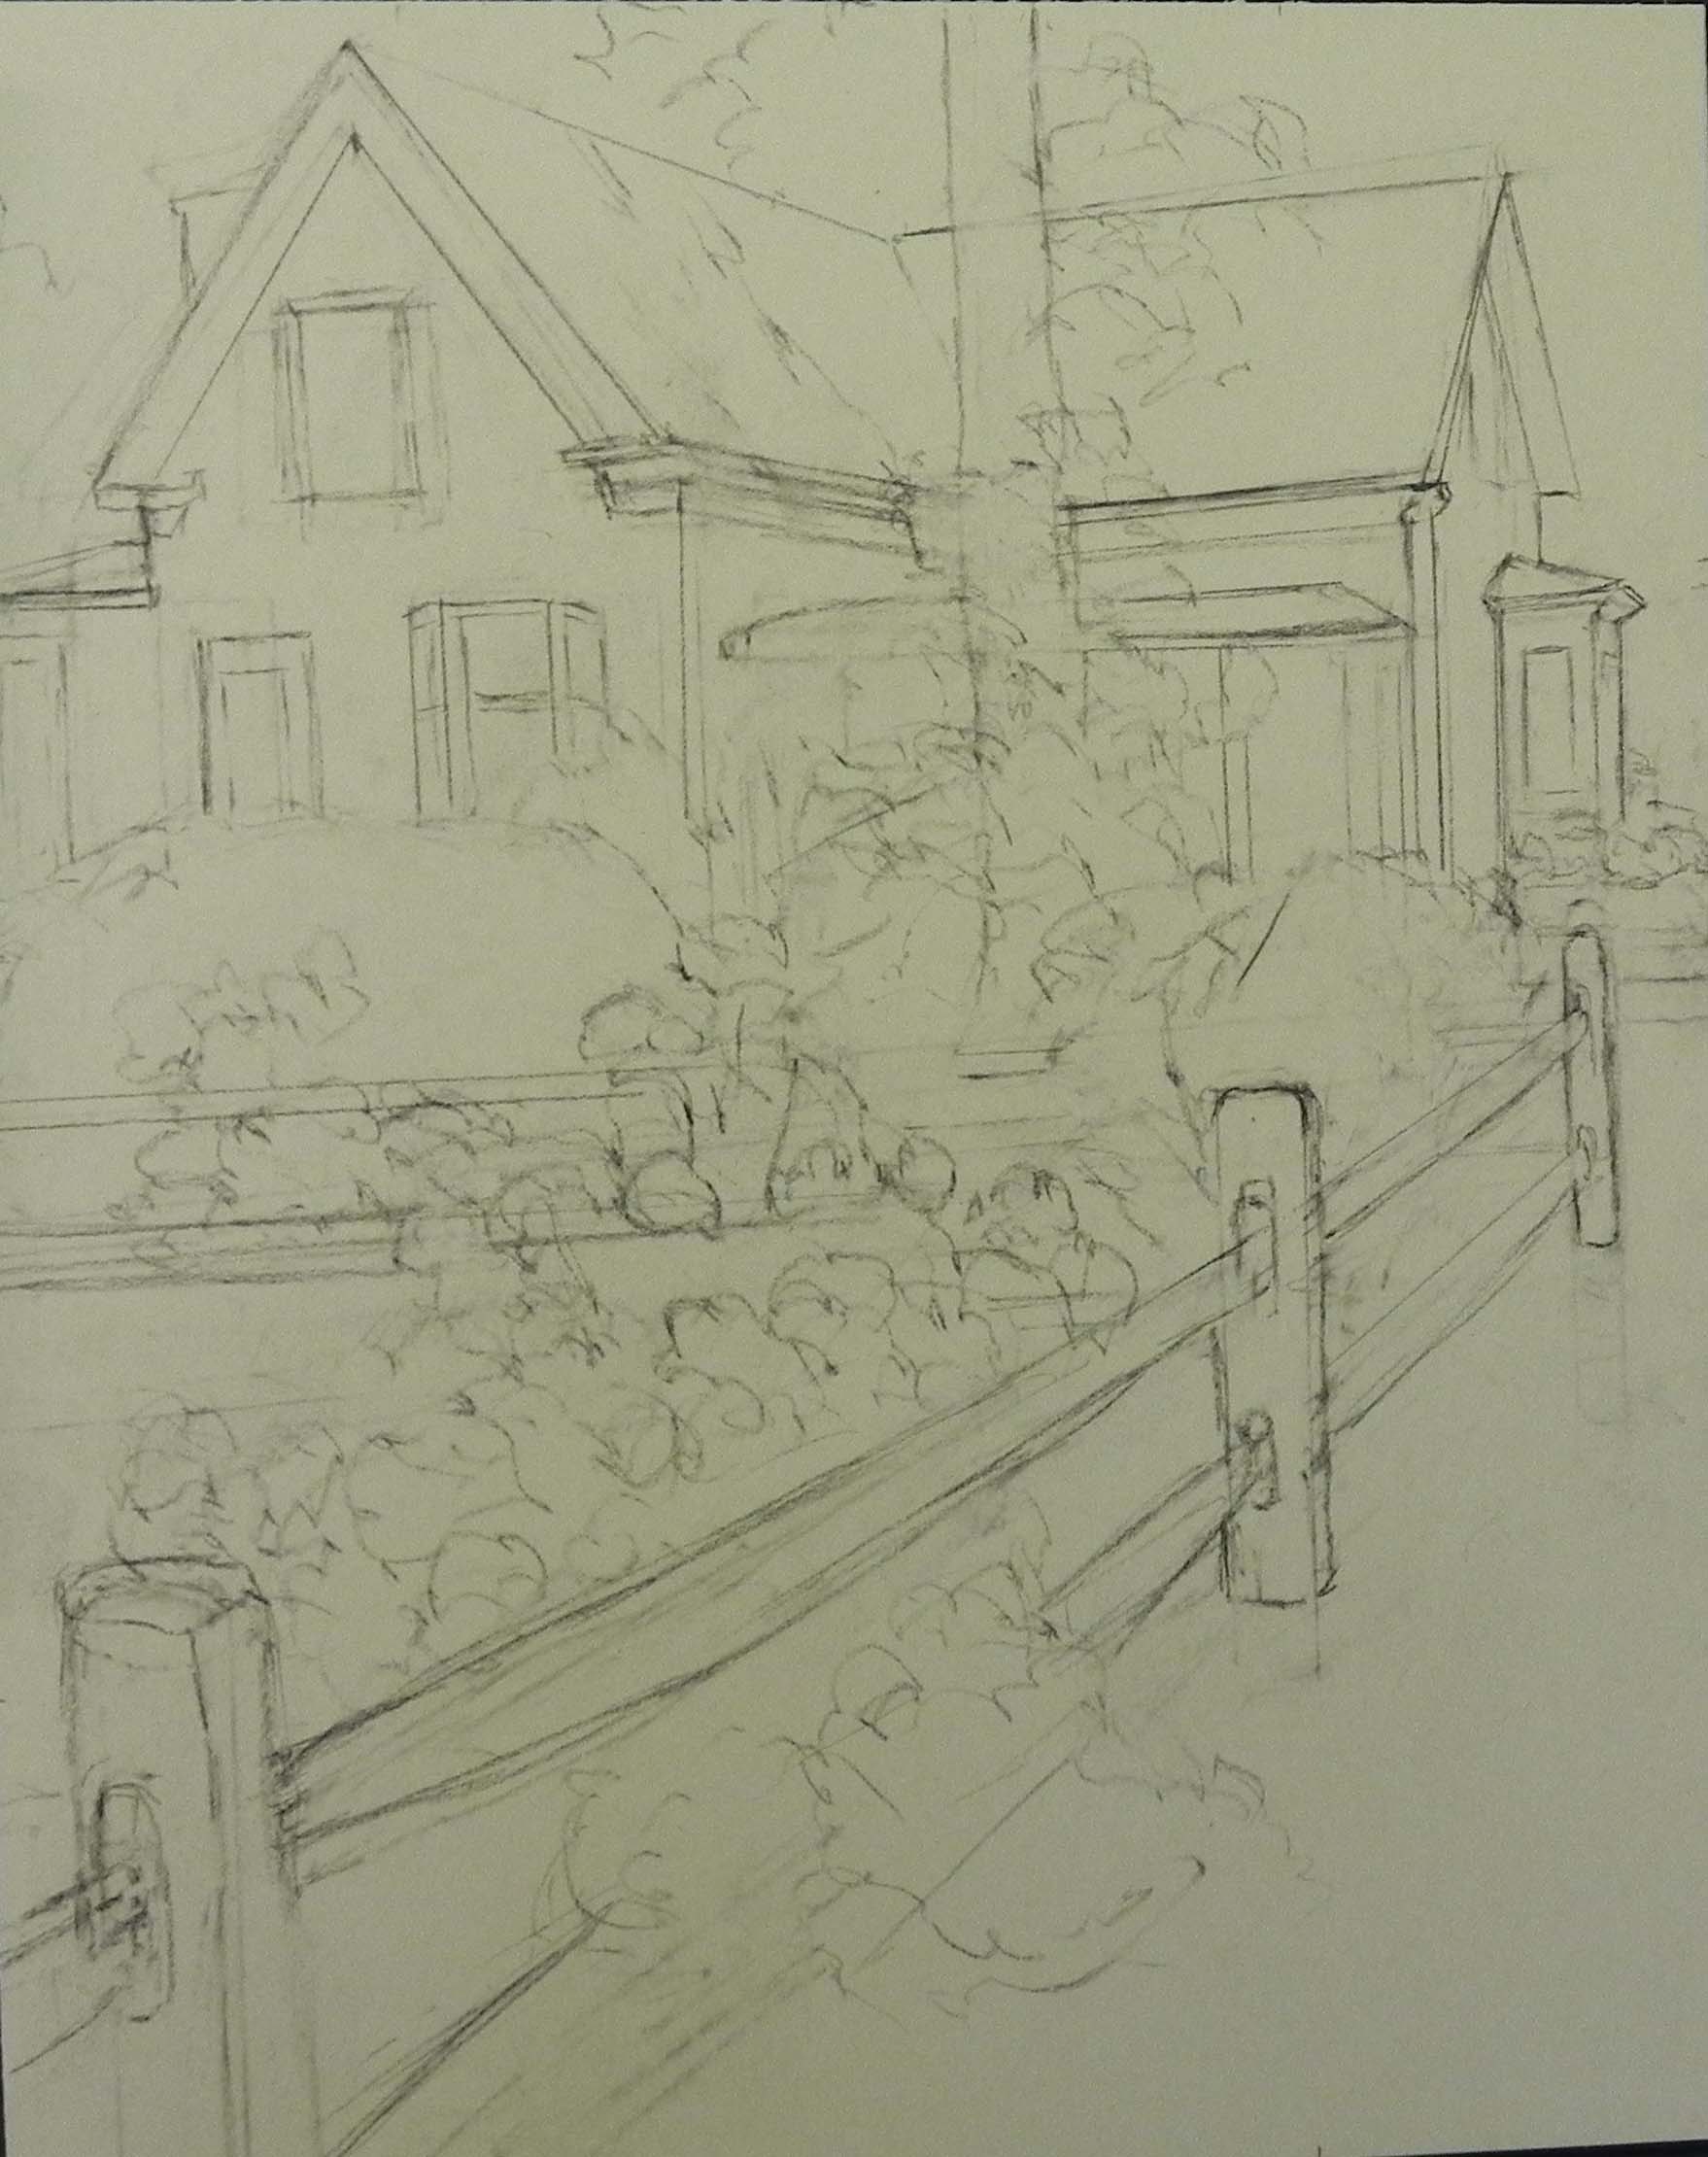
Drawing on board with pastel pencil

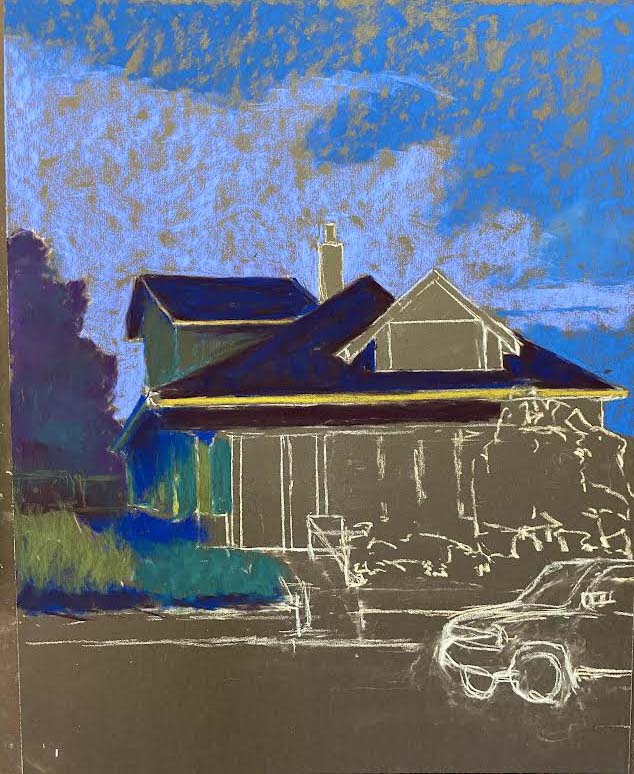
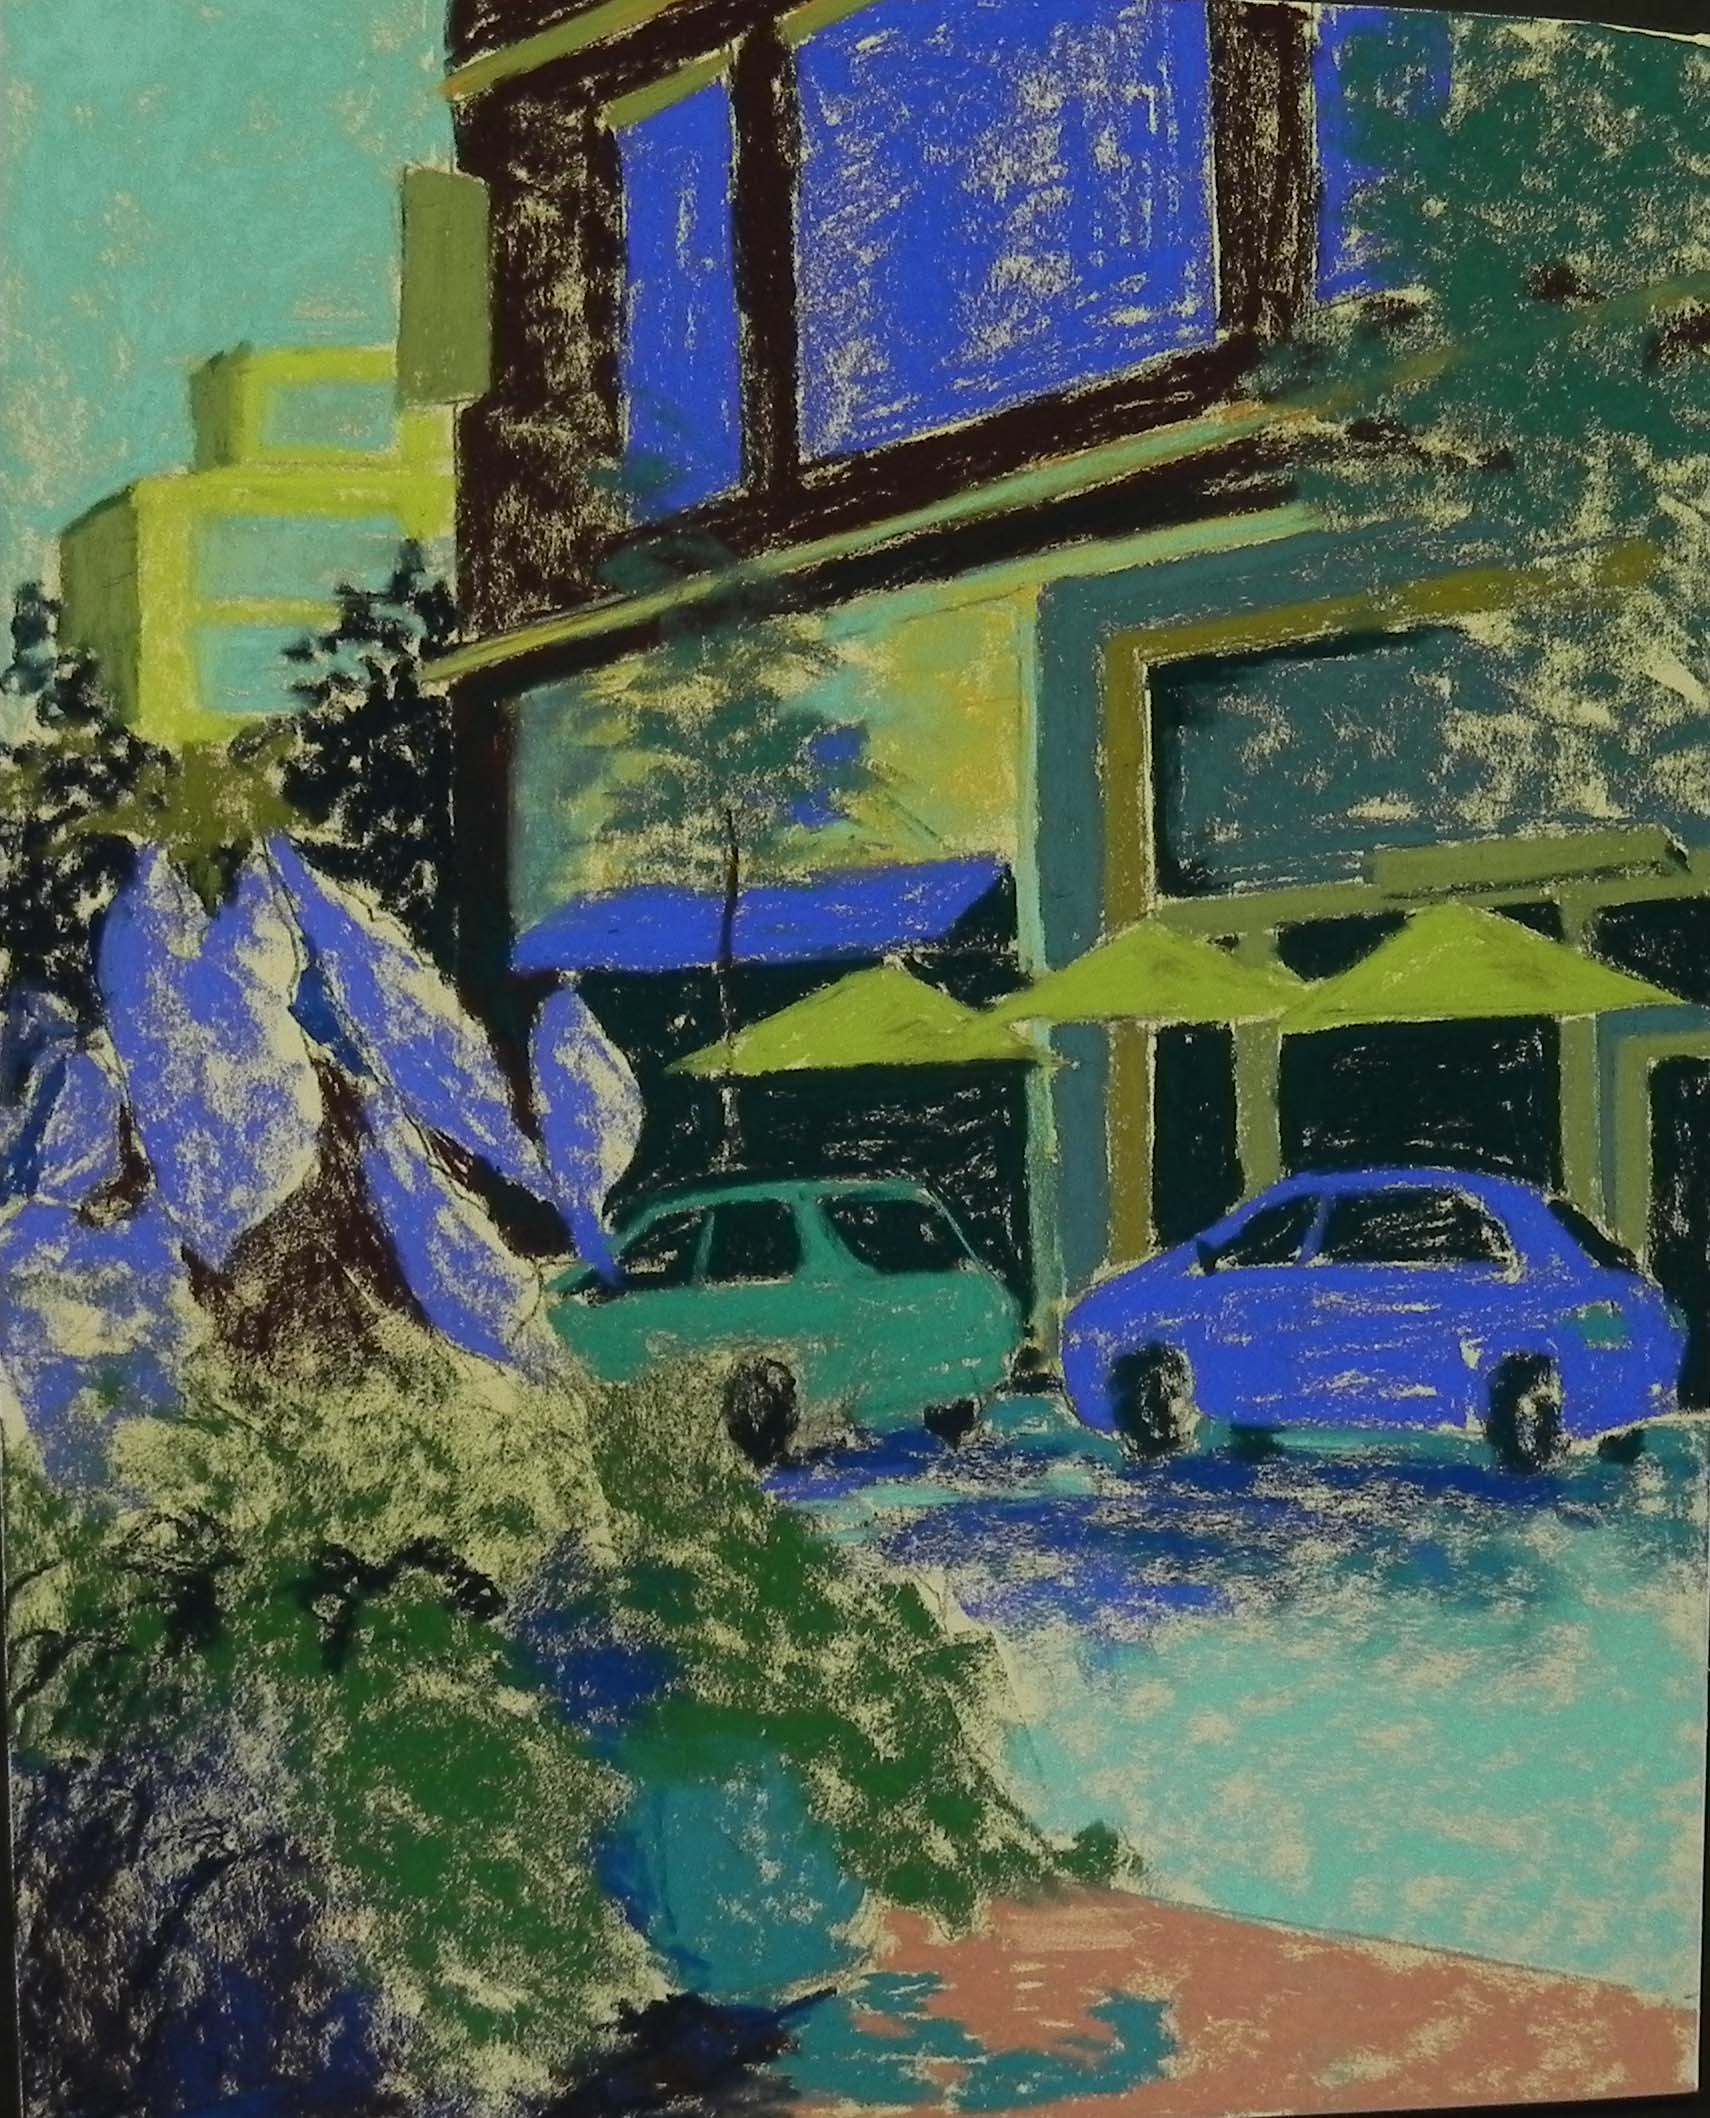
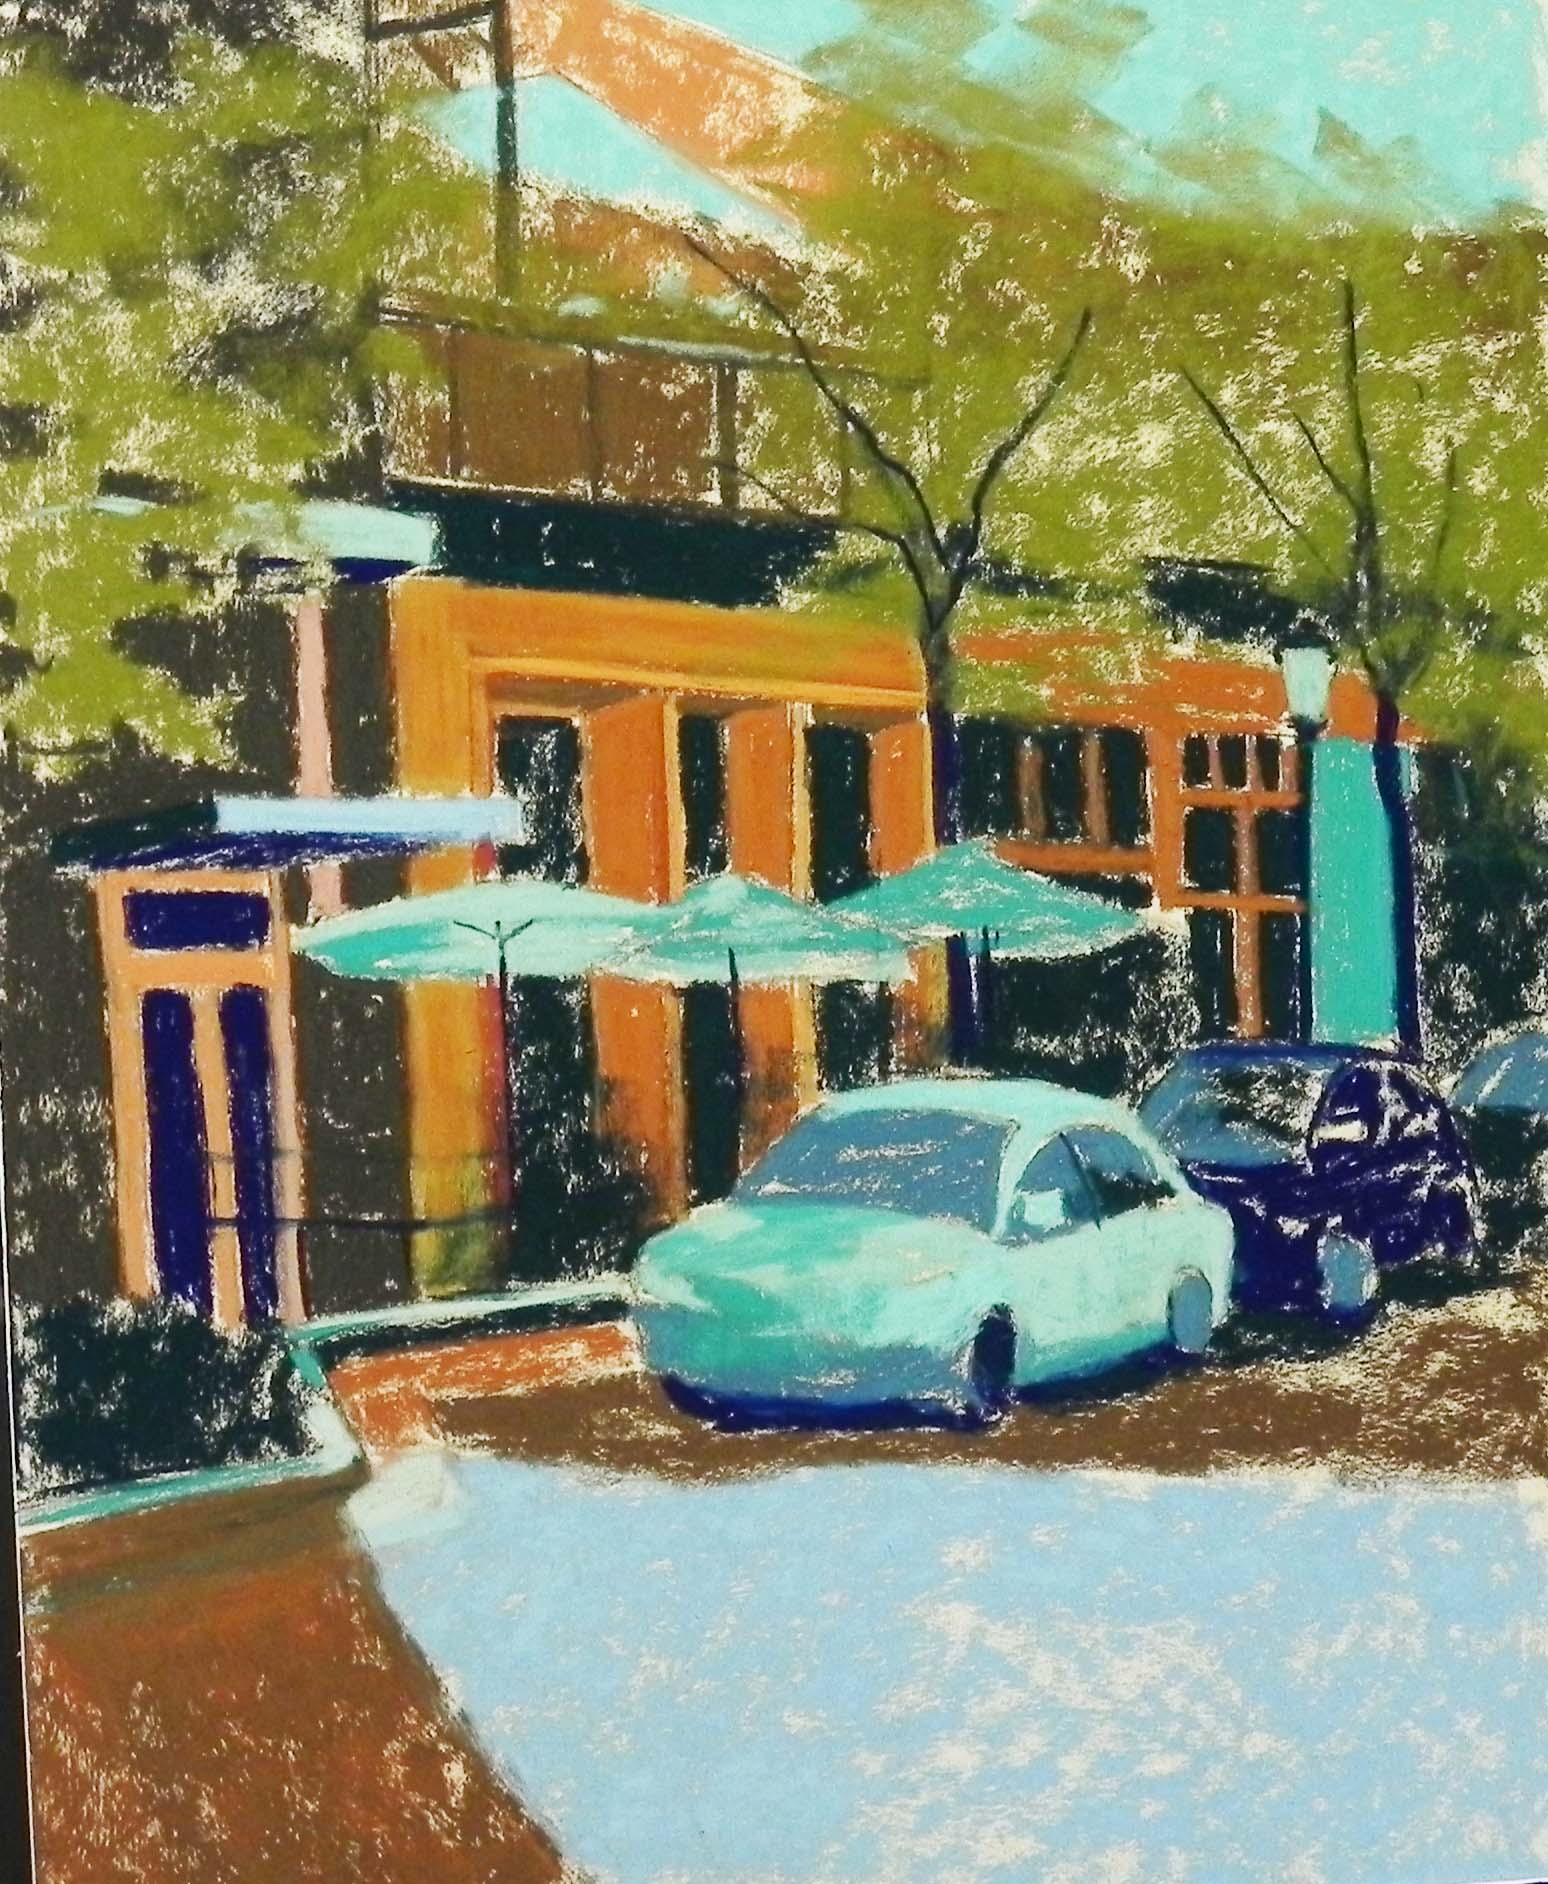
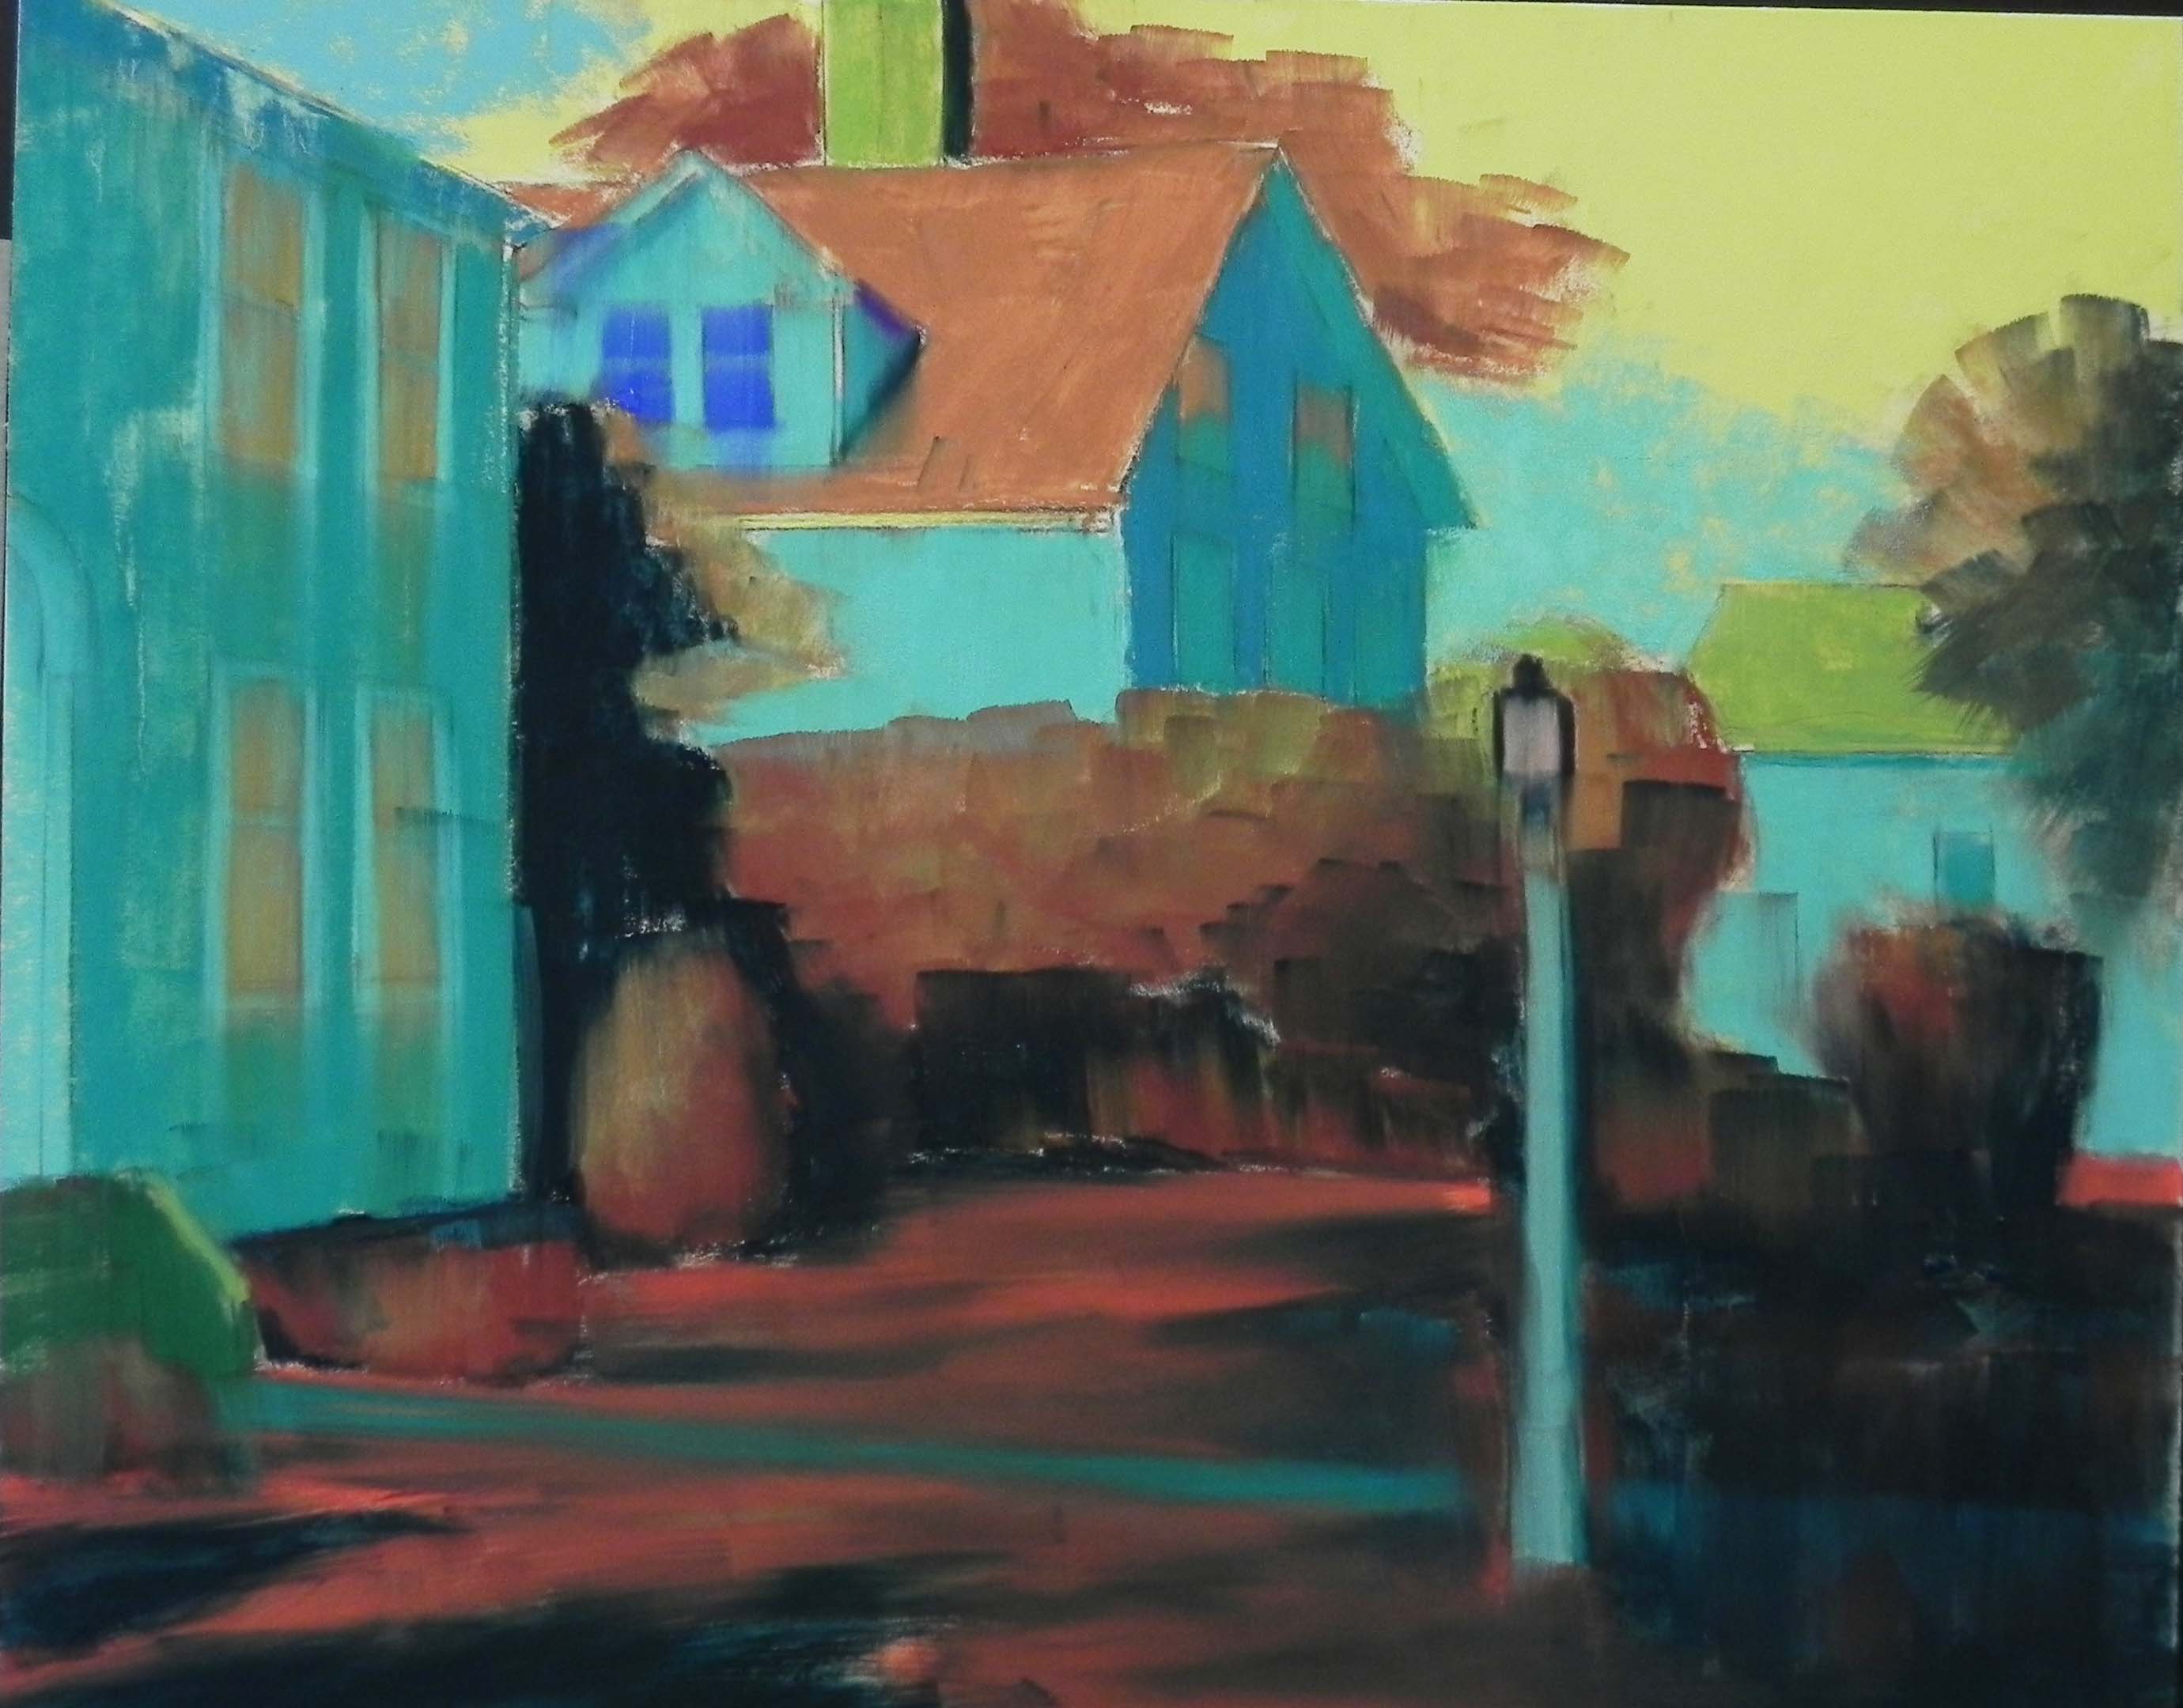
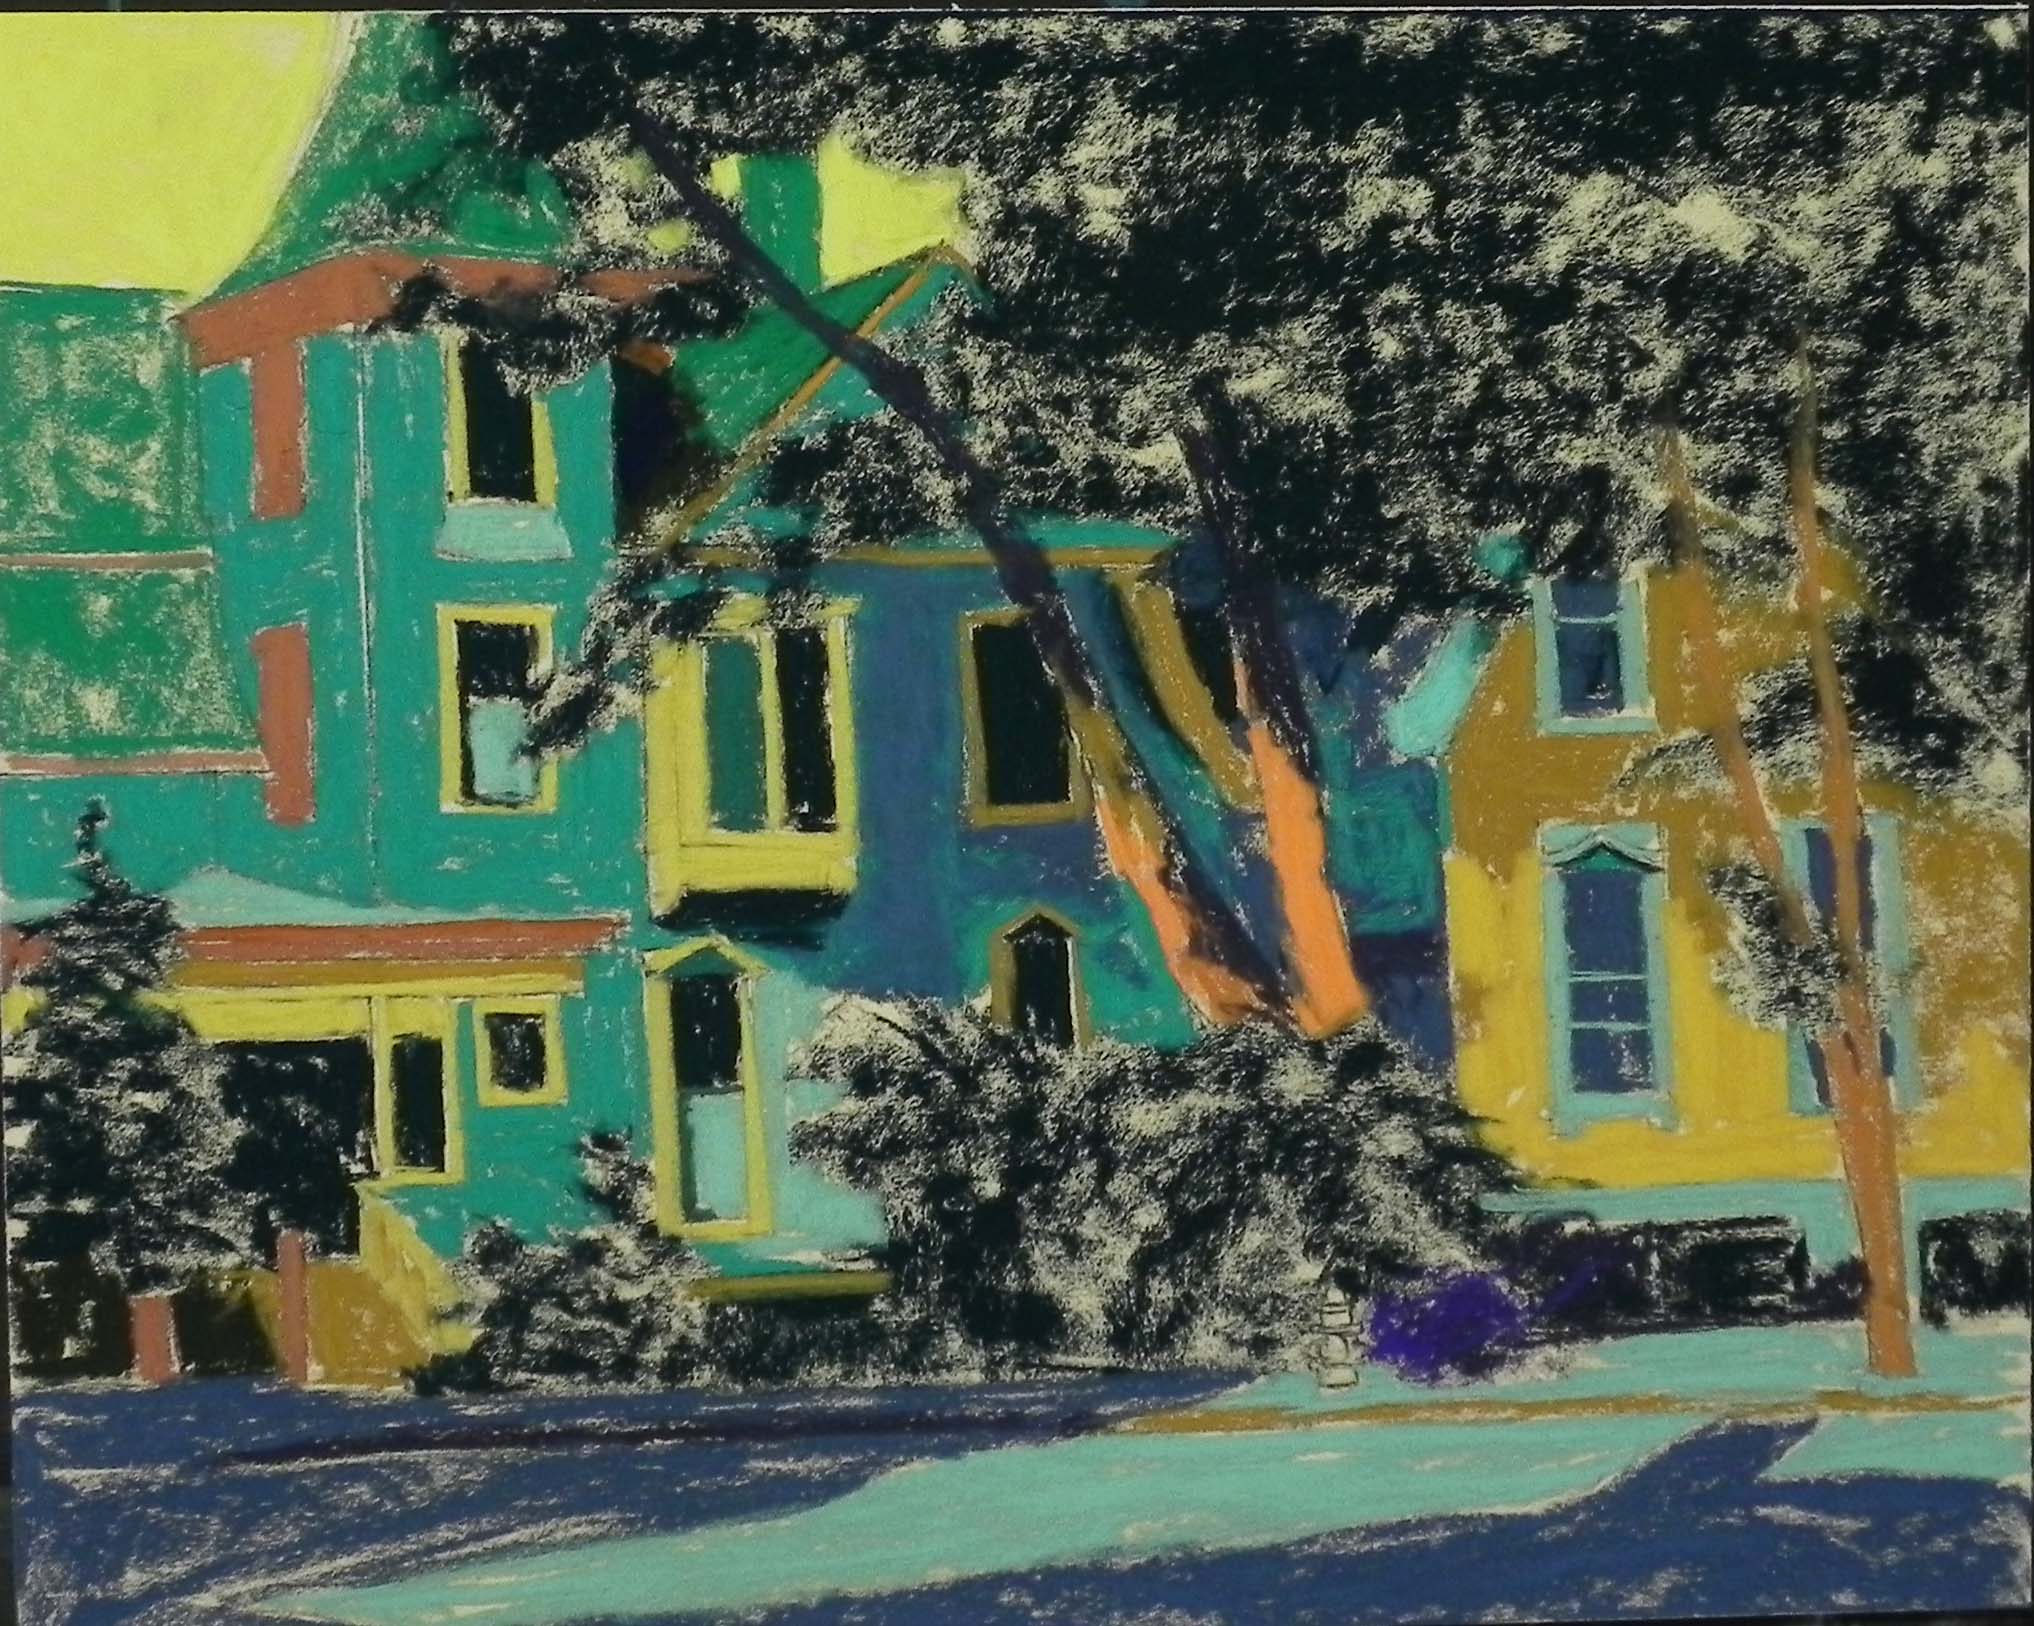
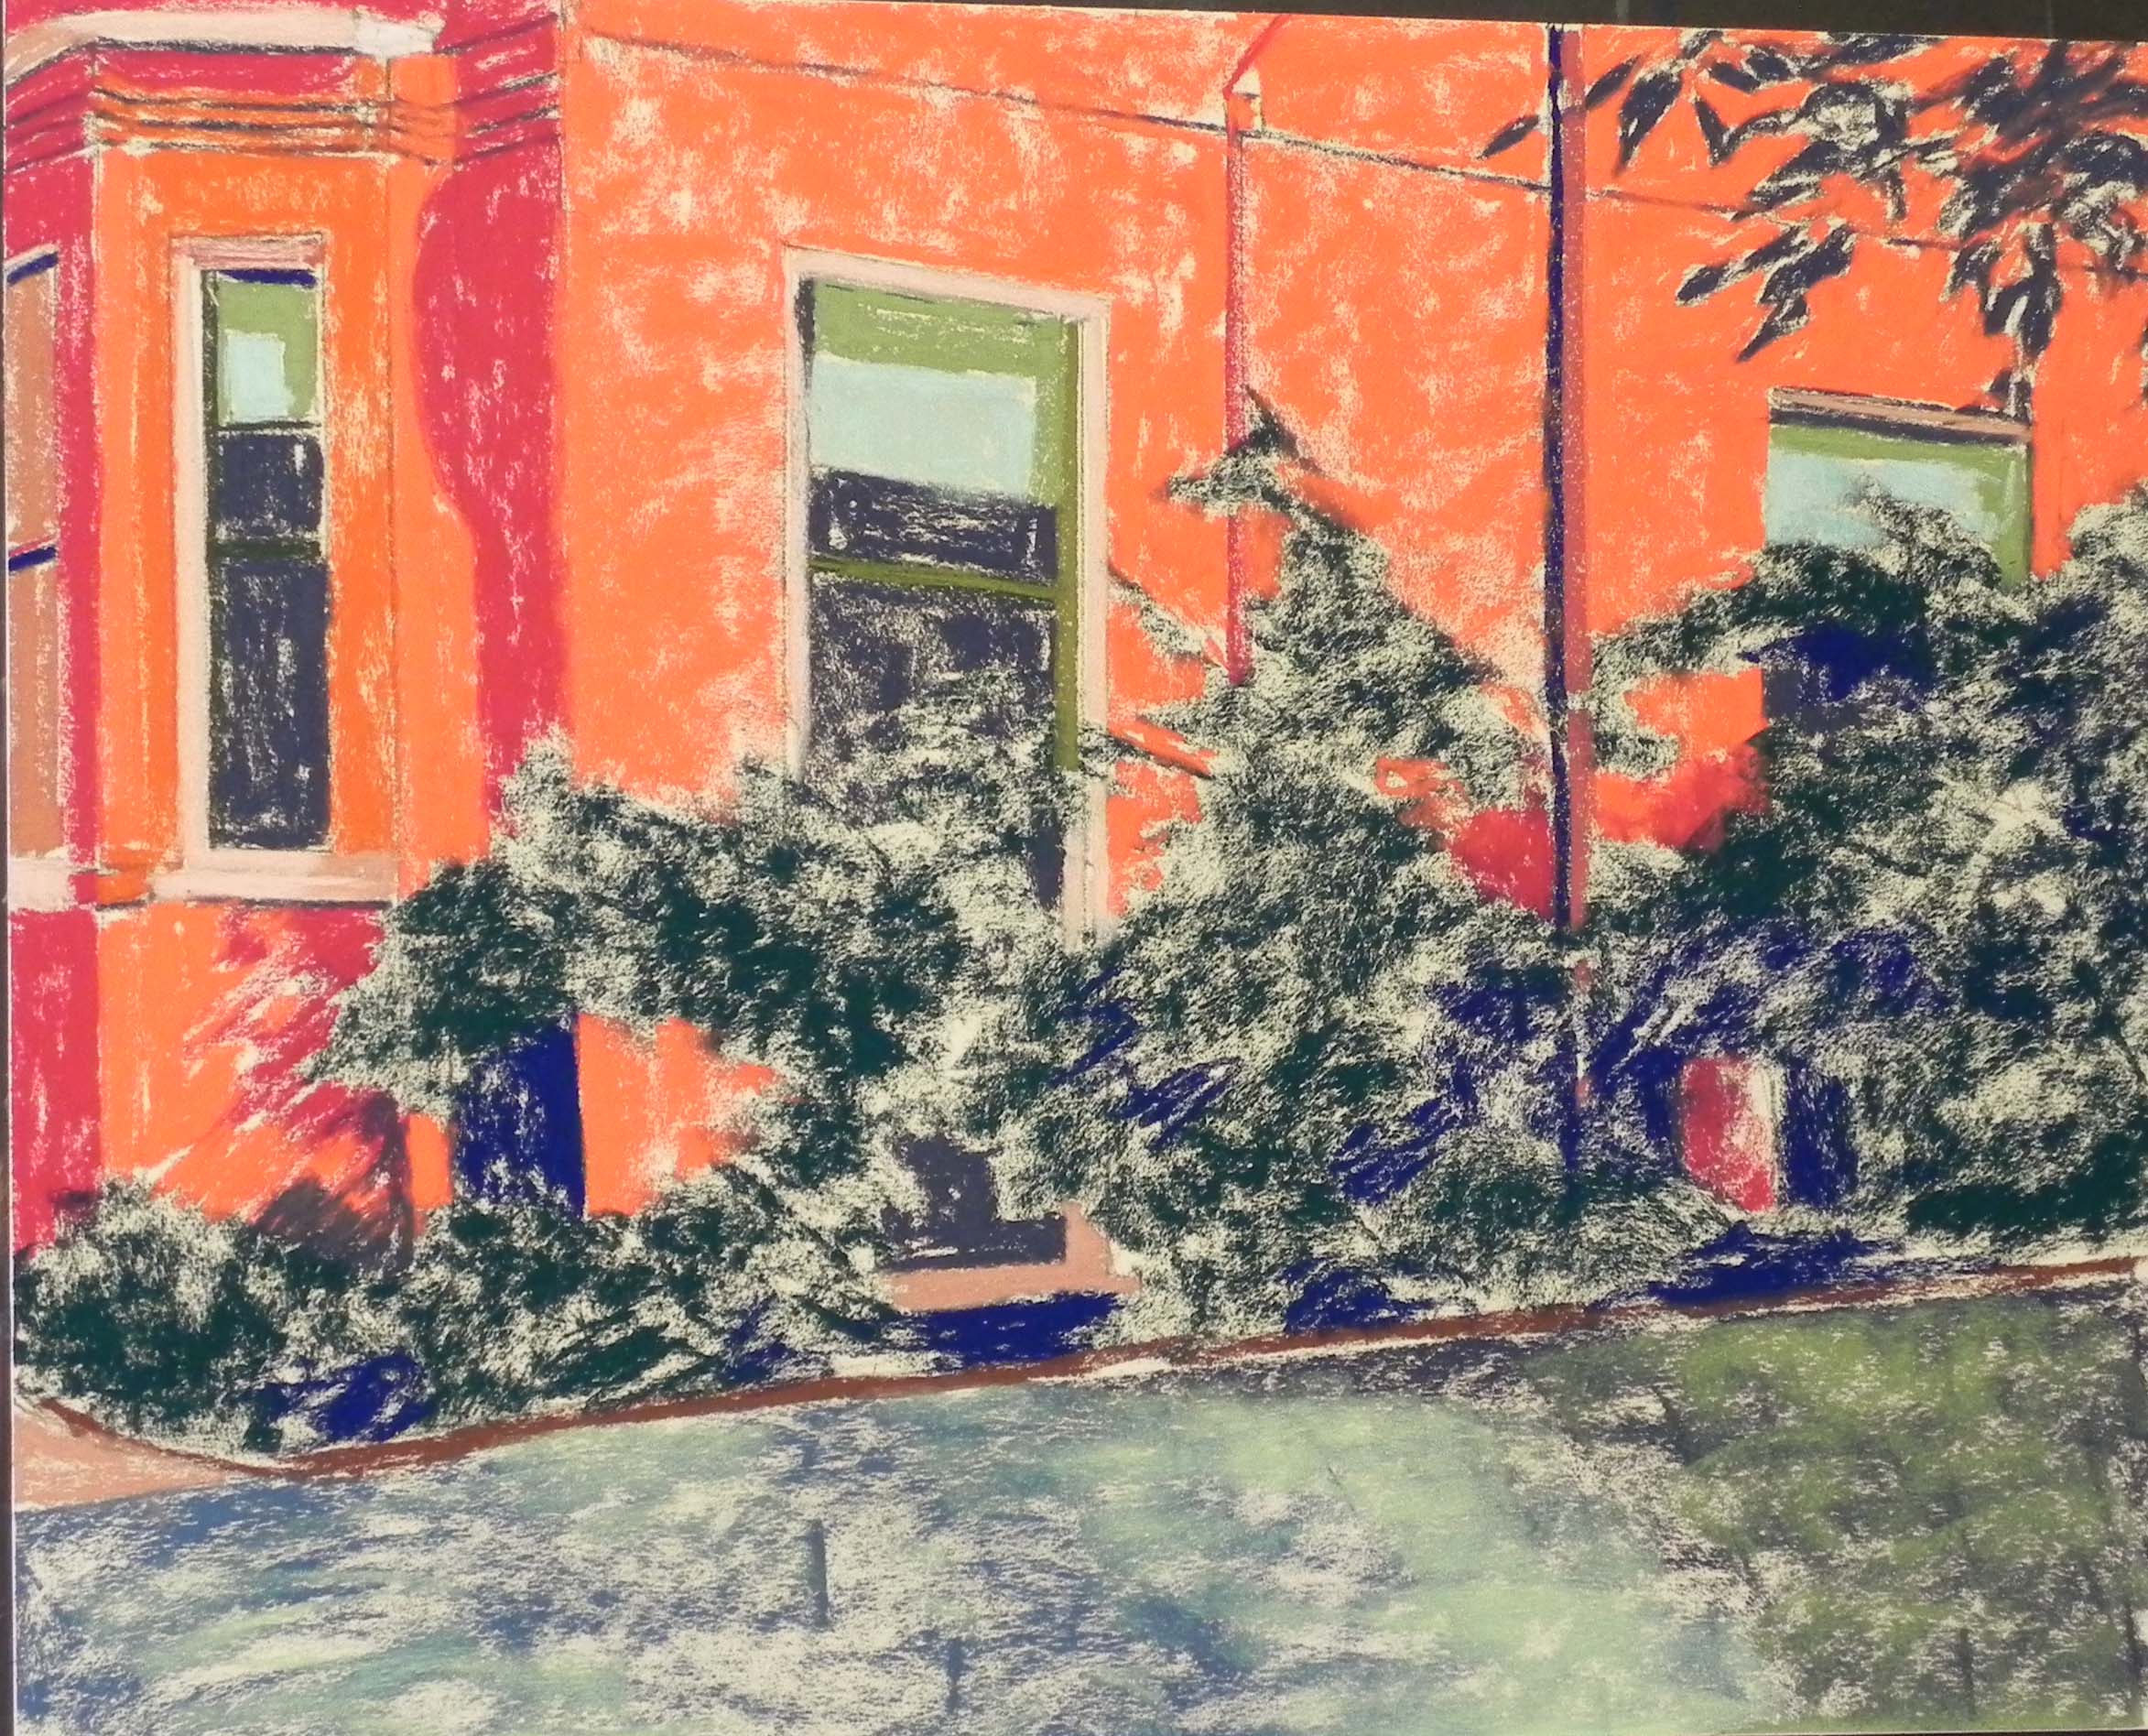
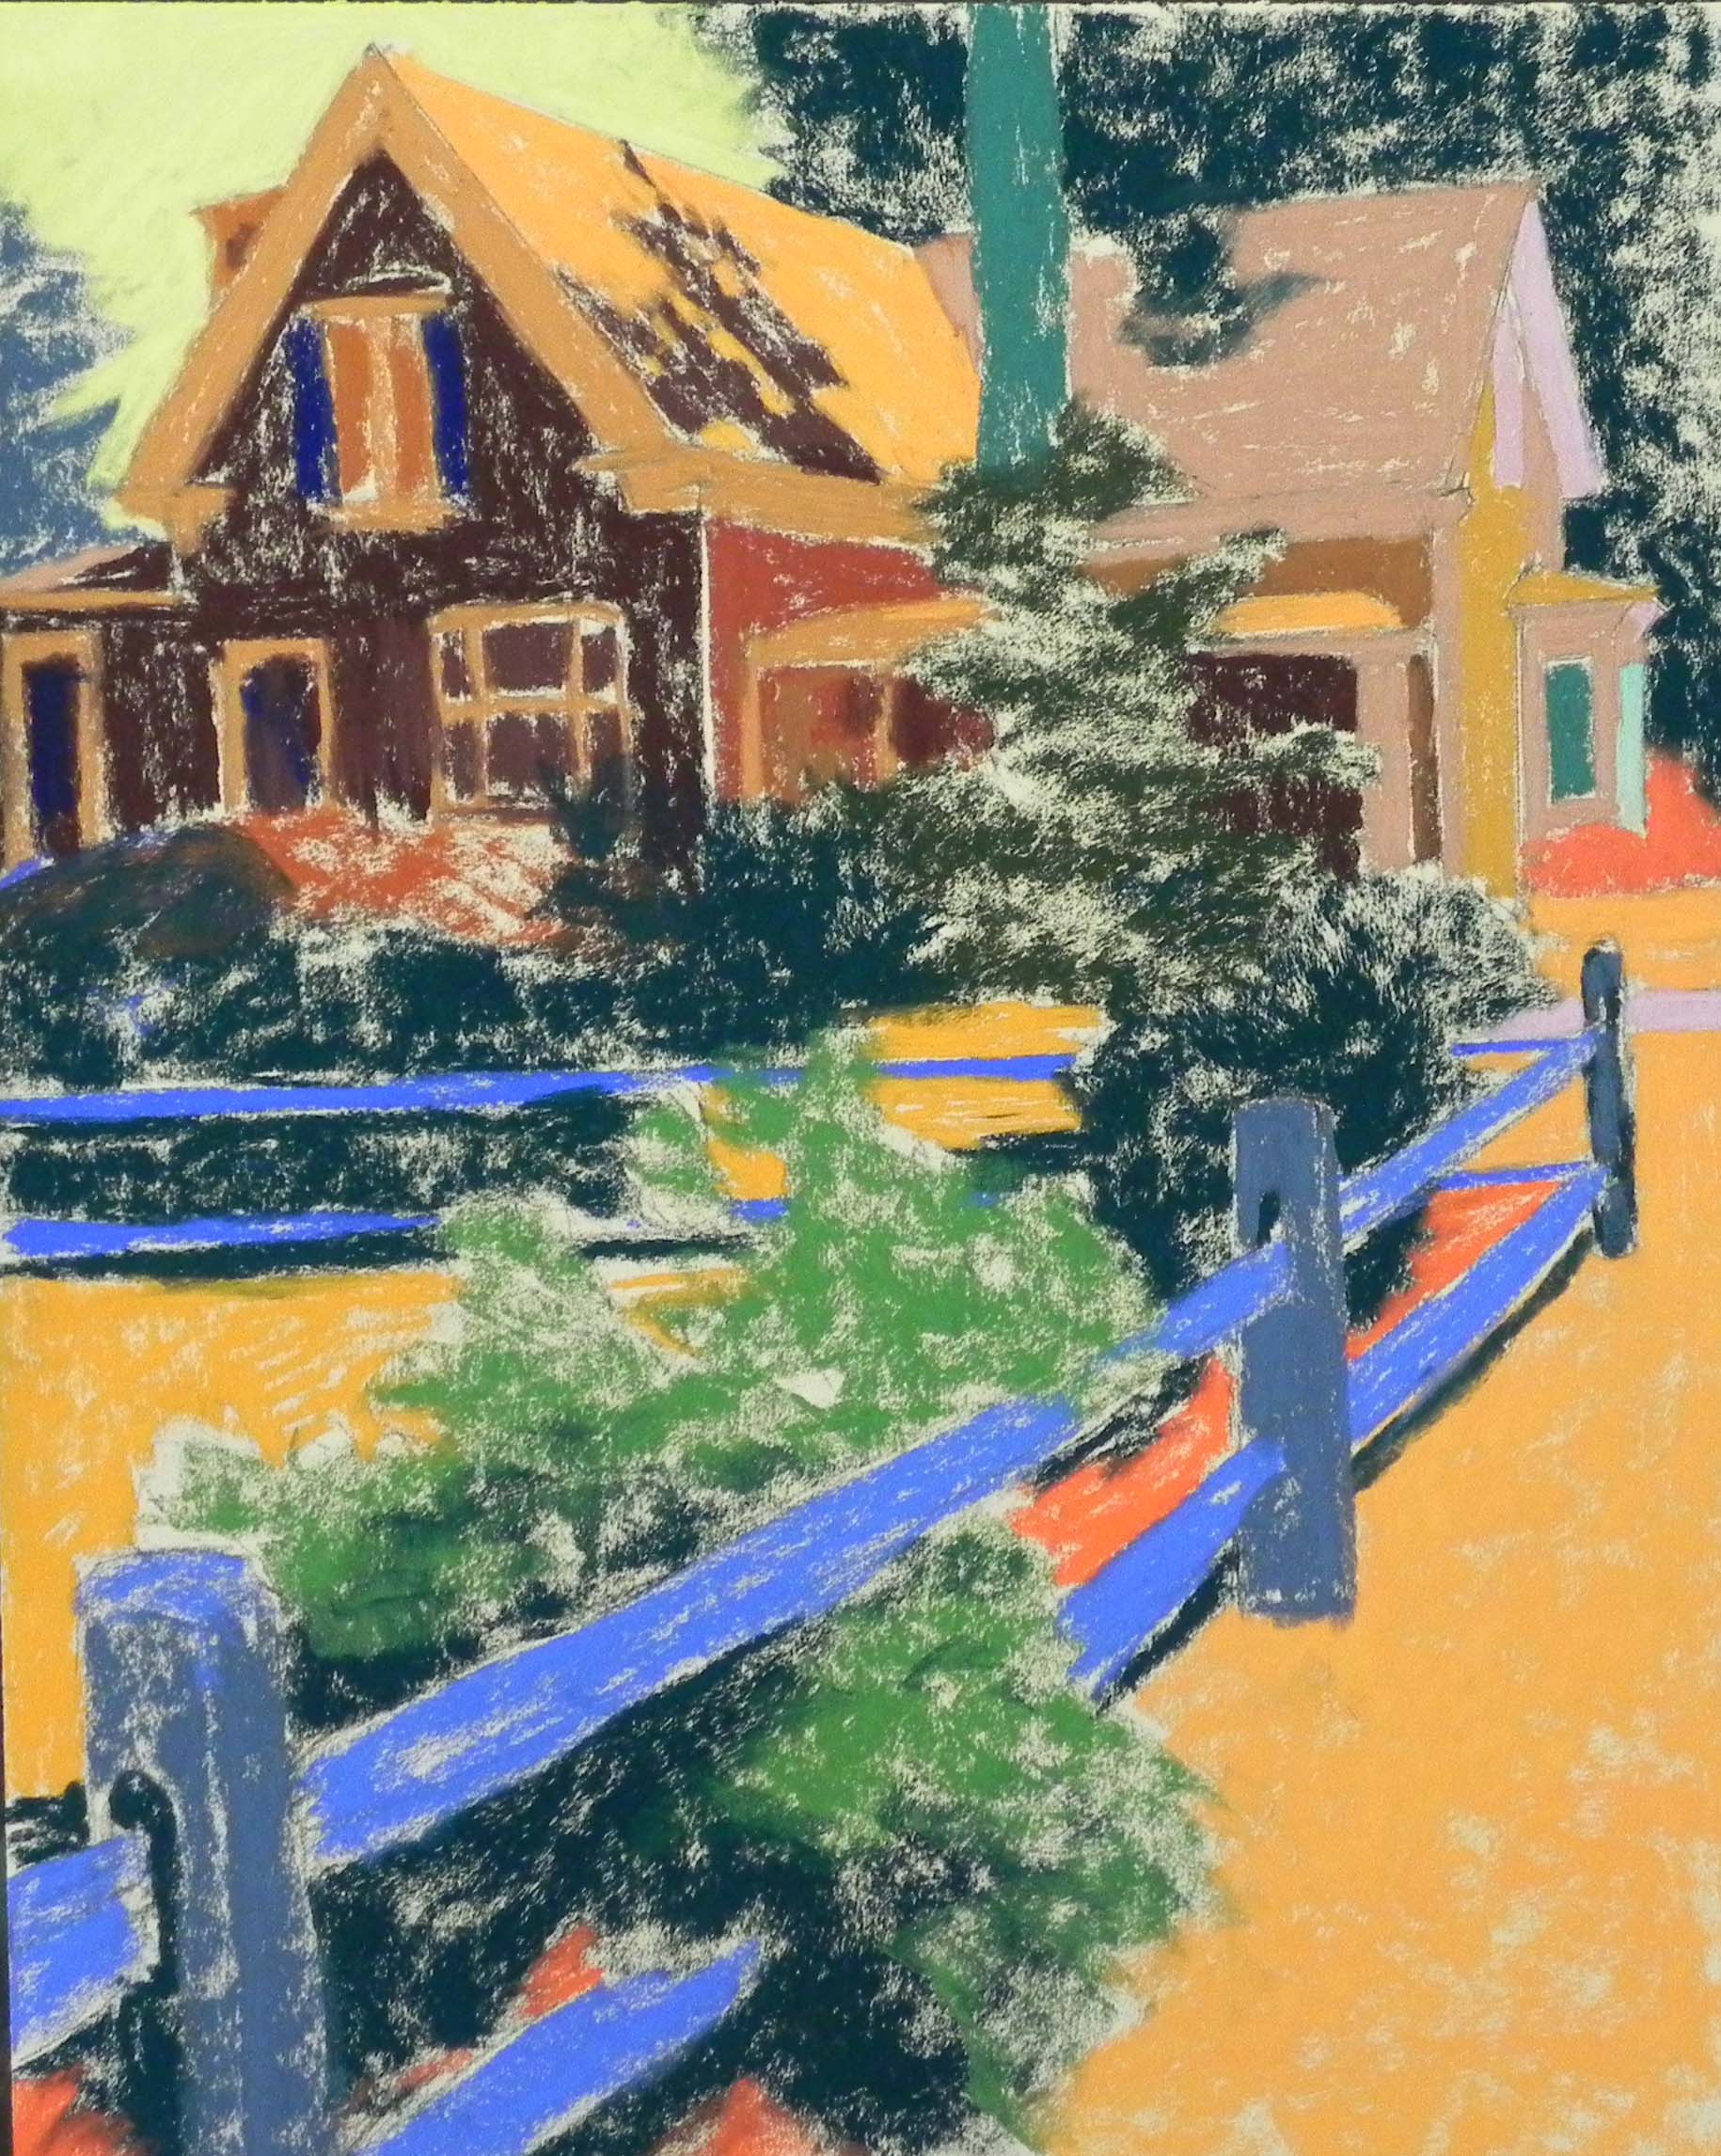
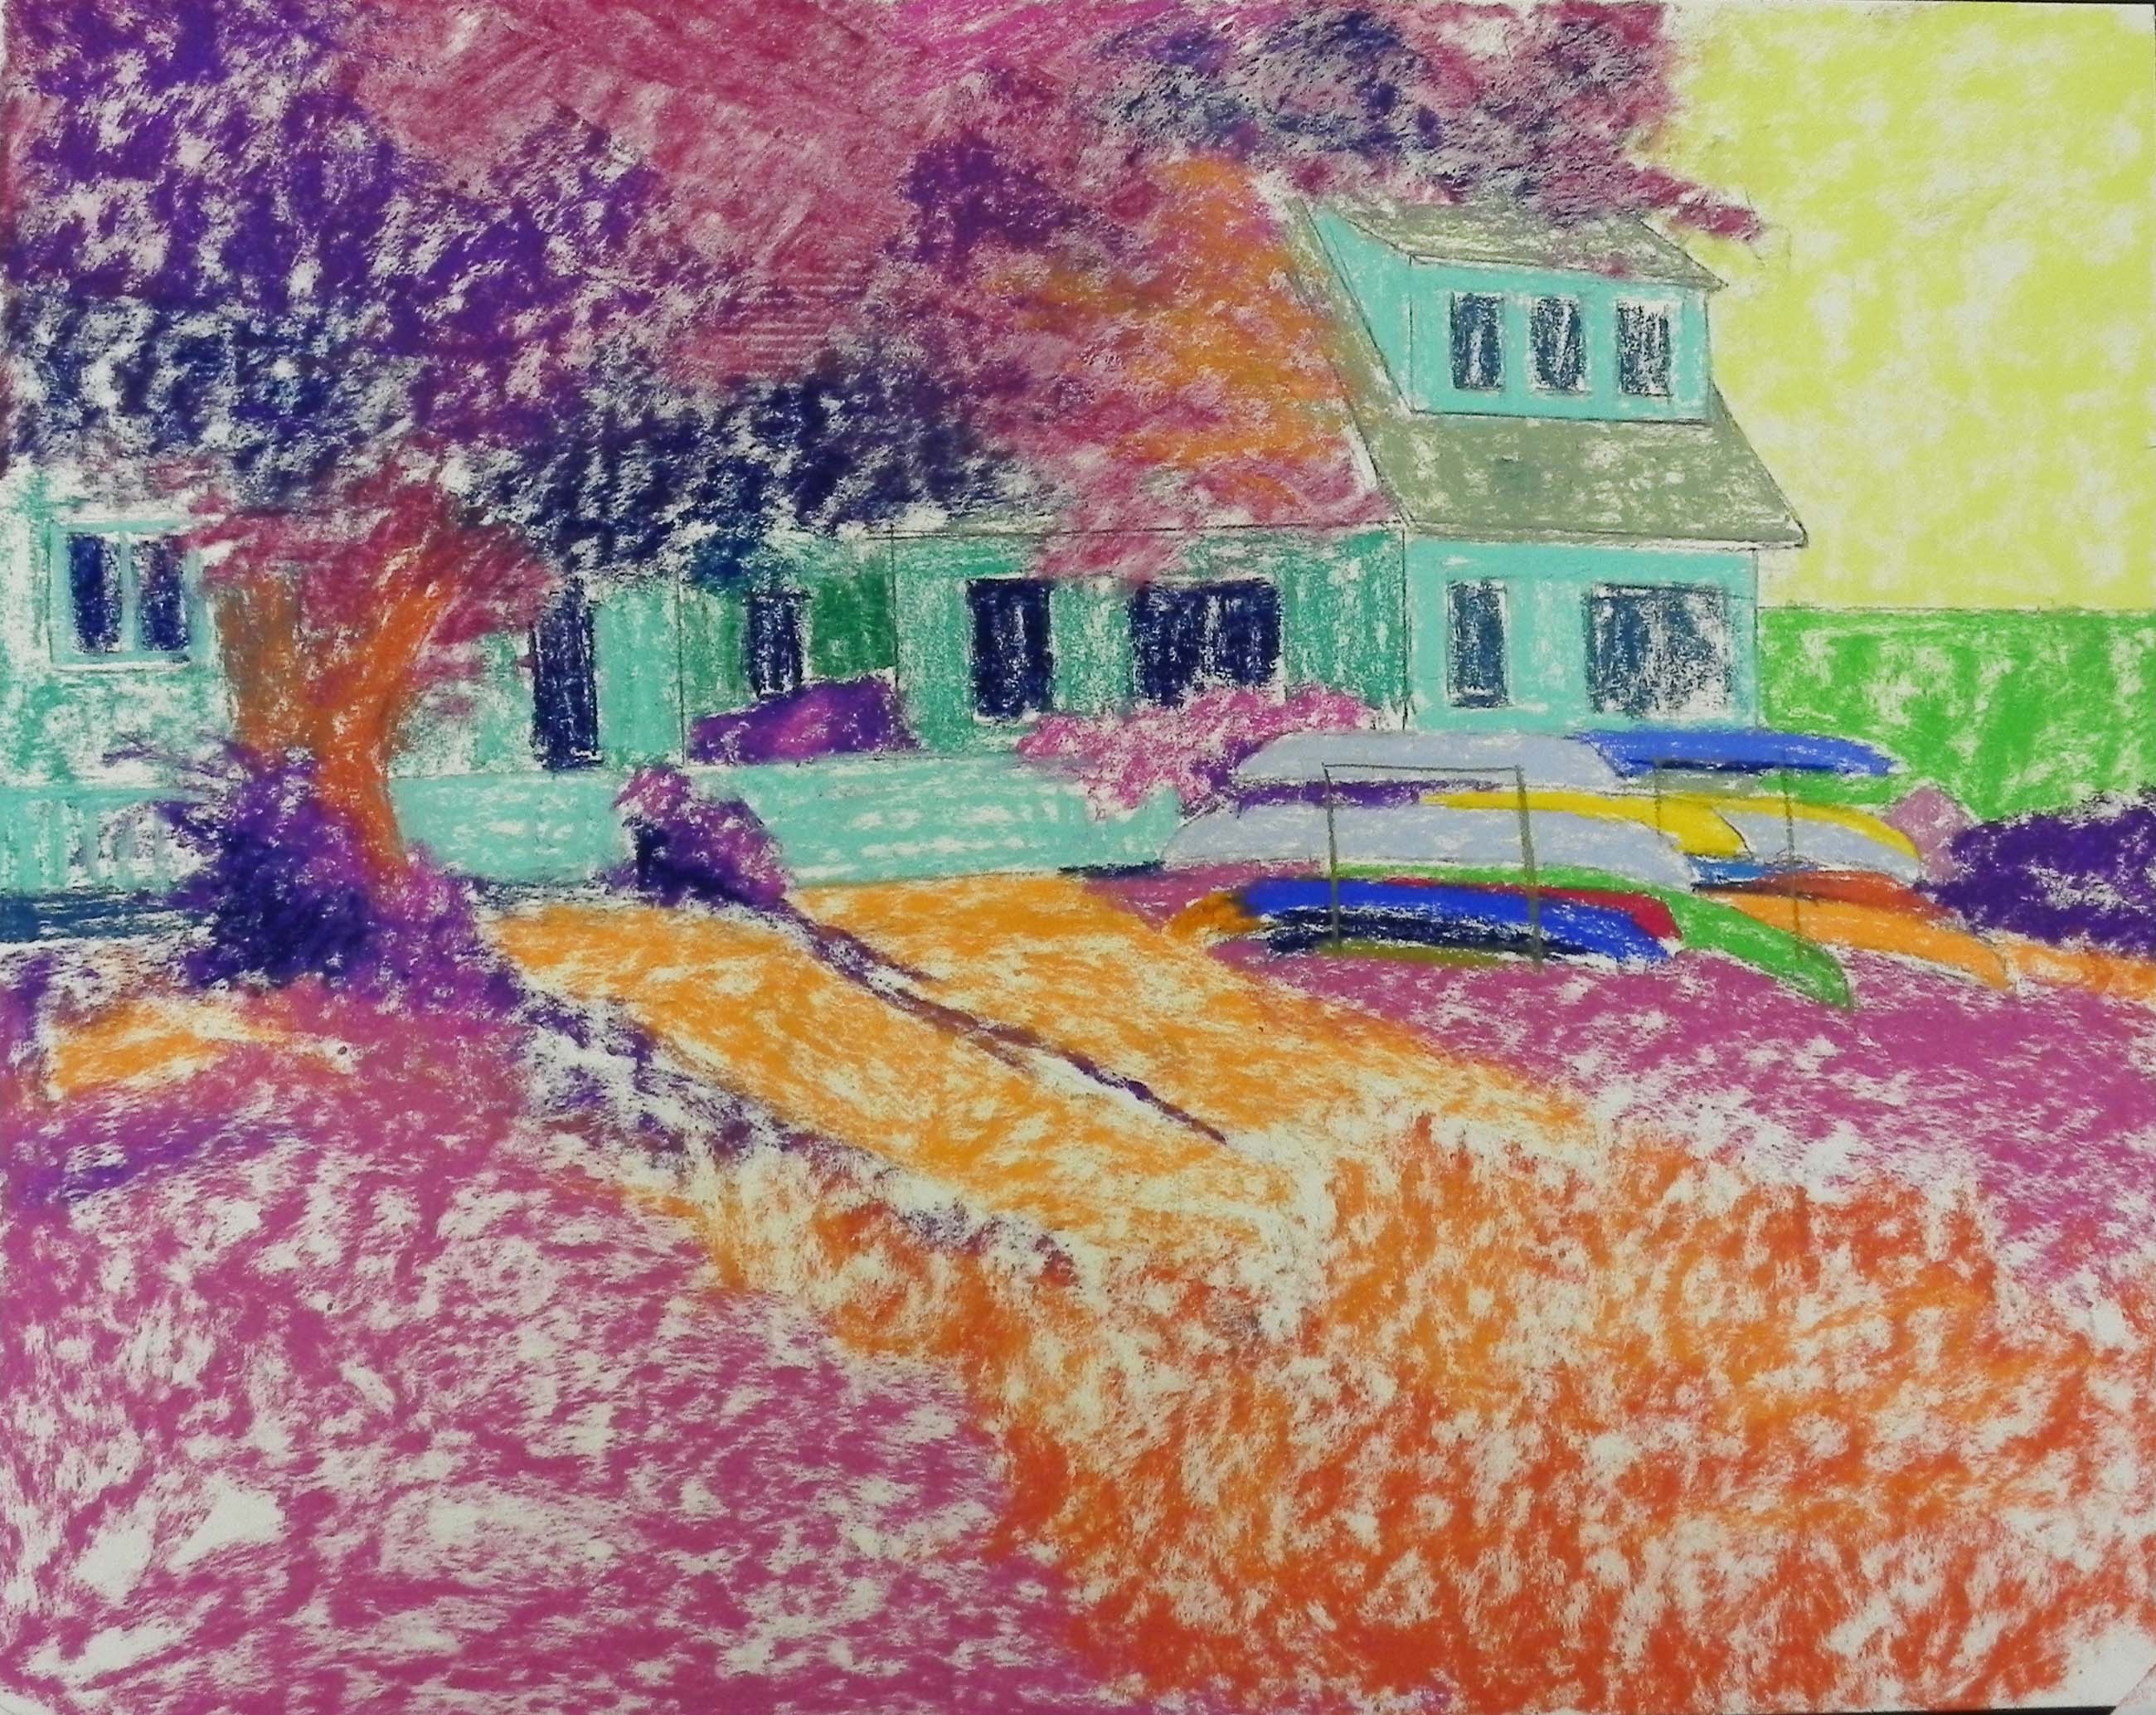
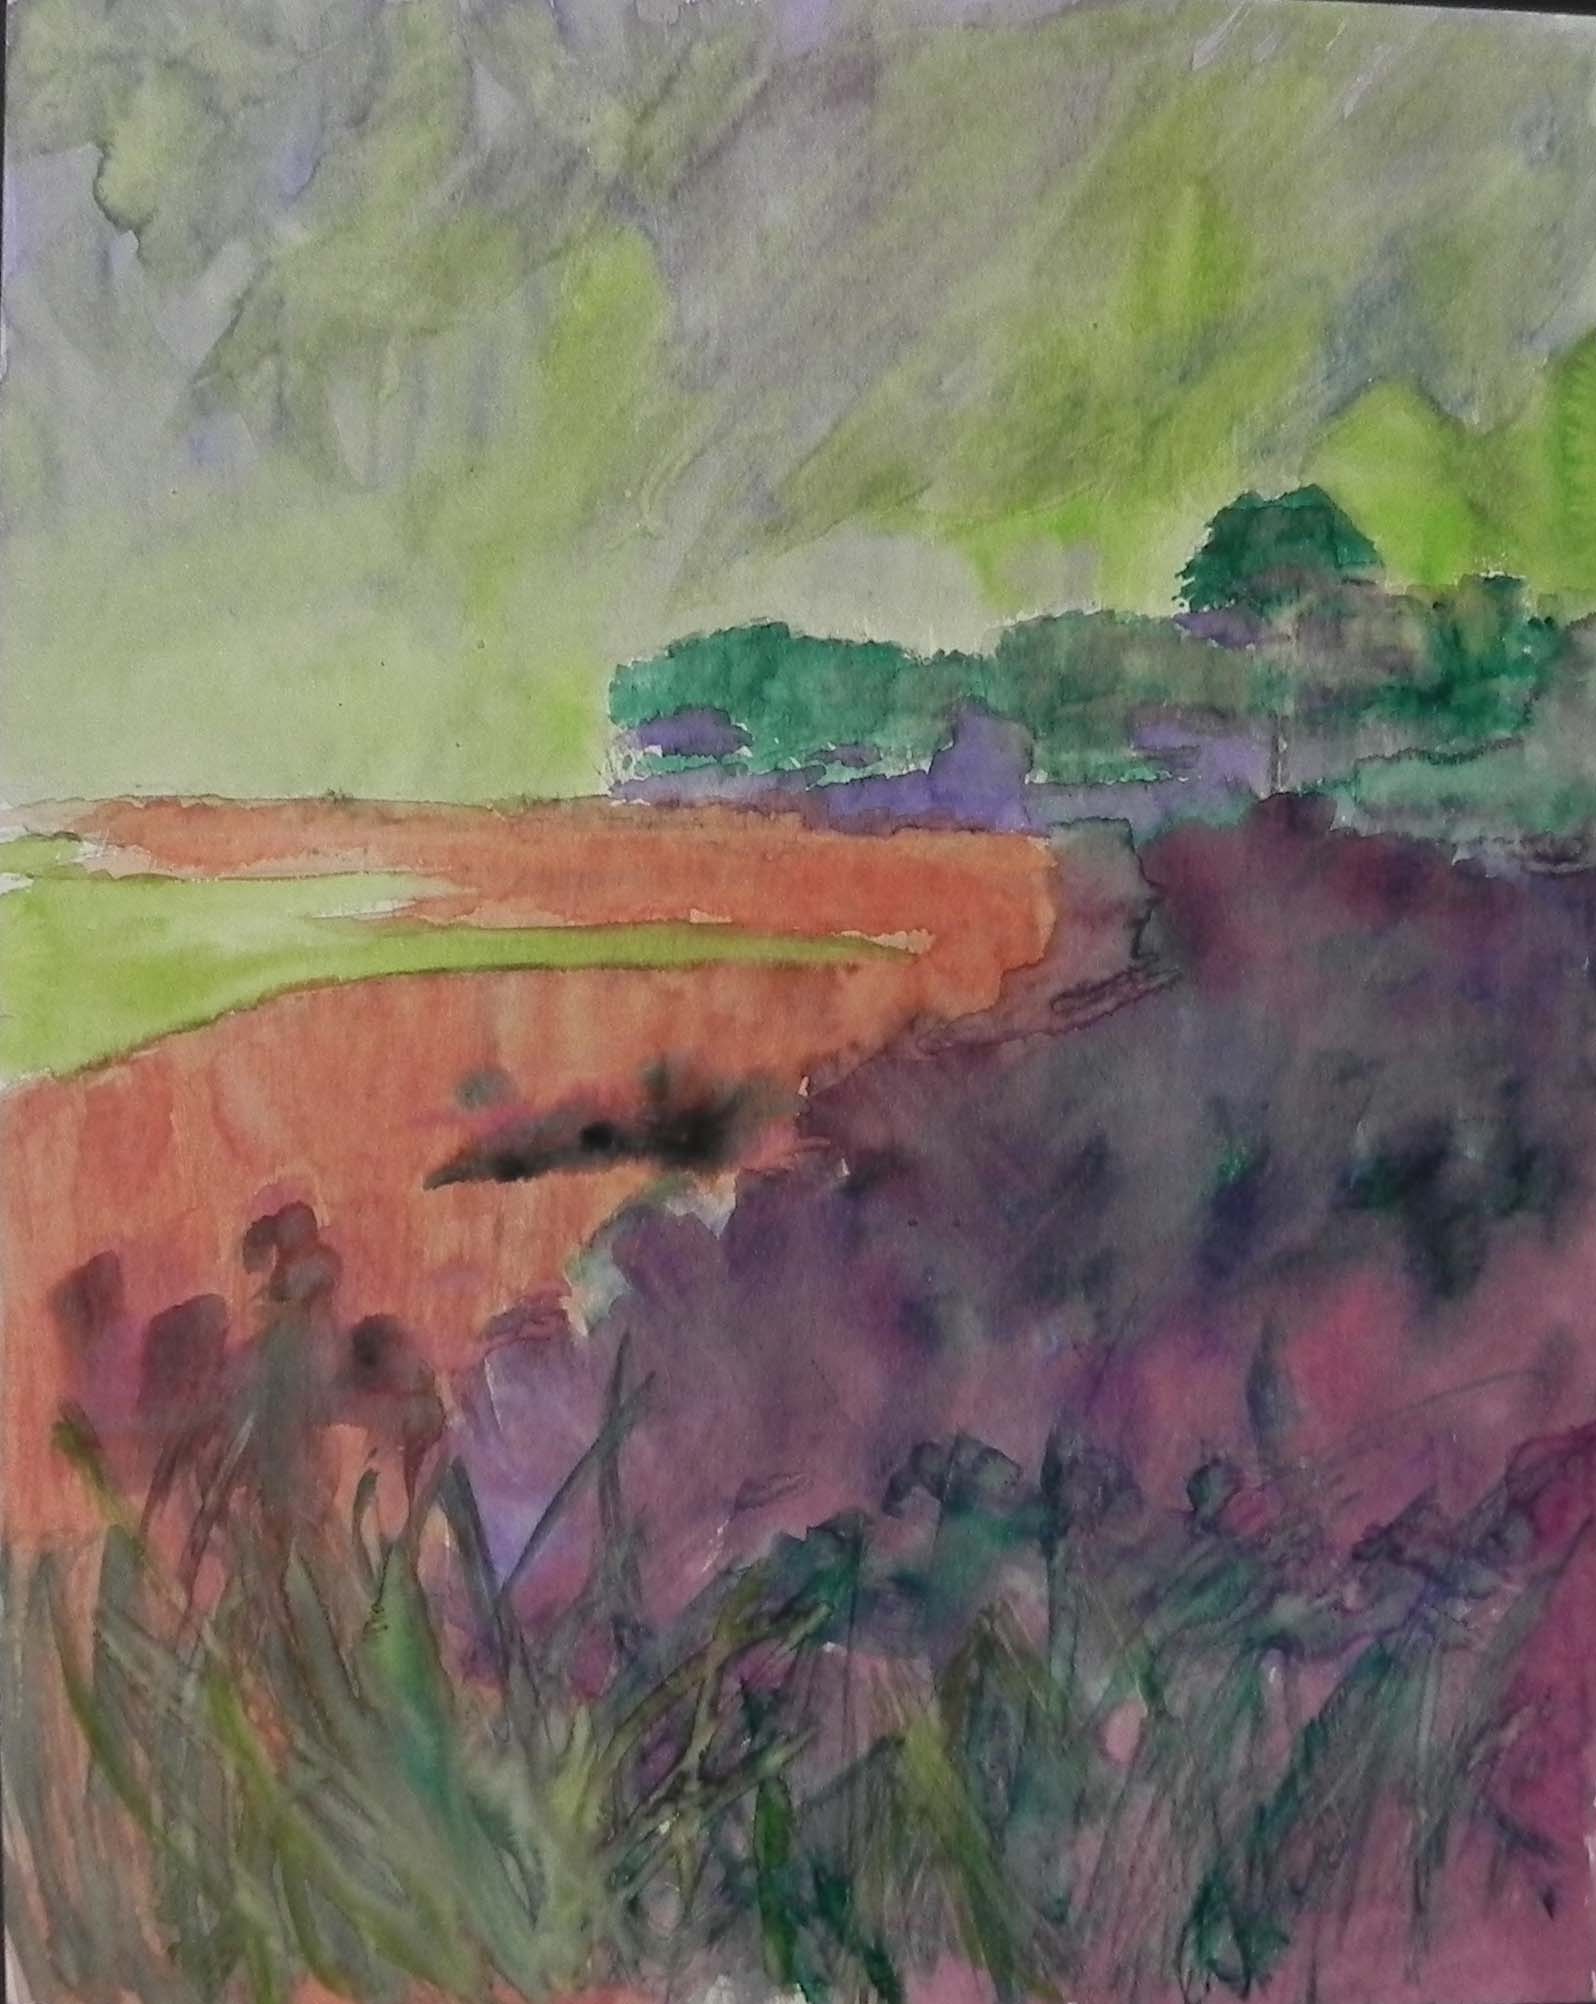
Beginning stage with hard pastel

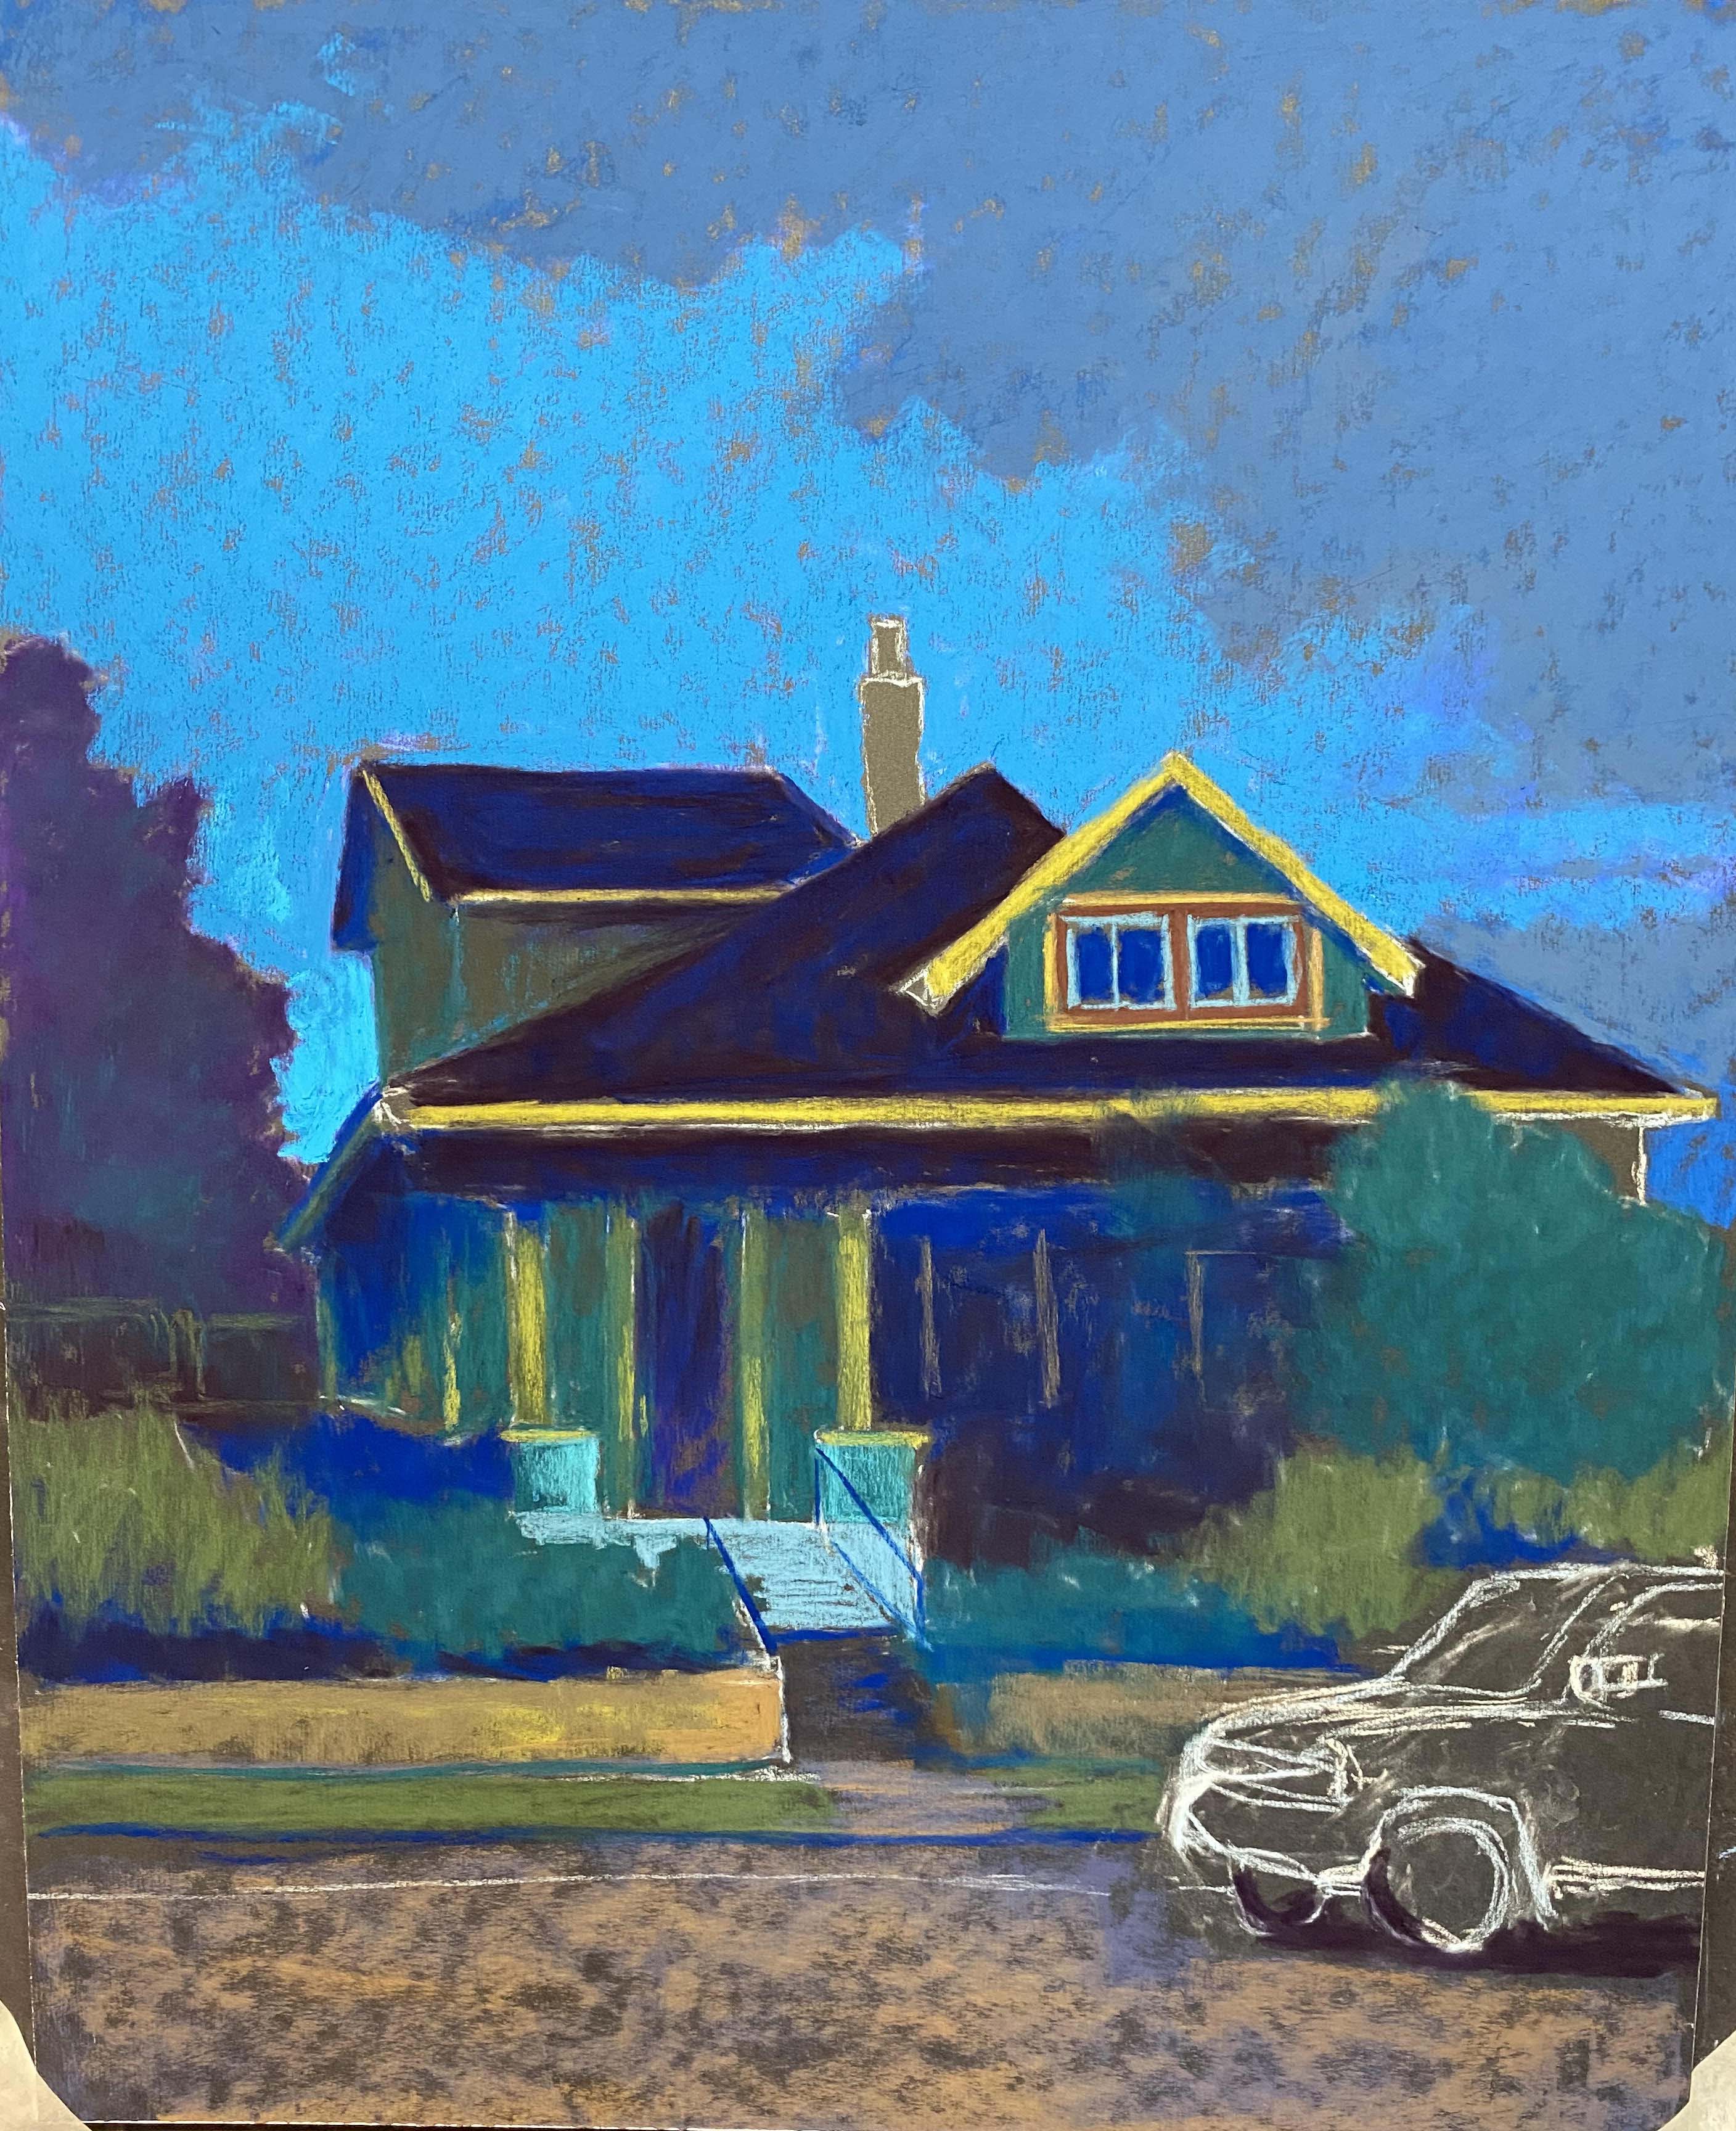
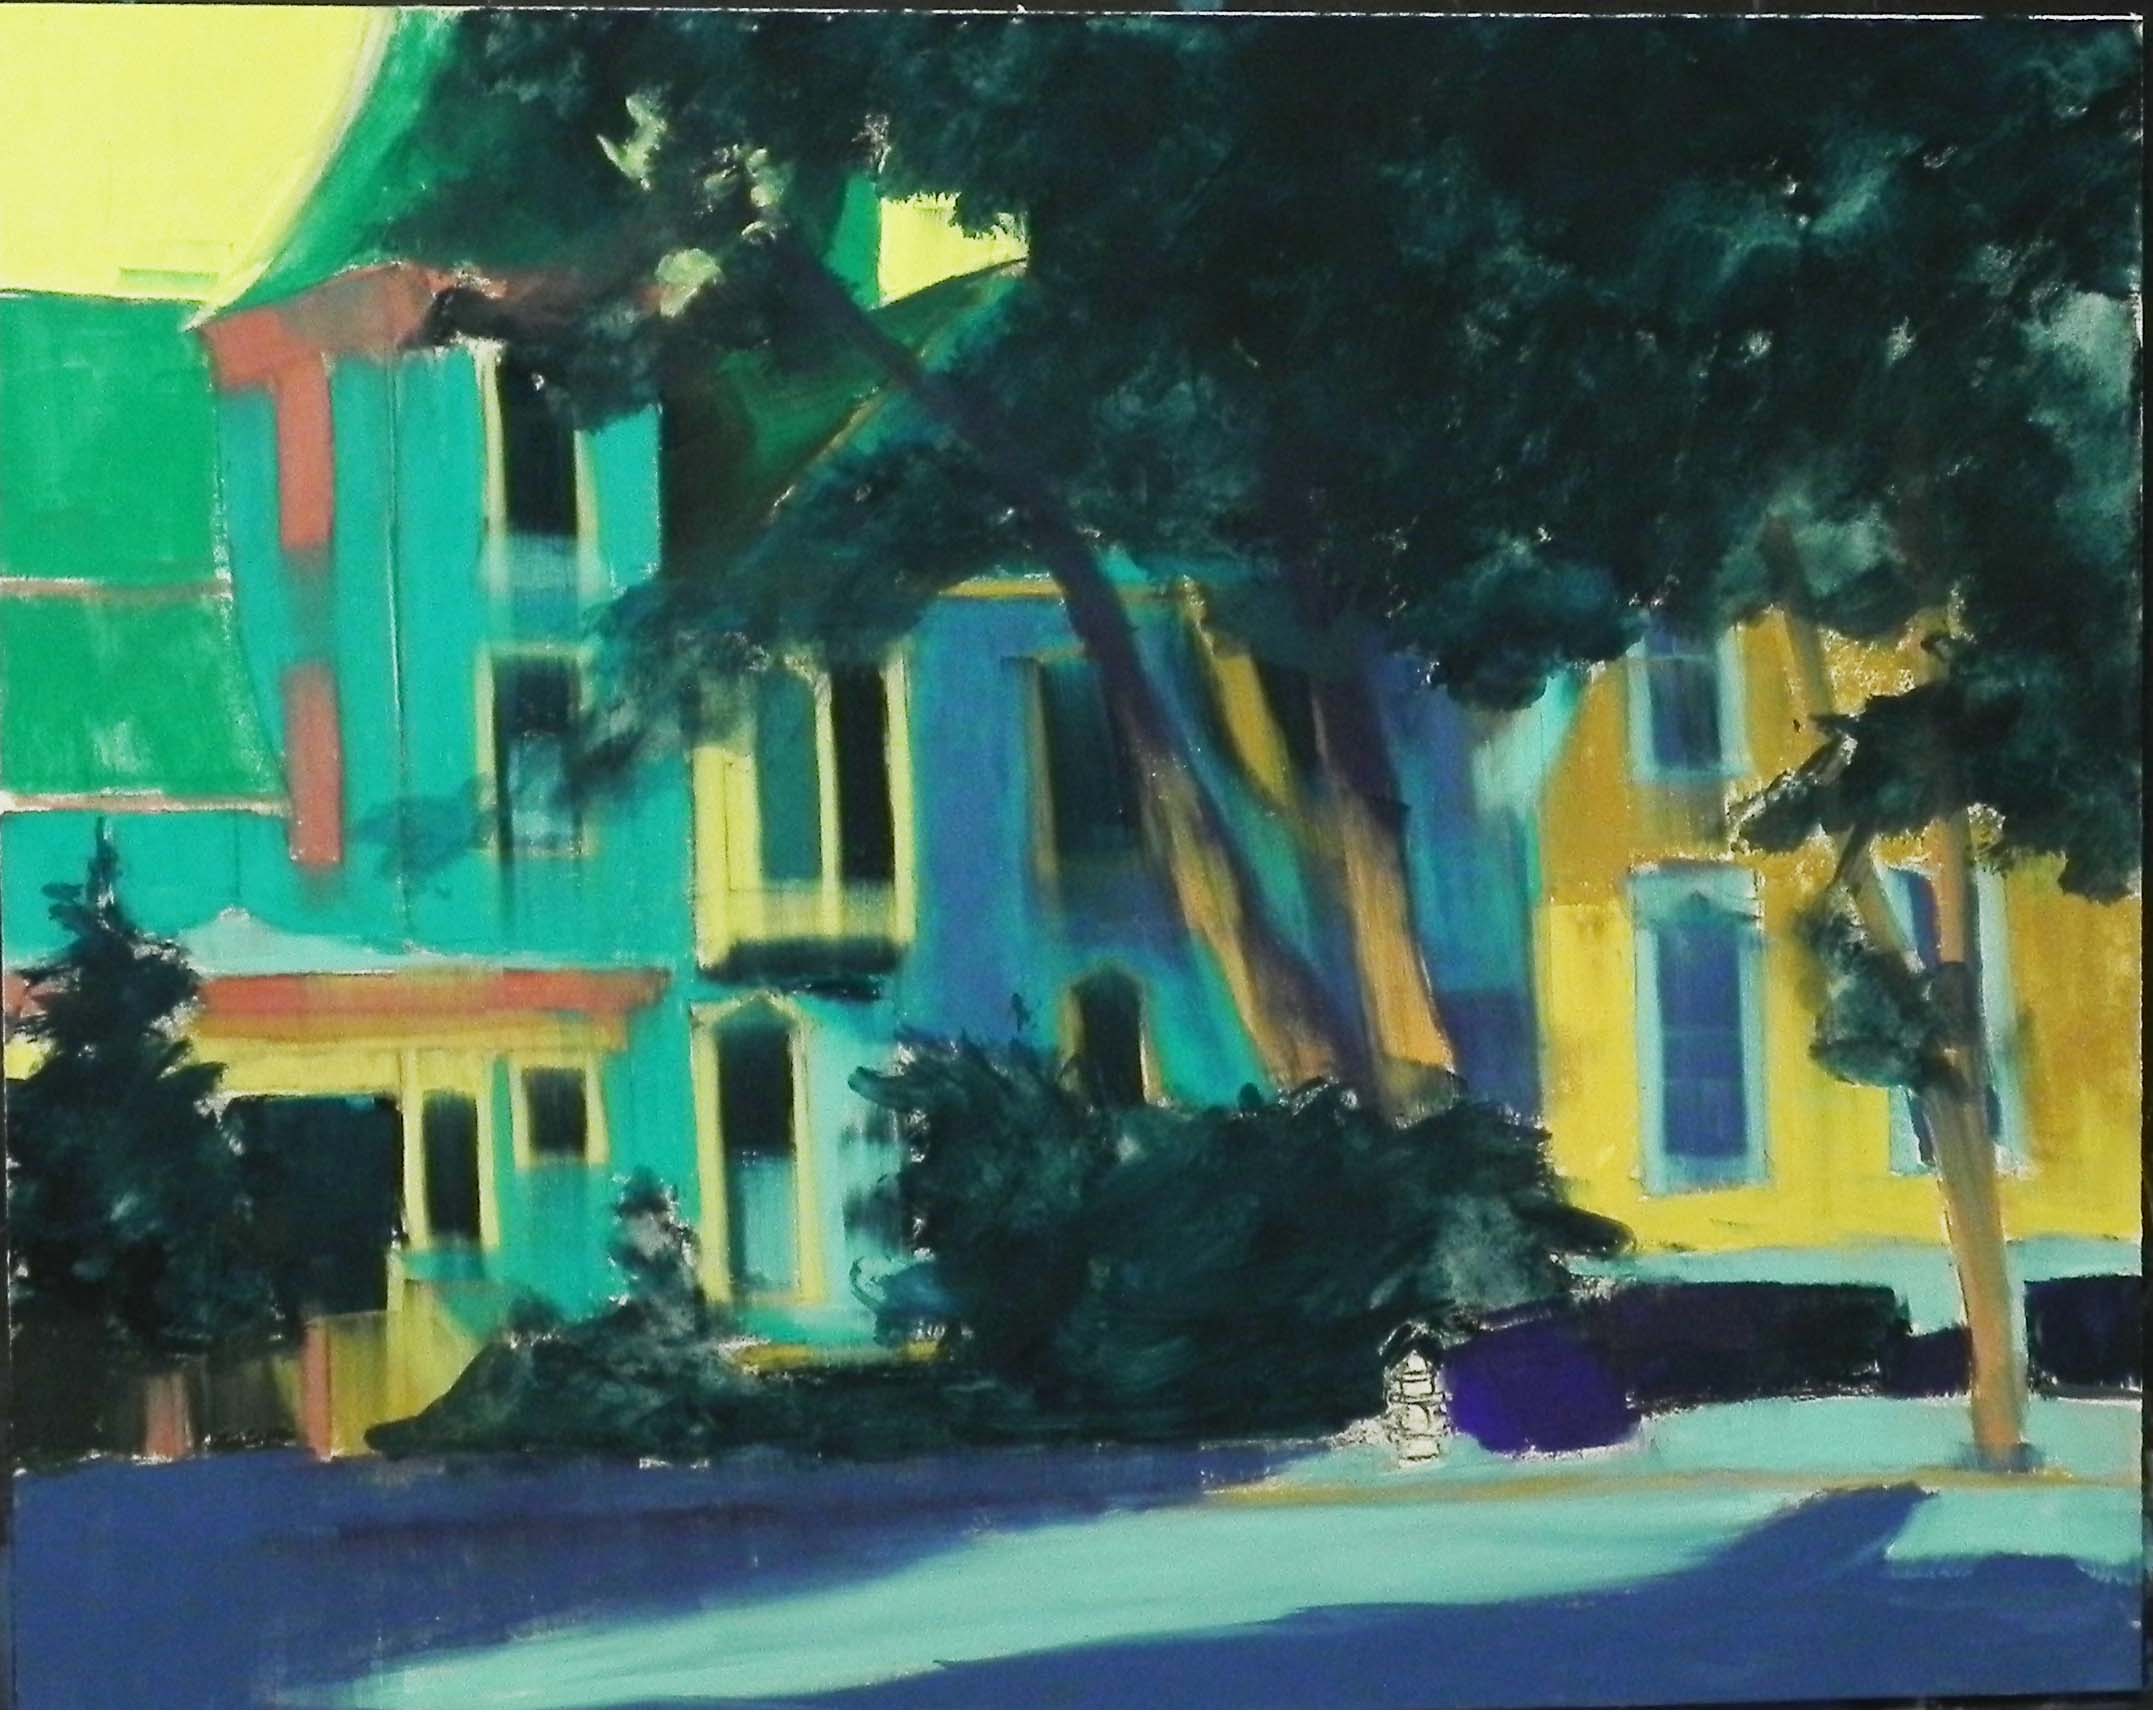
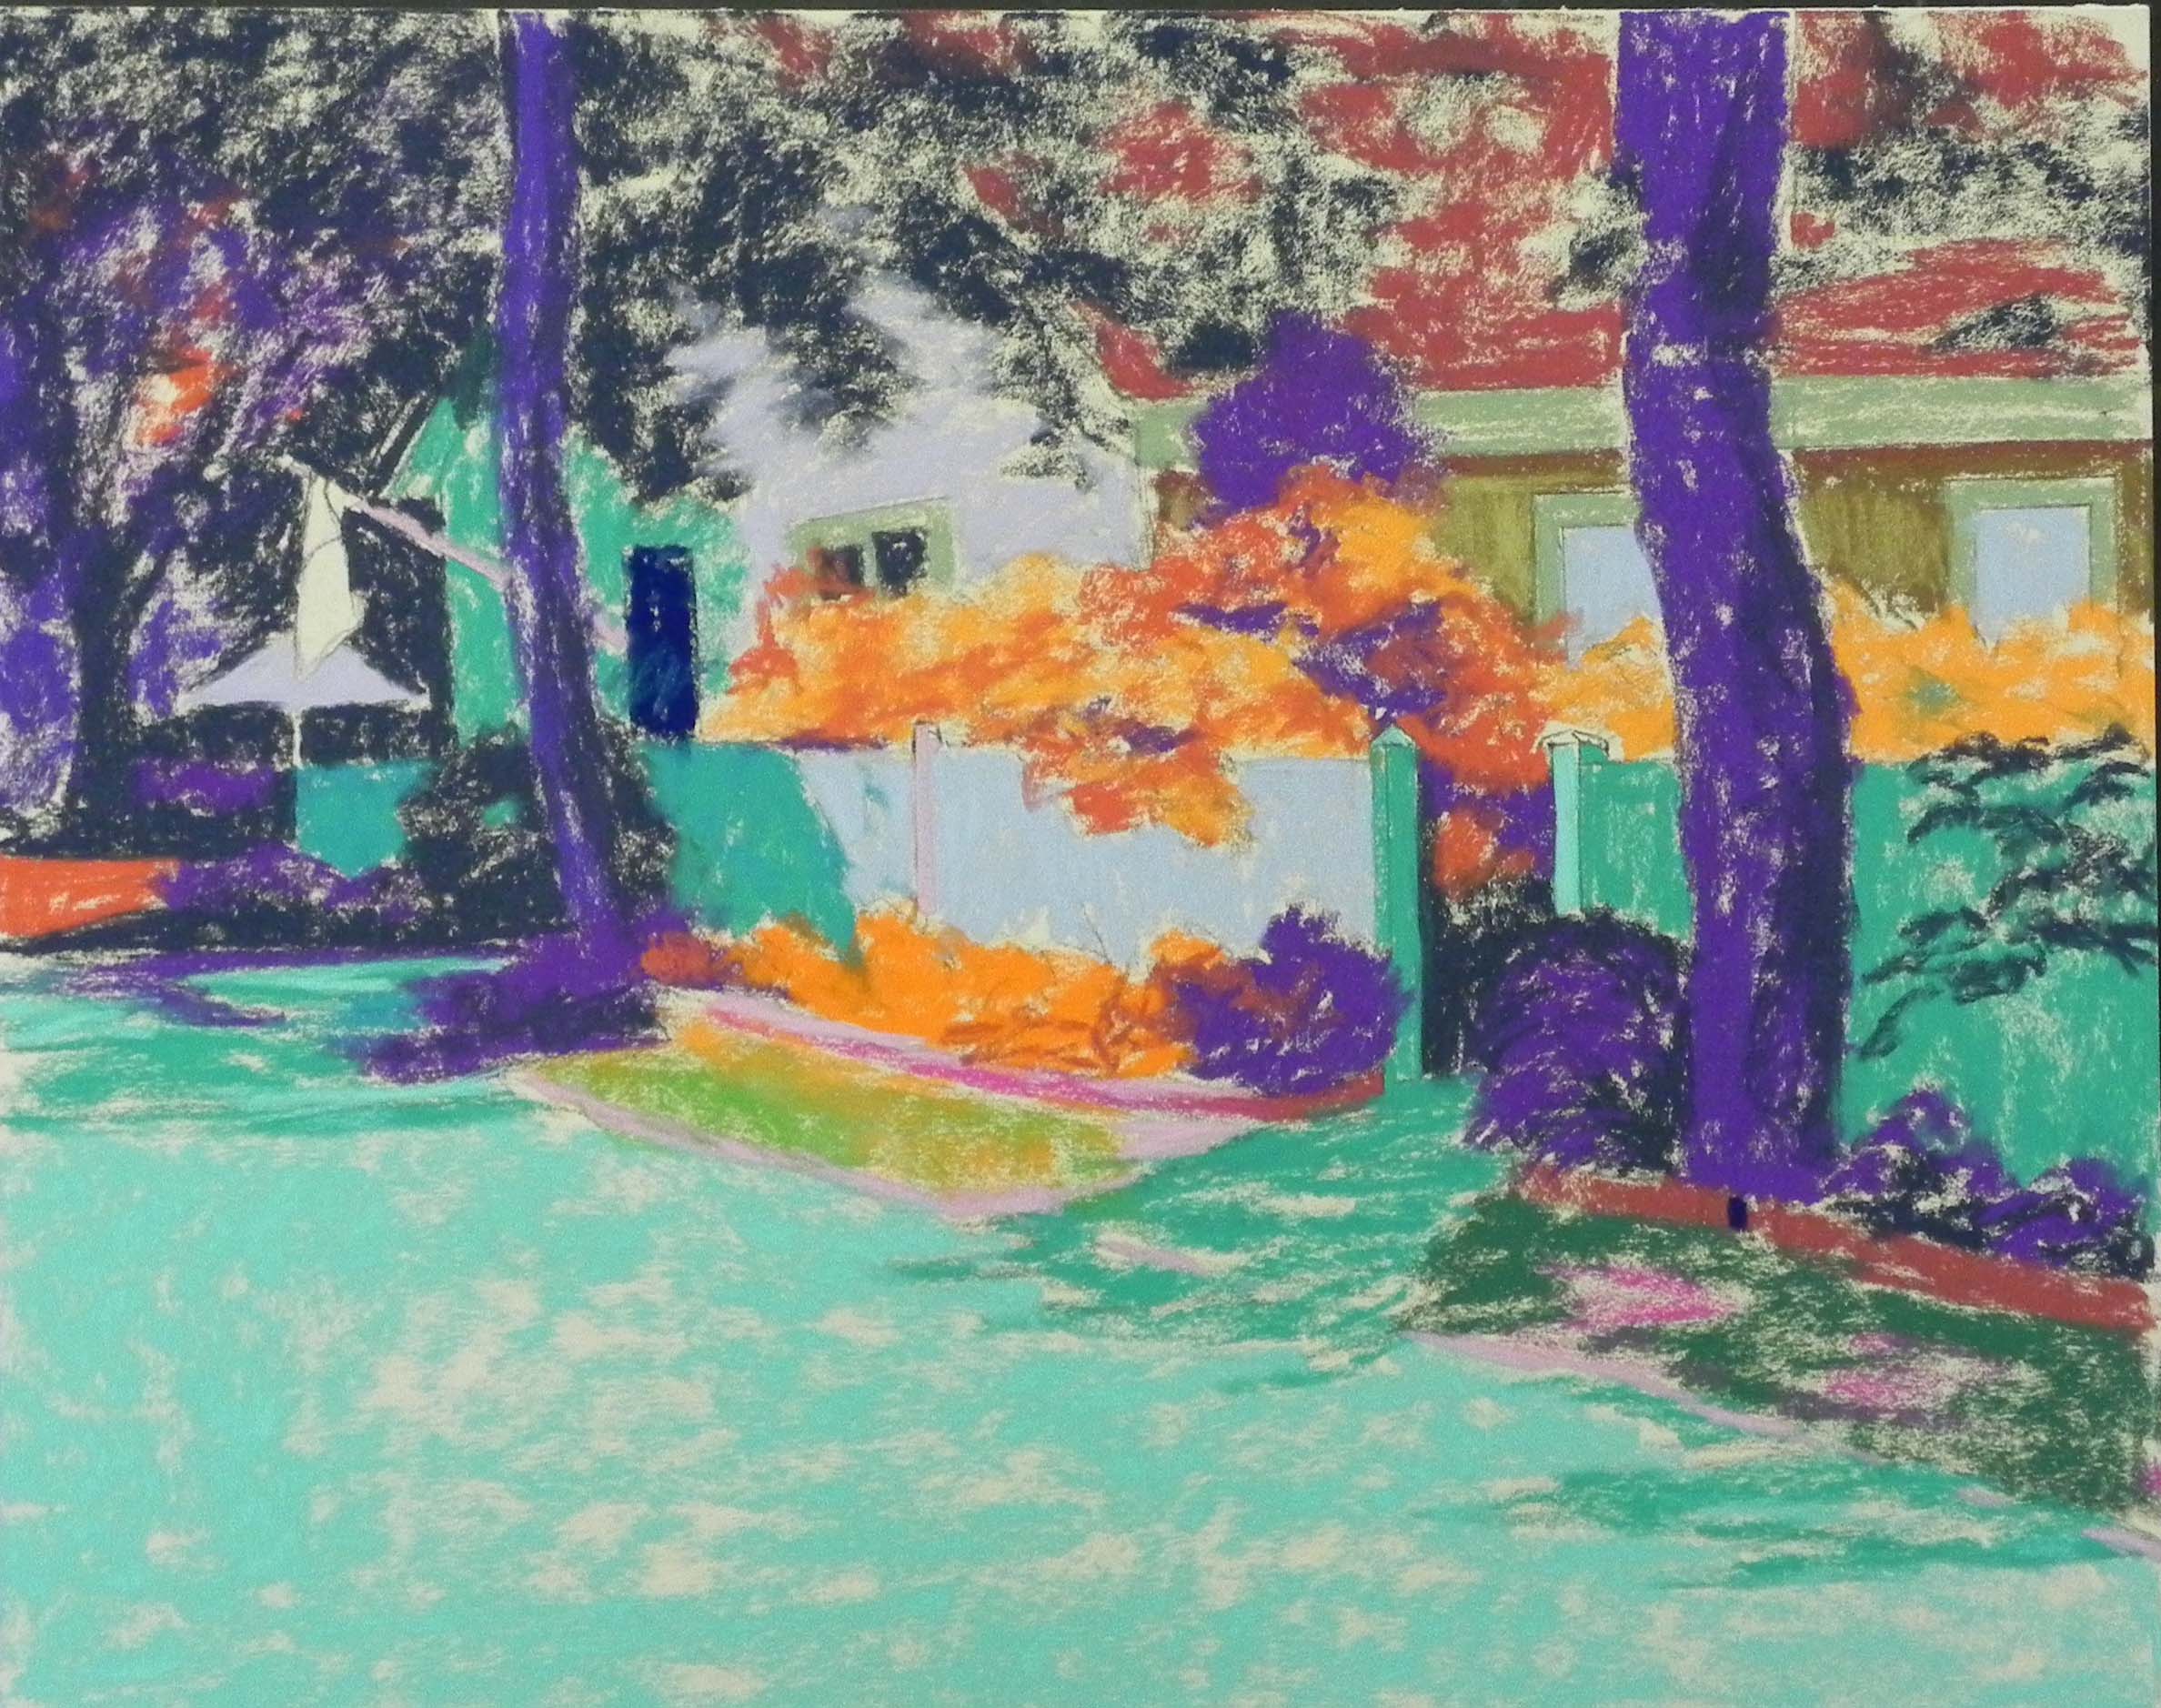
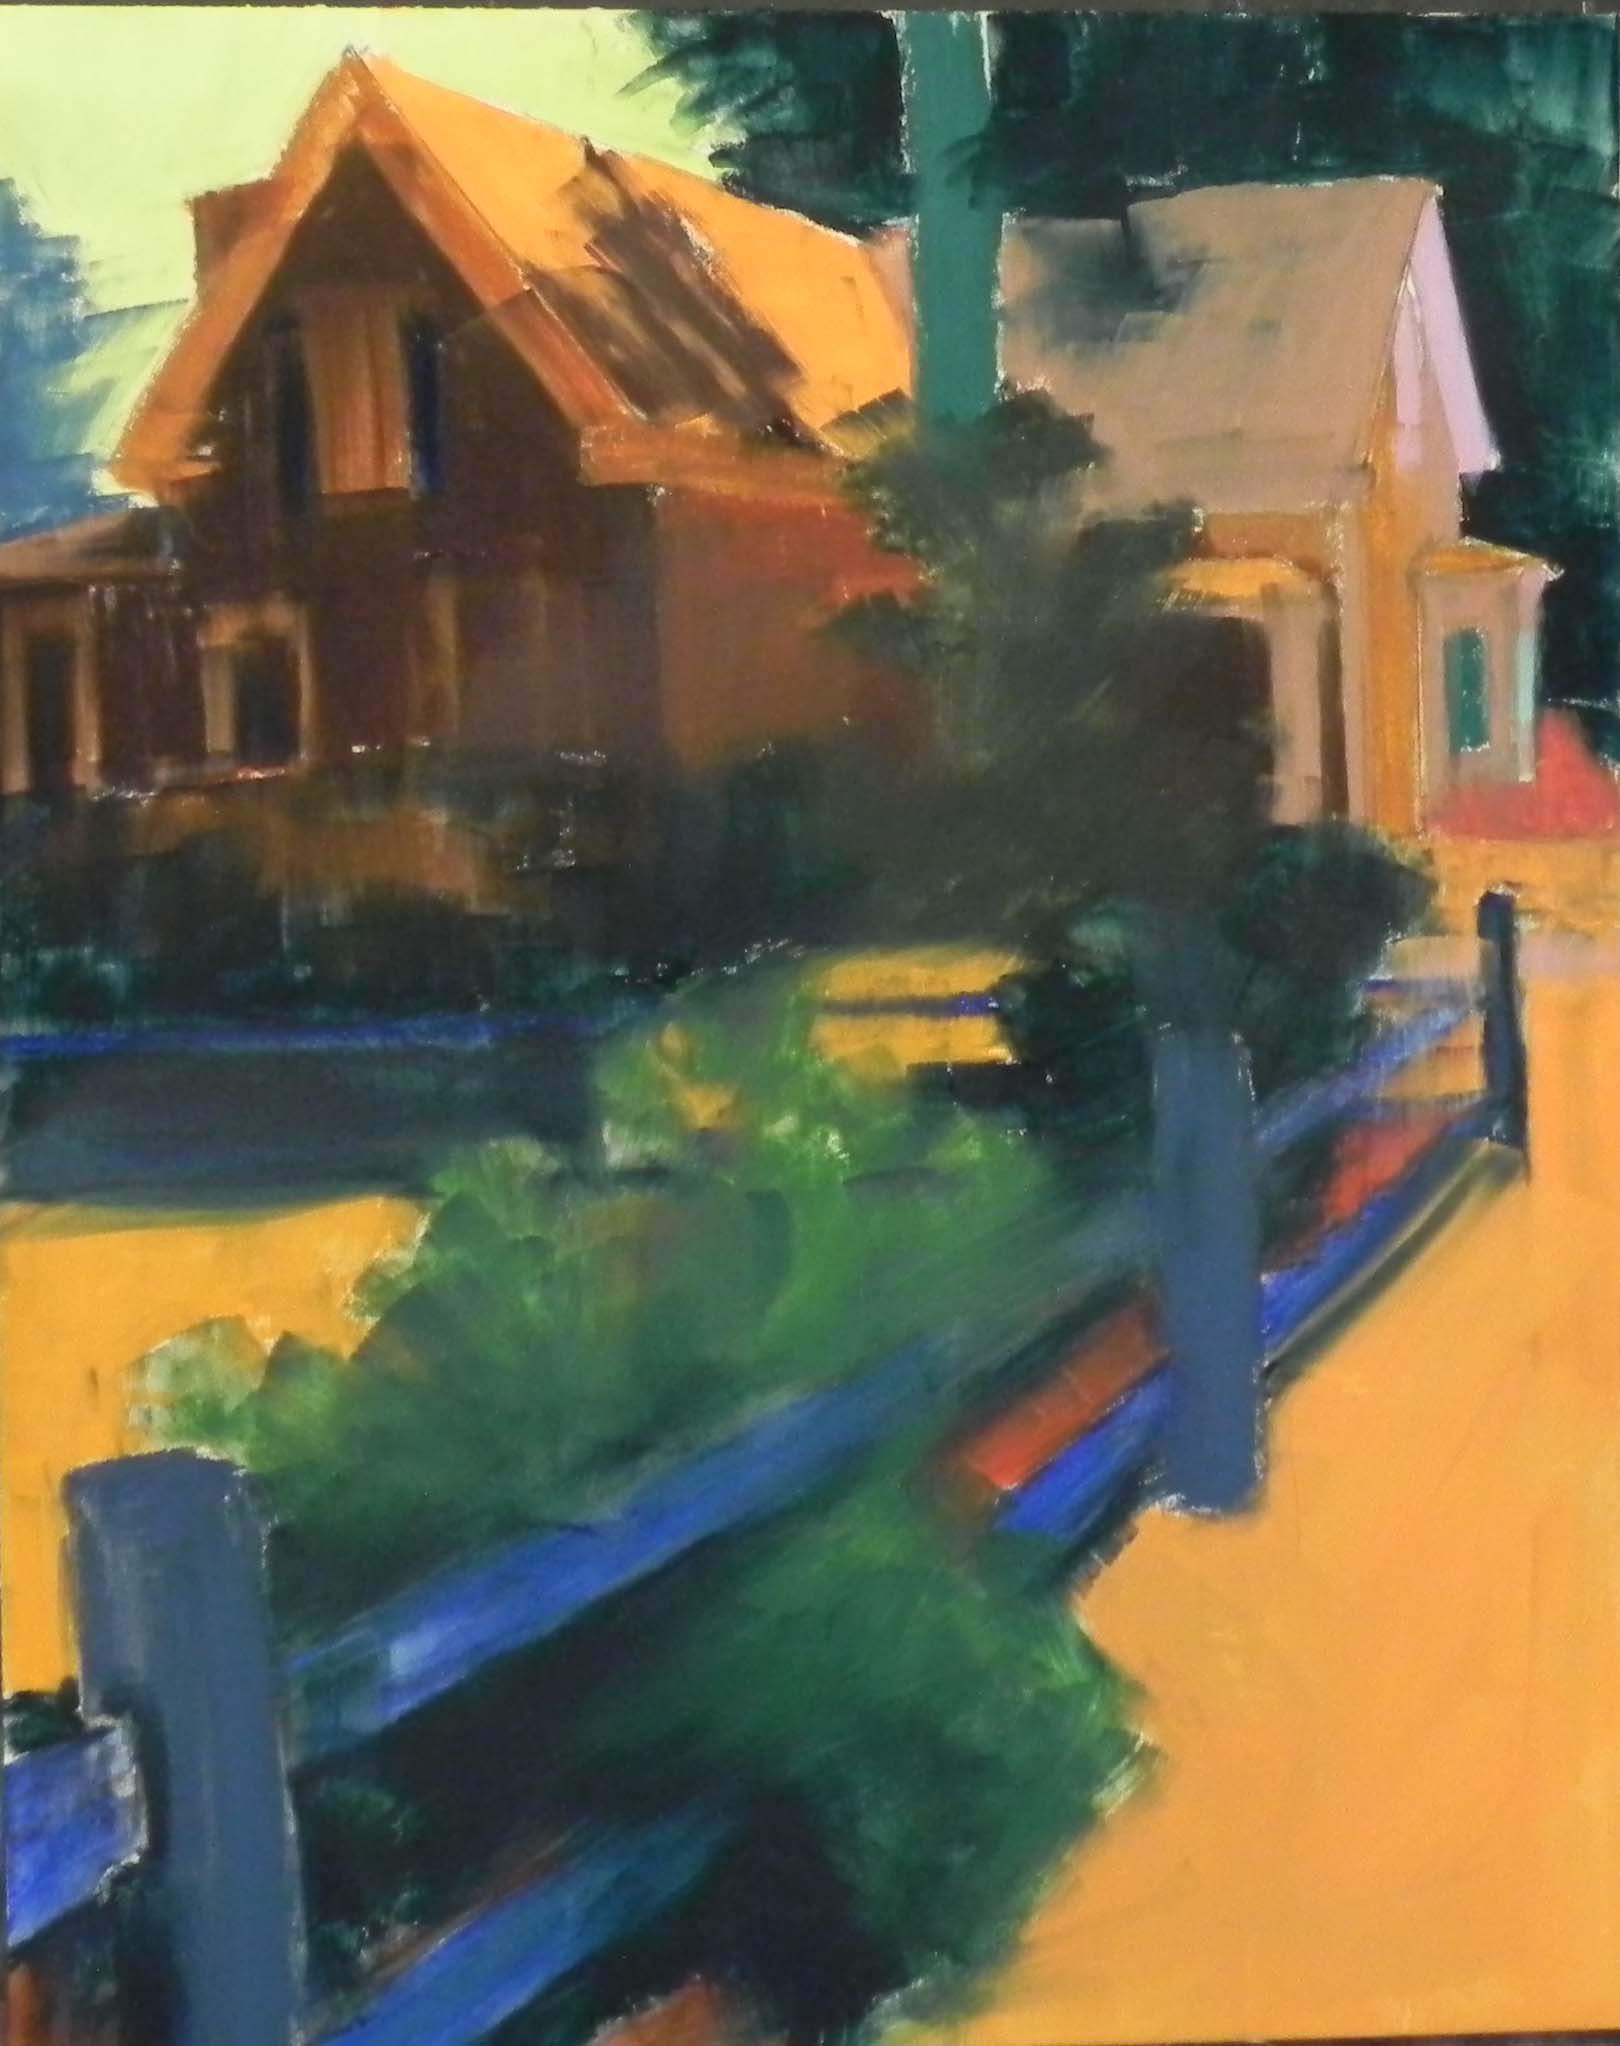
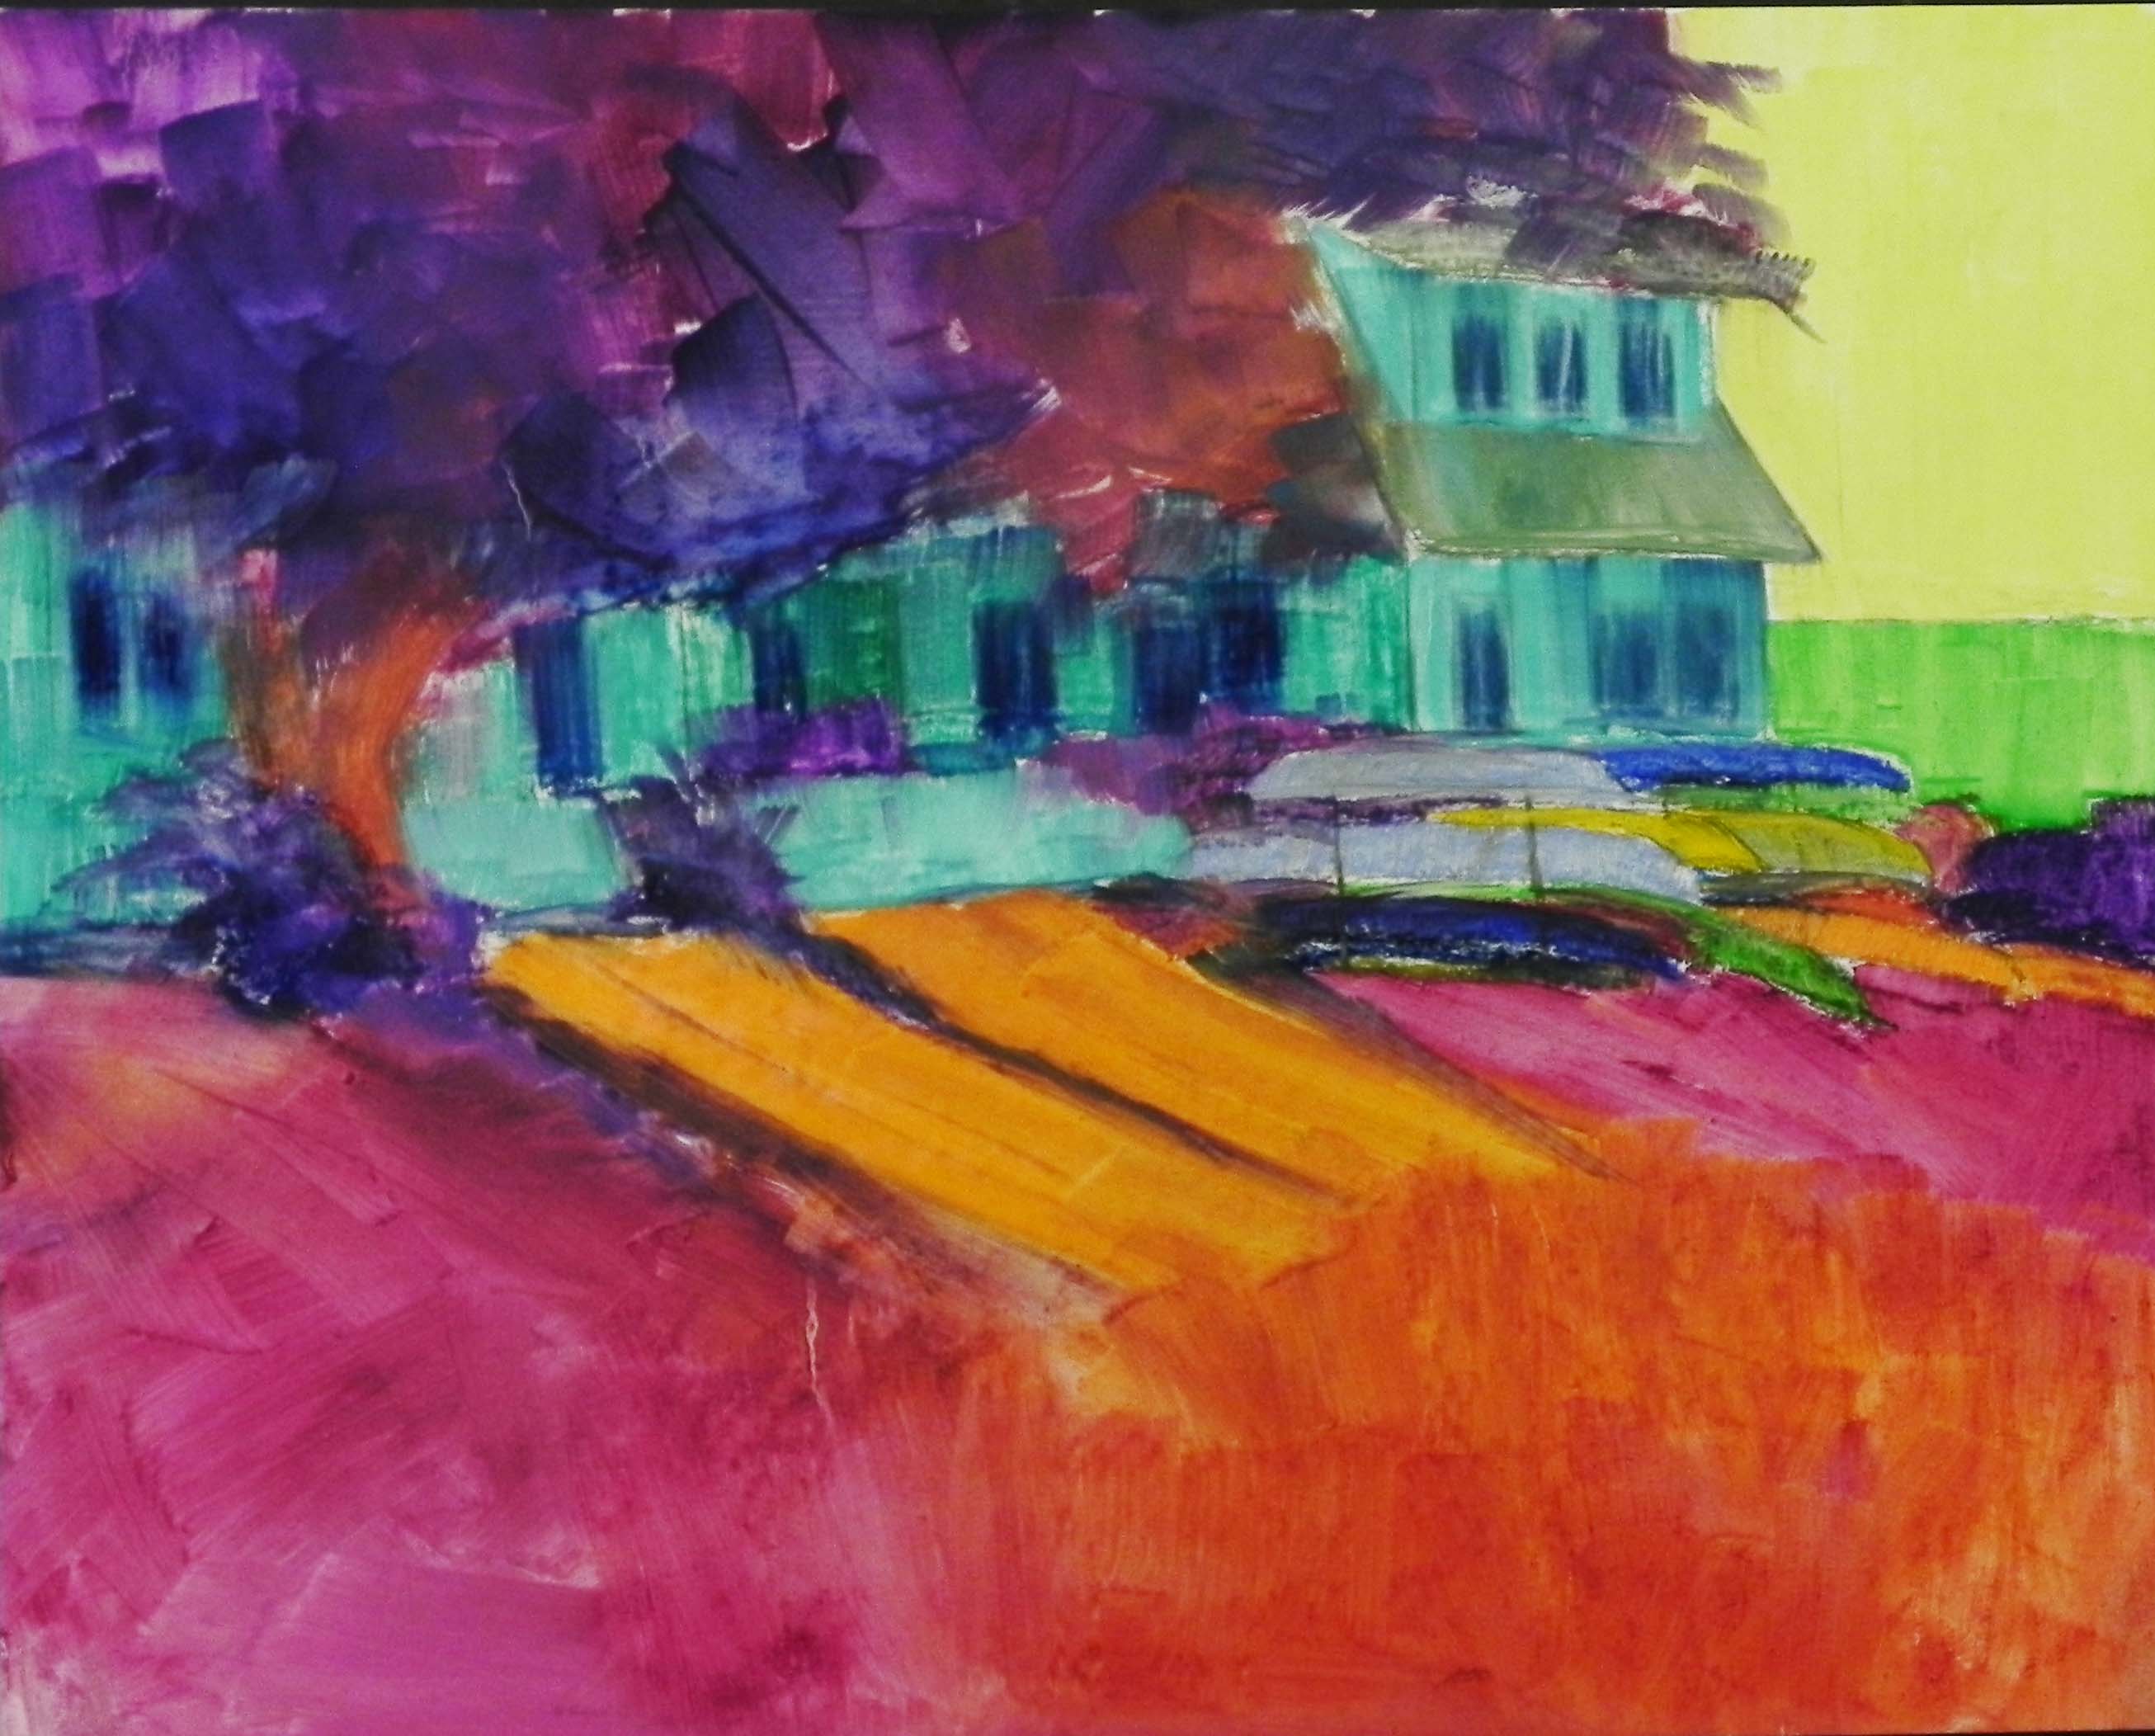
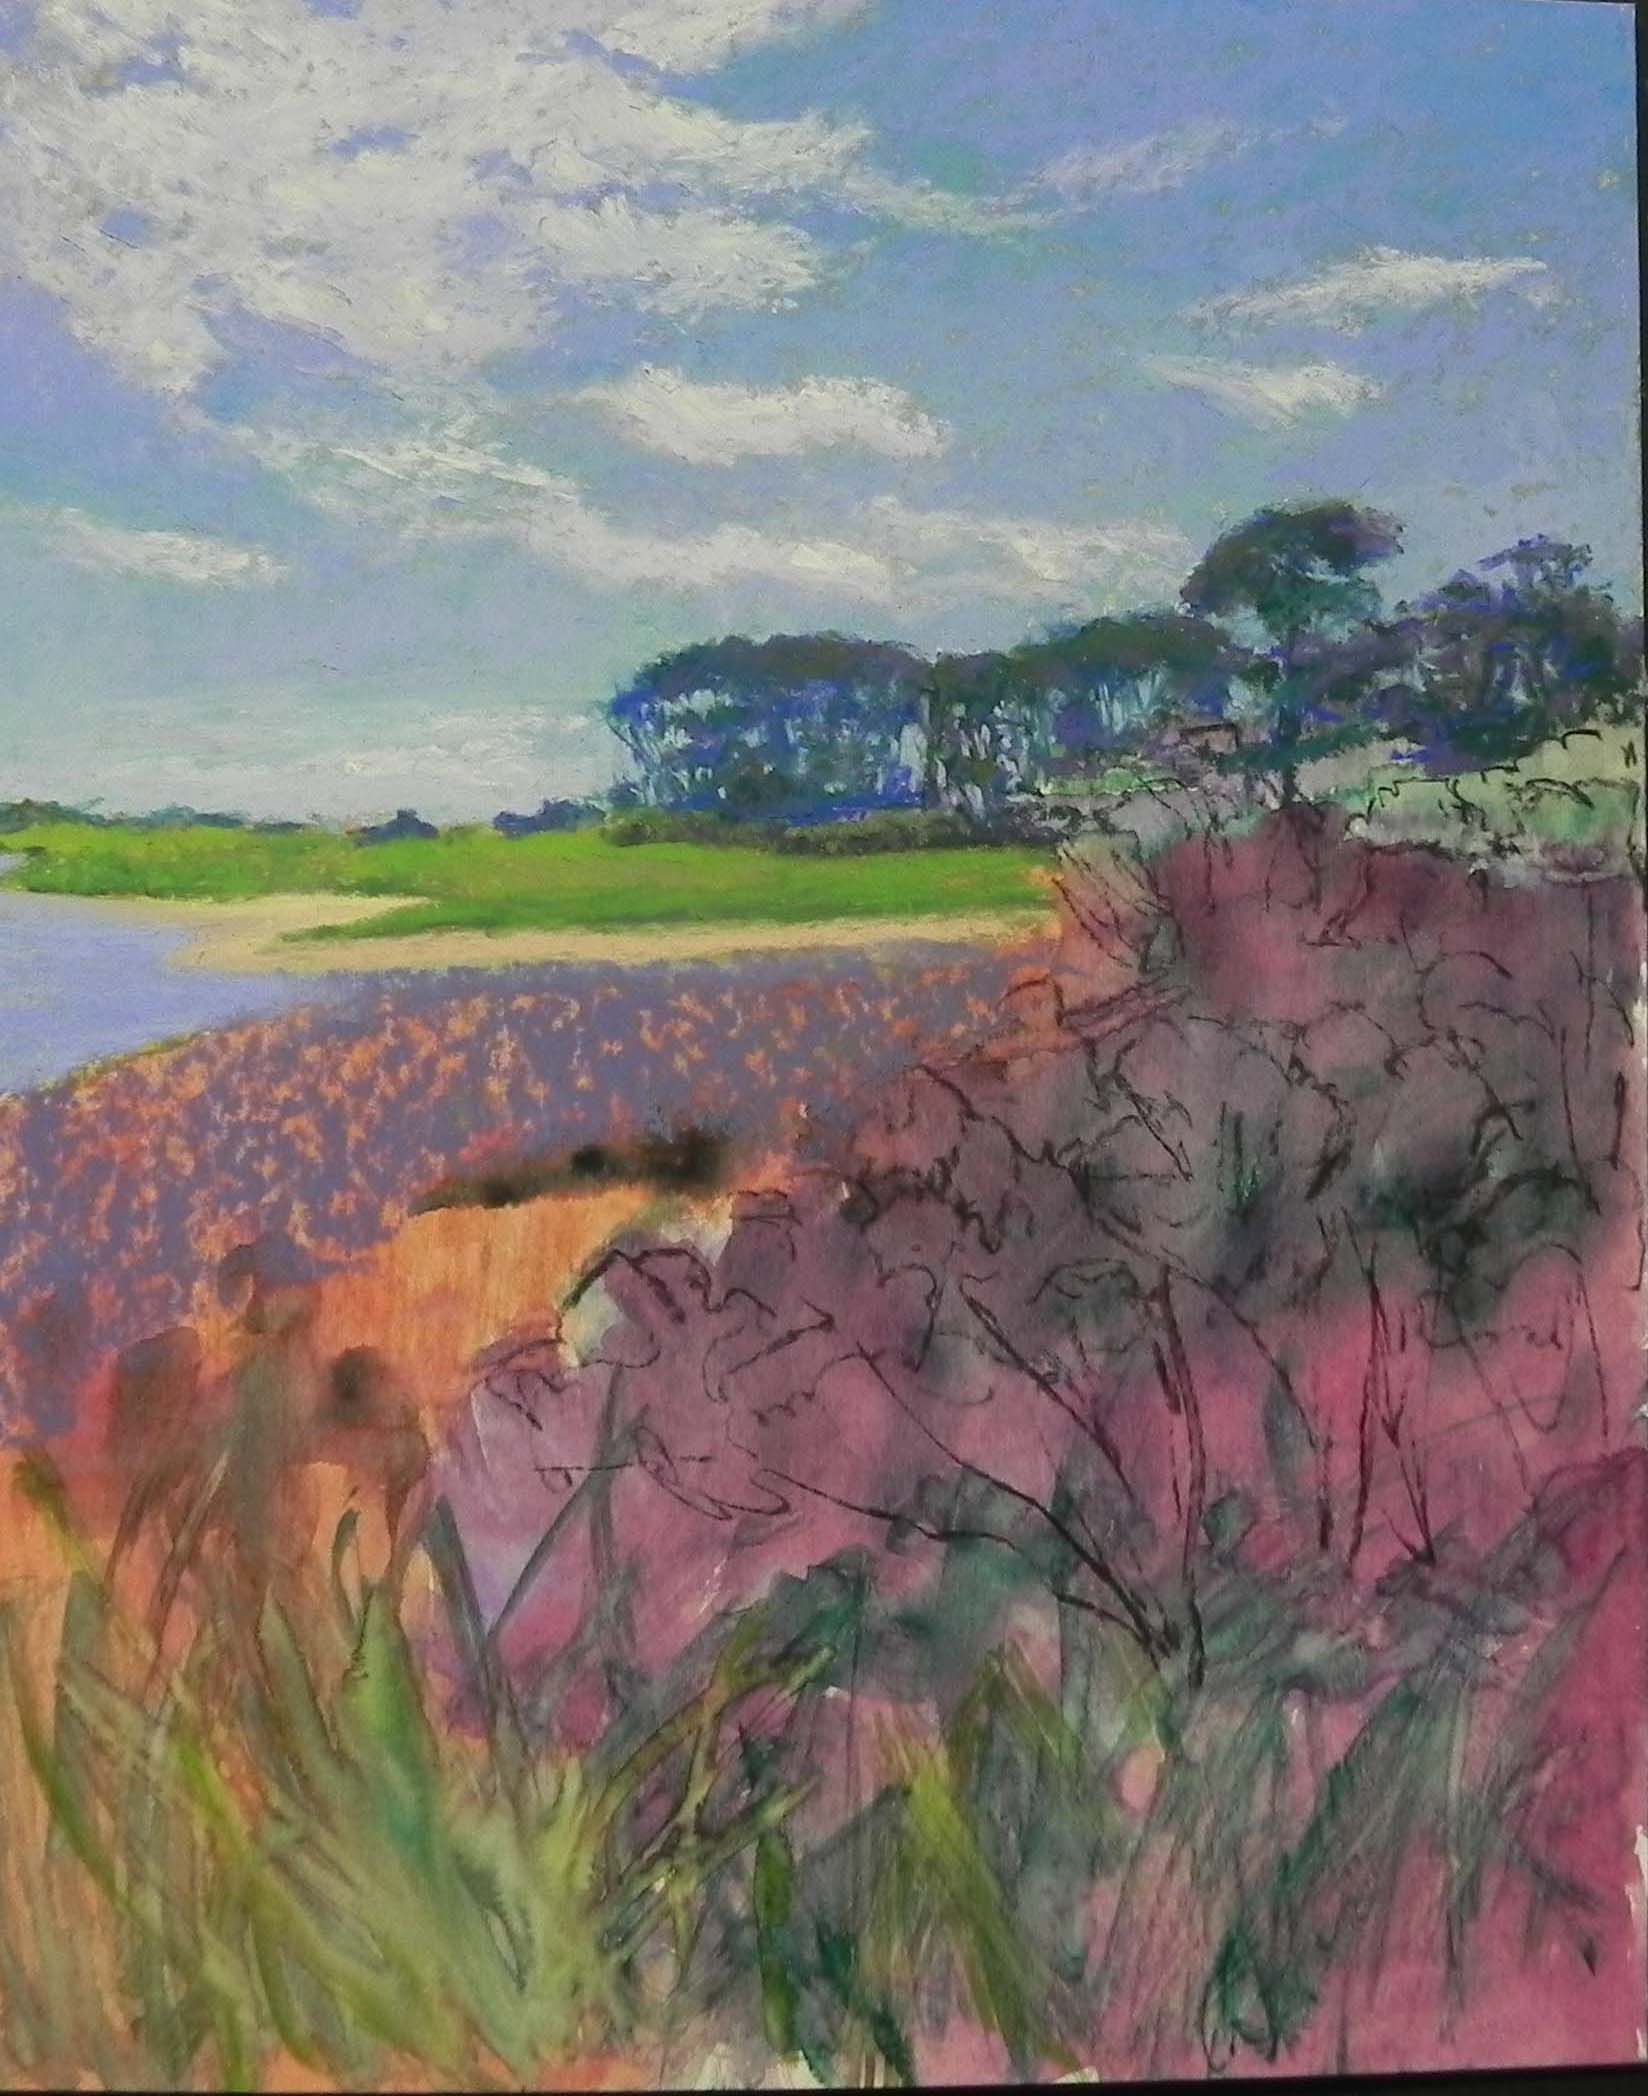
Initial layin of sky with soft pastels

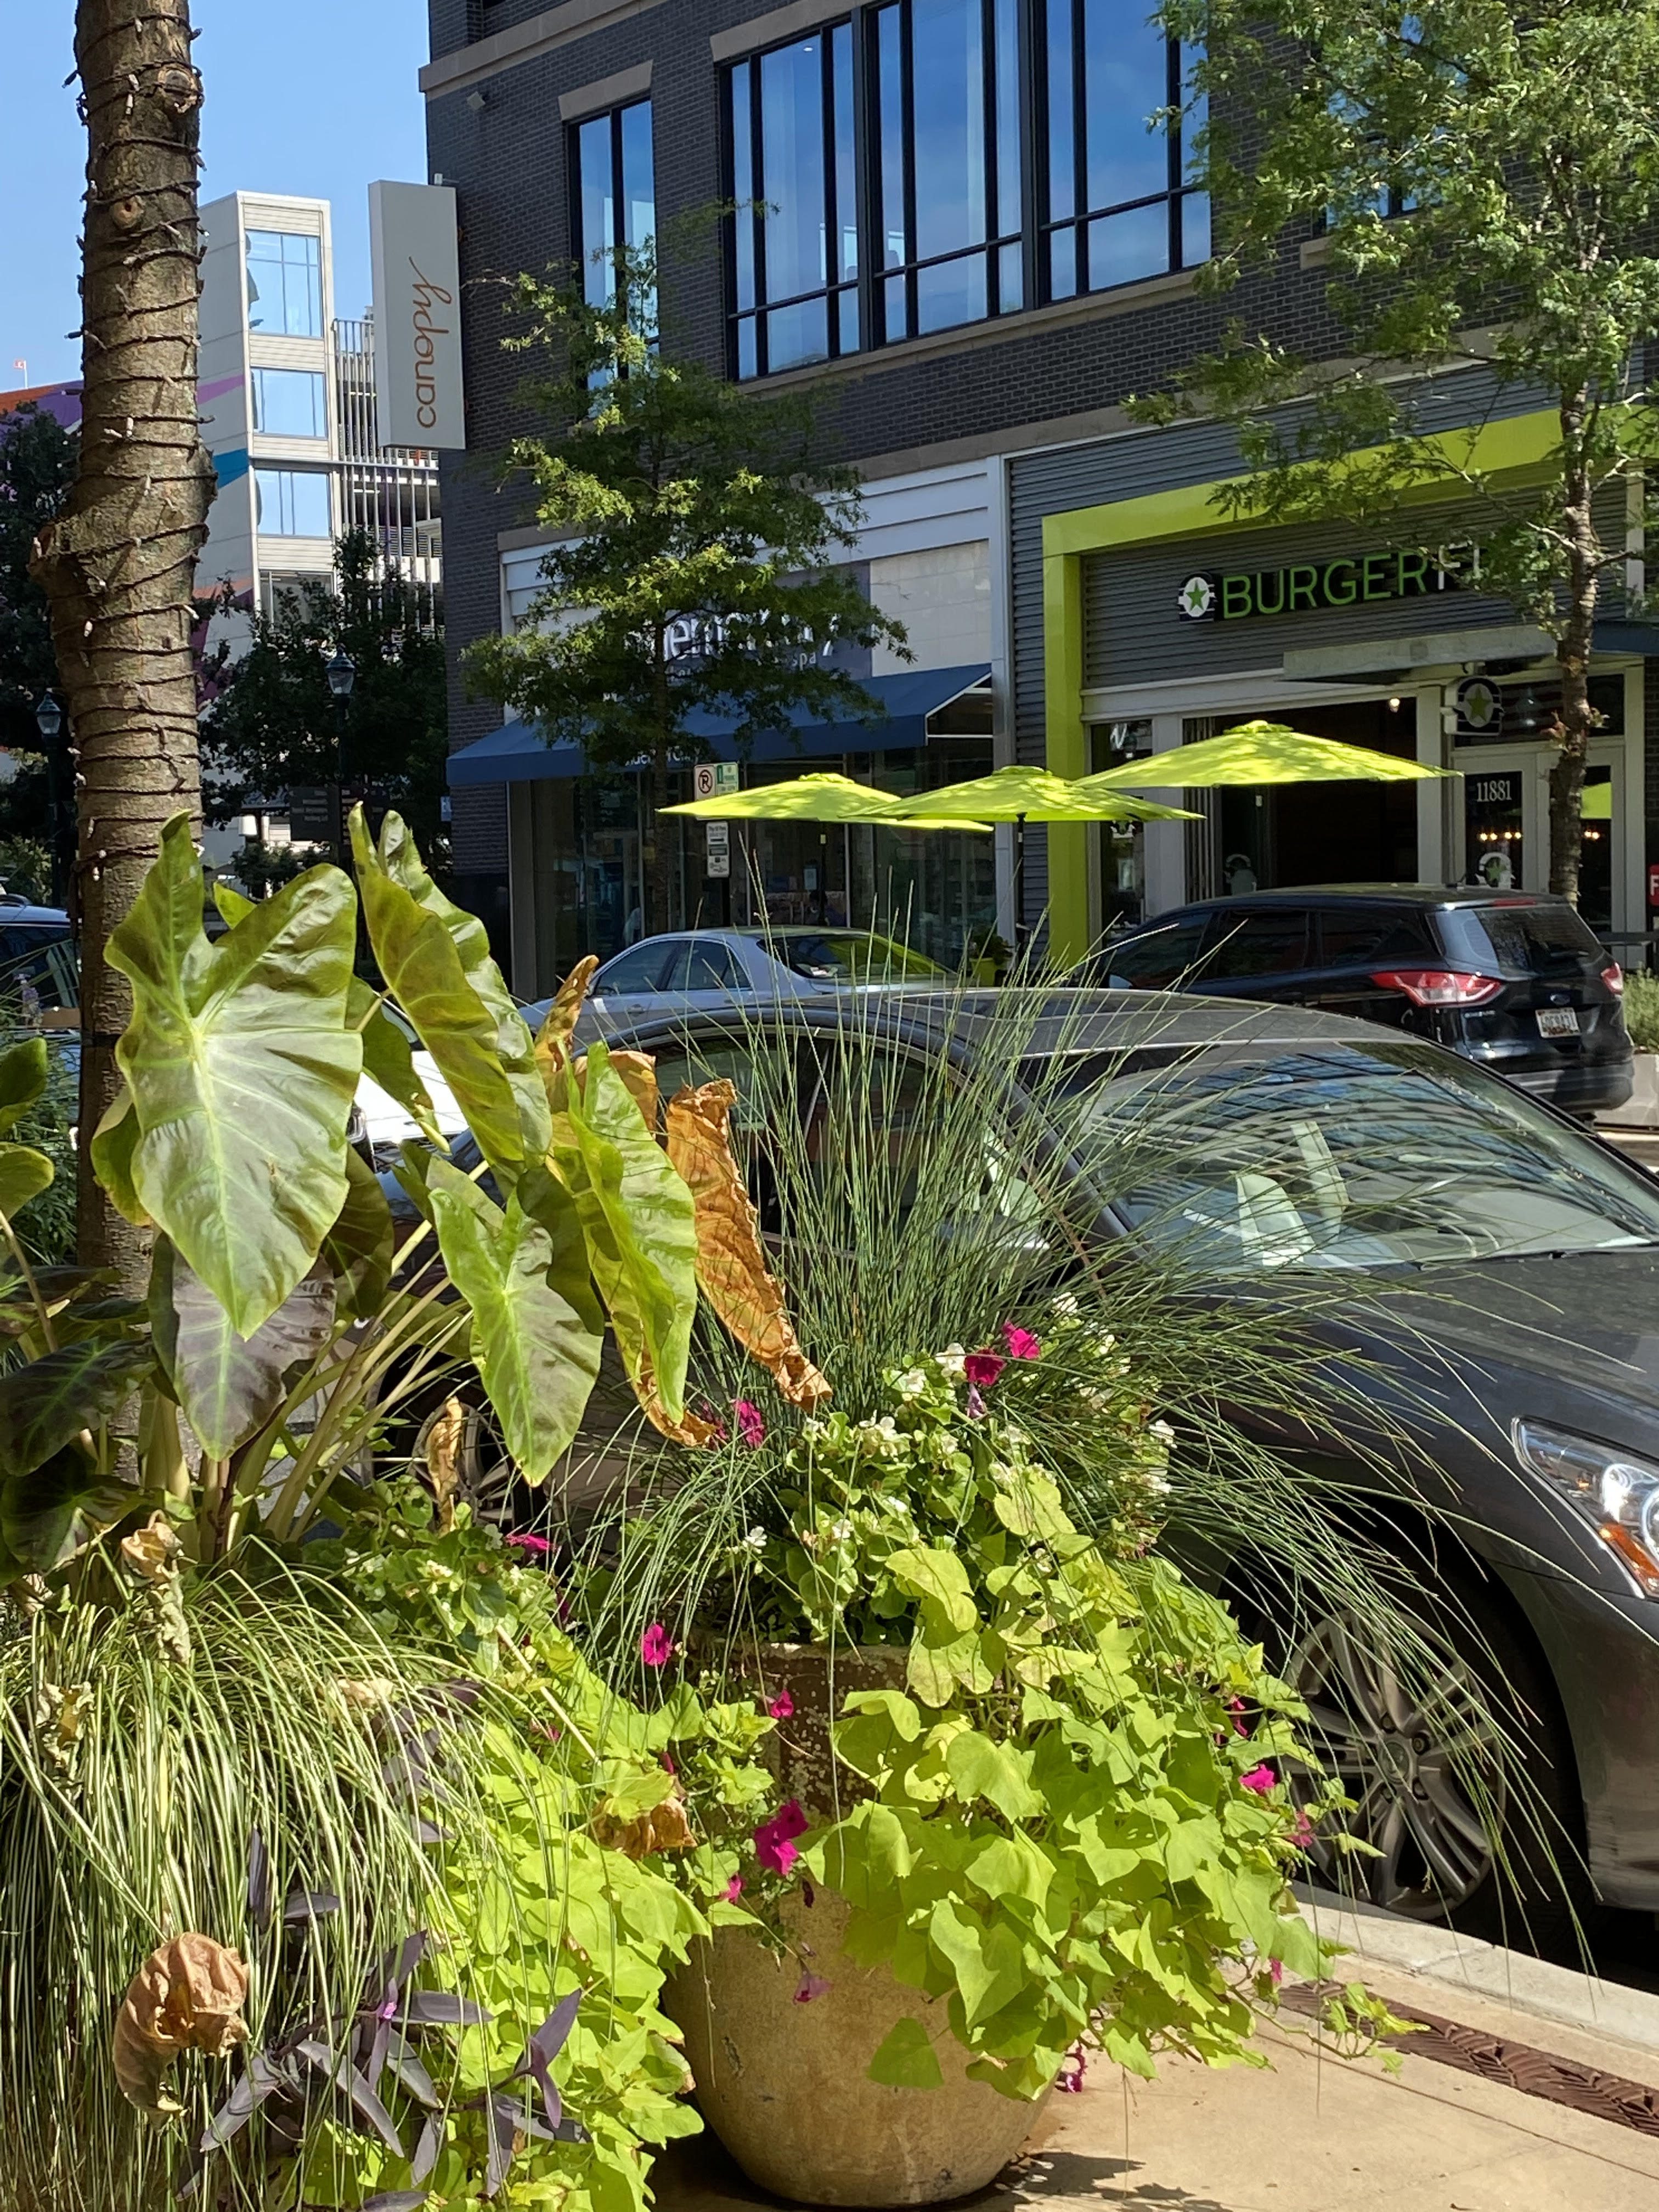
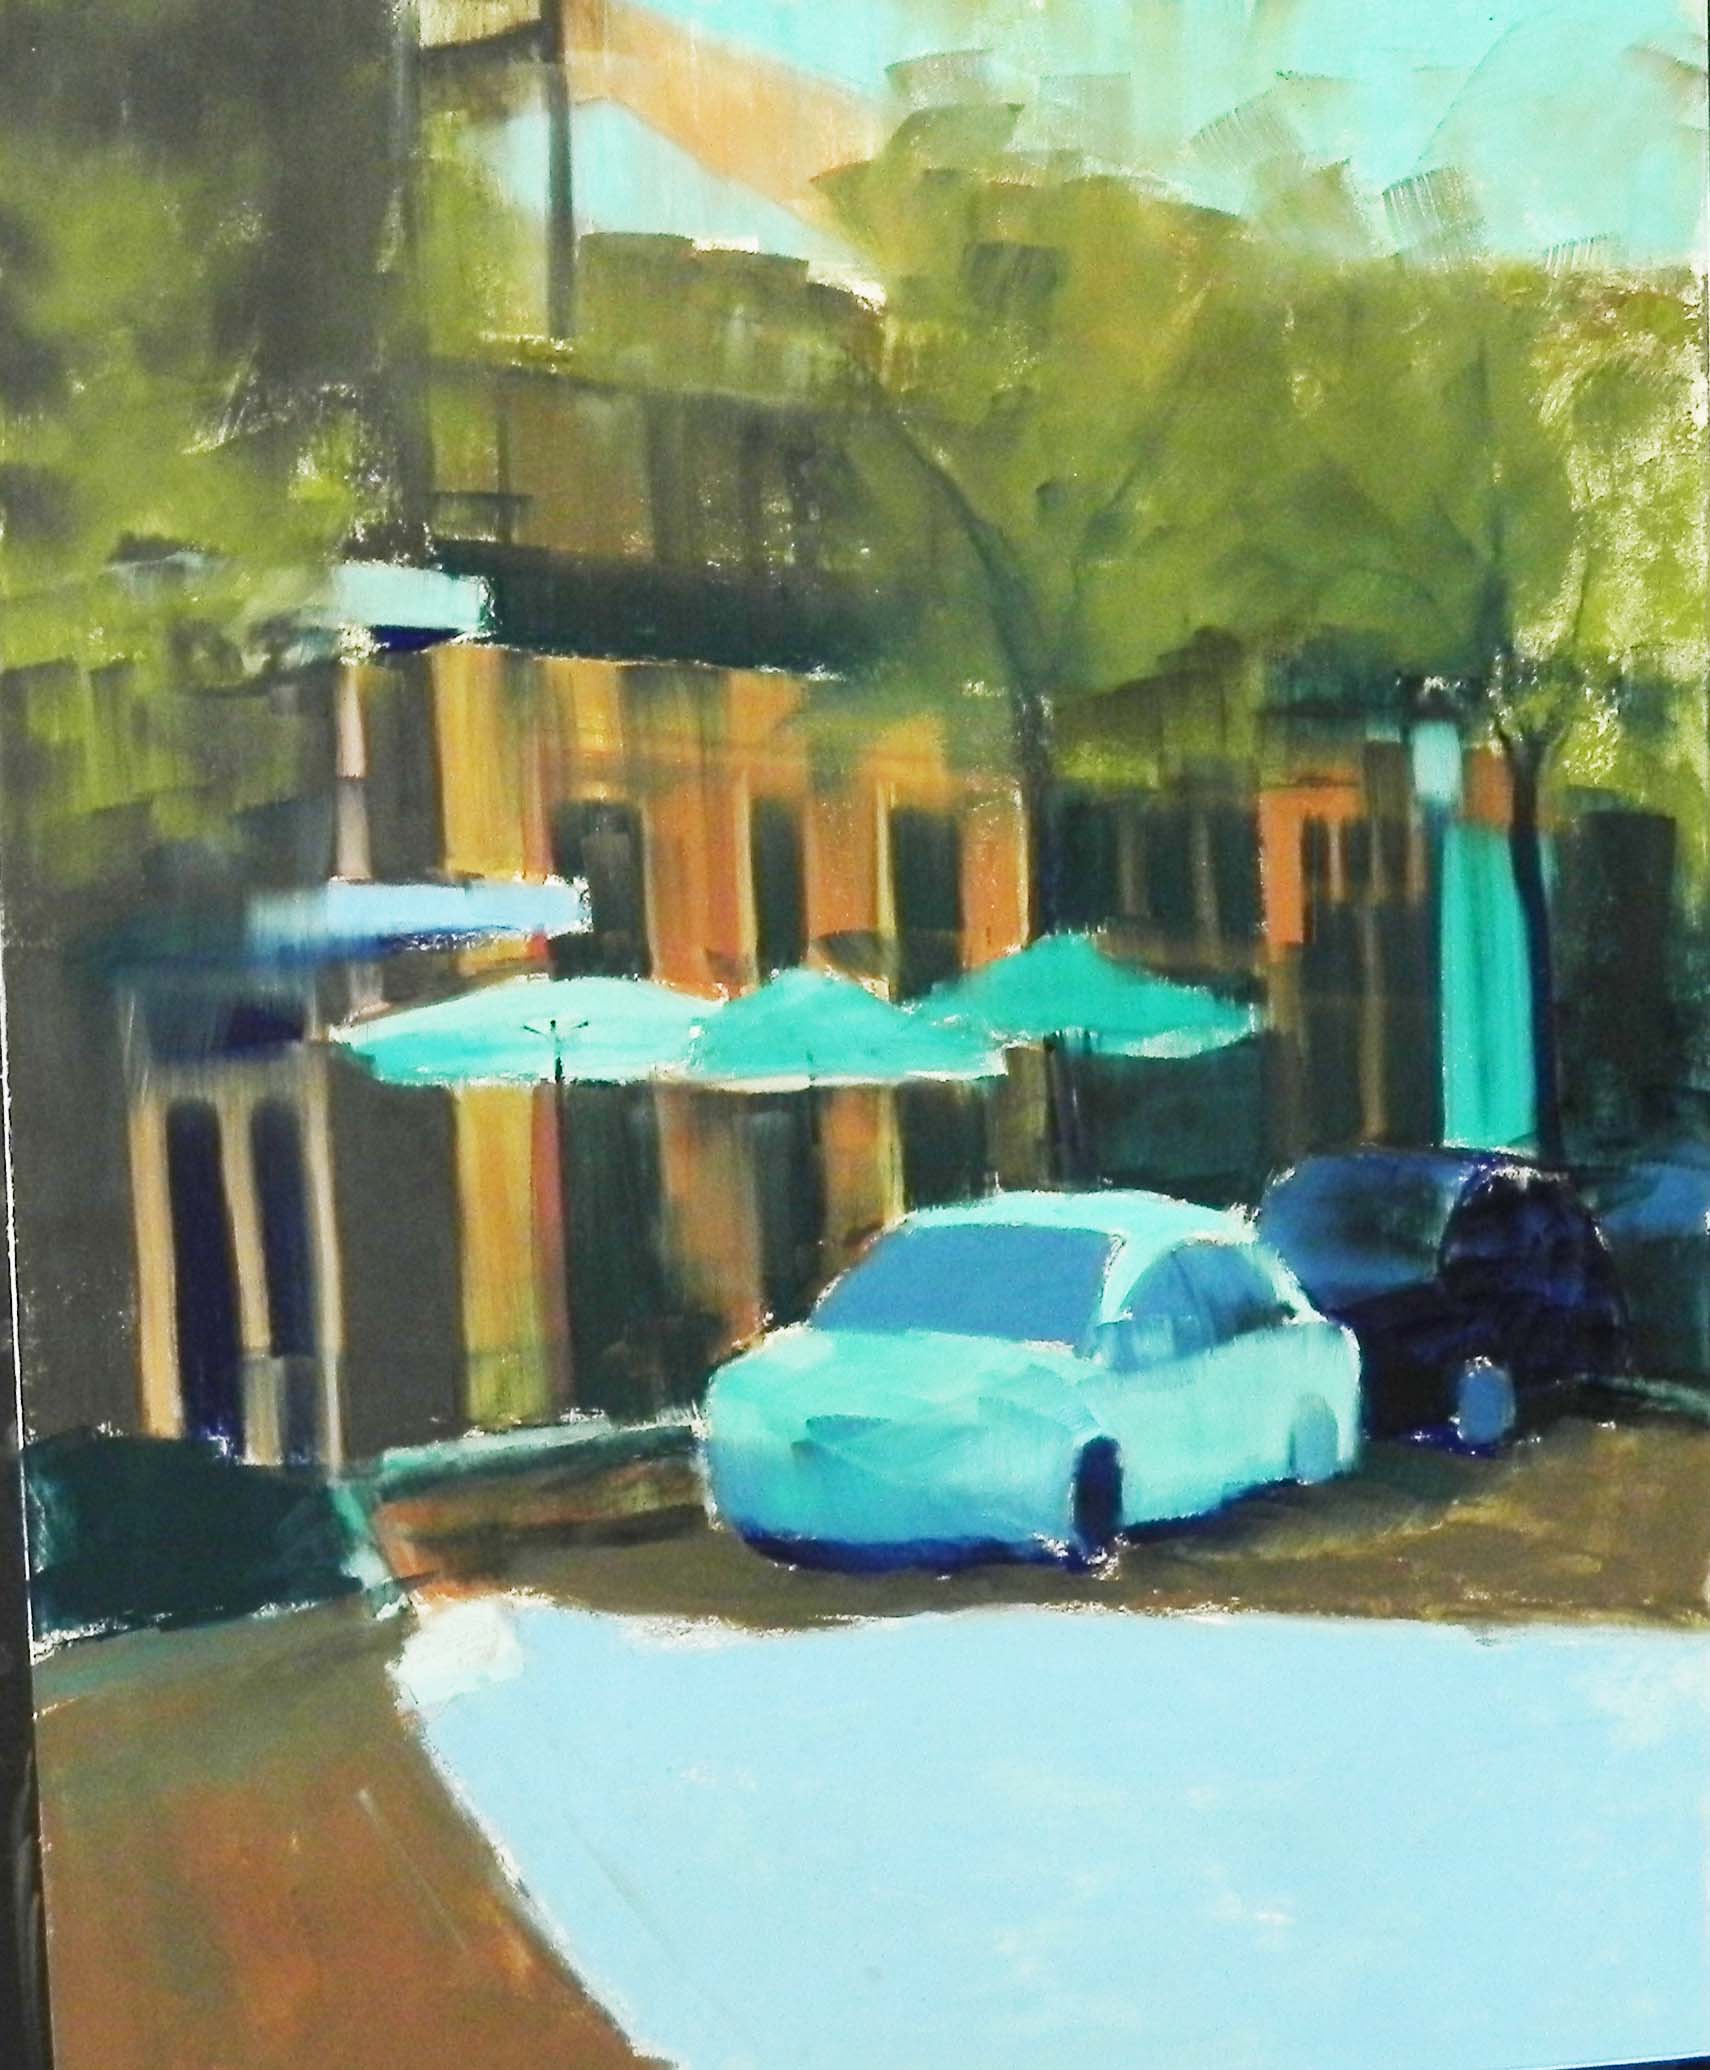
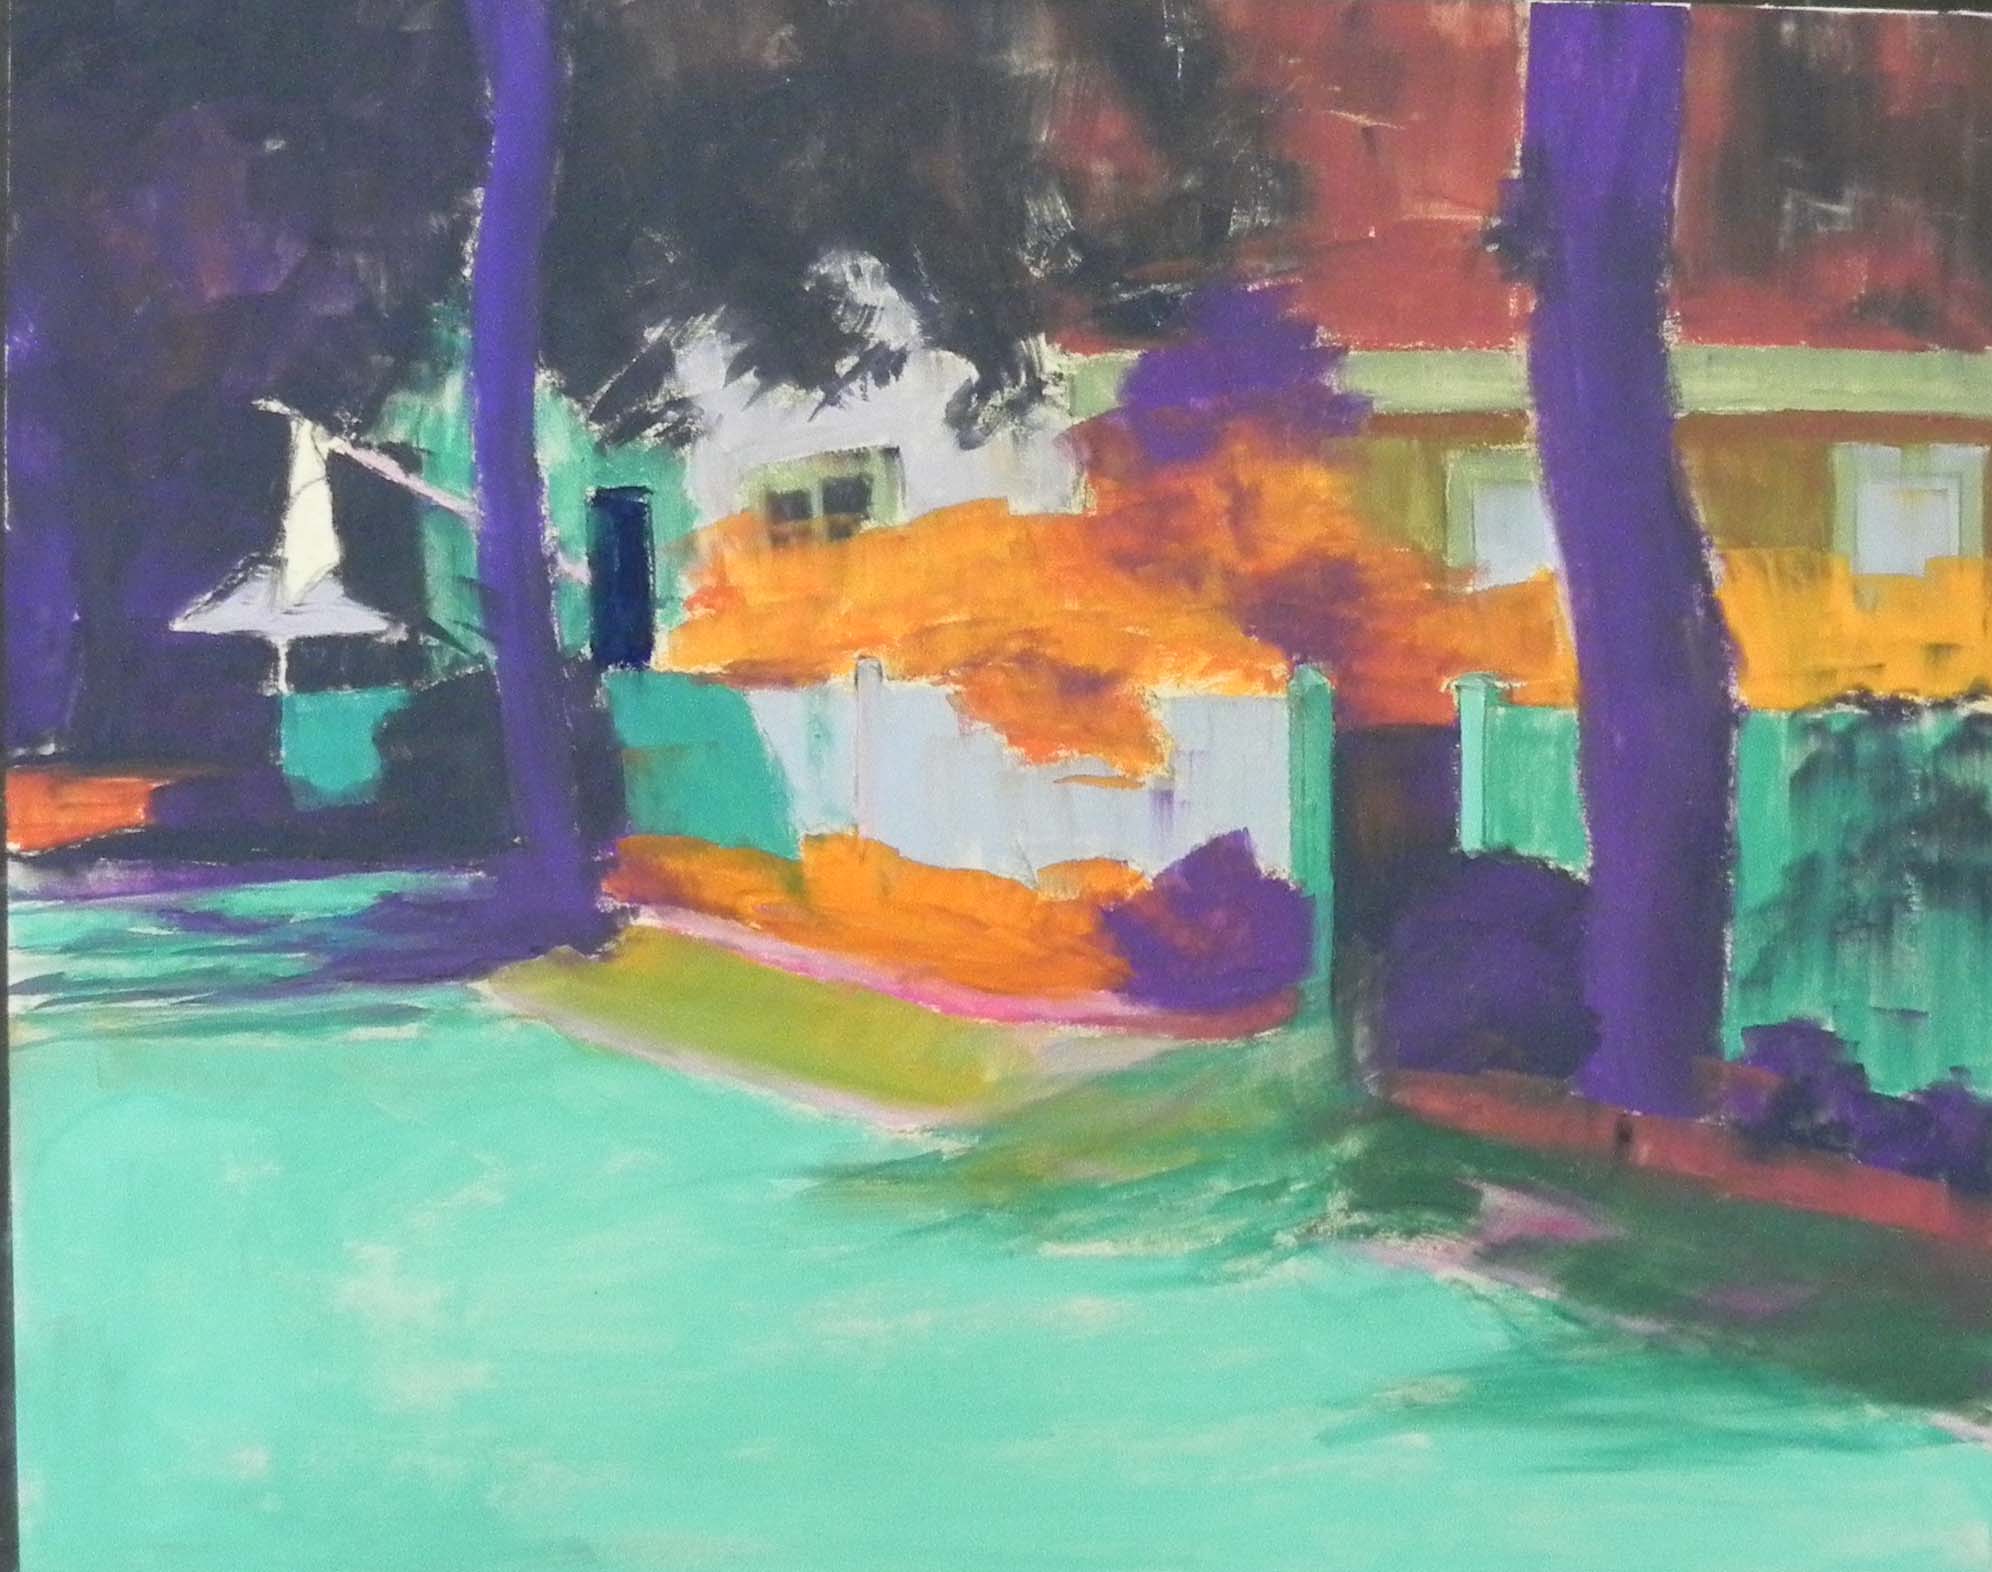
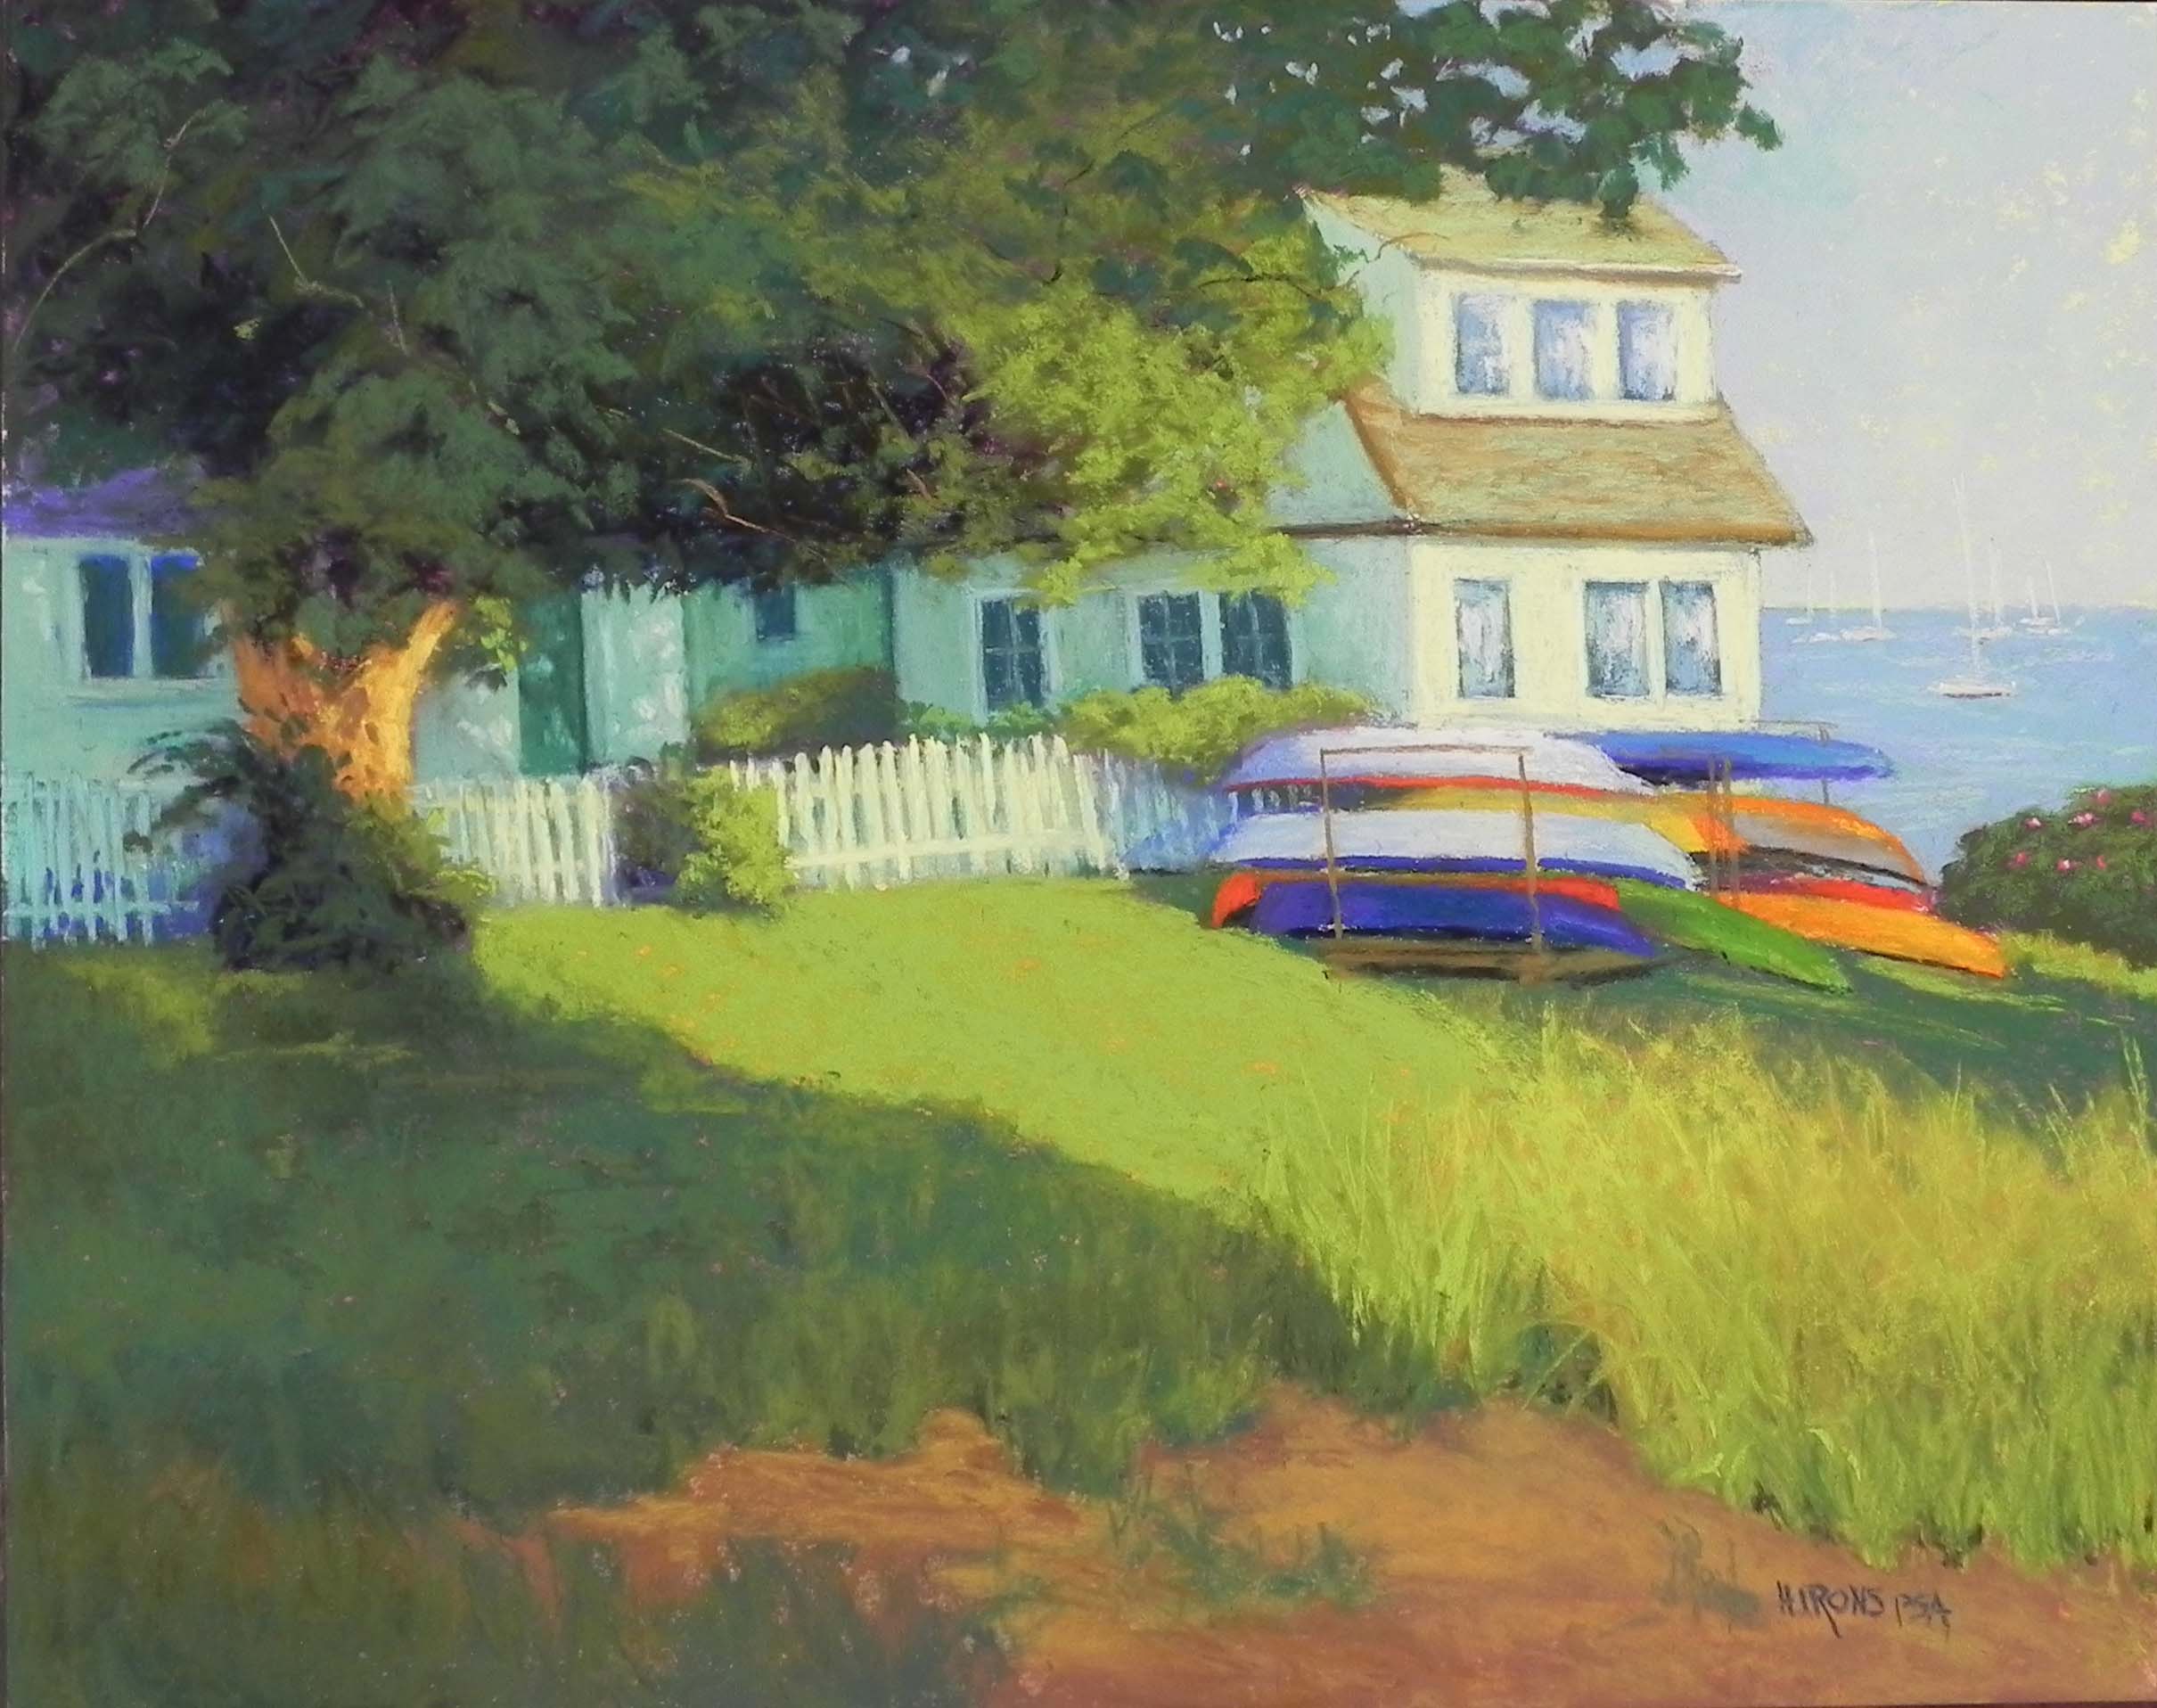
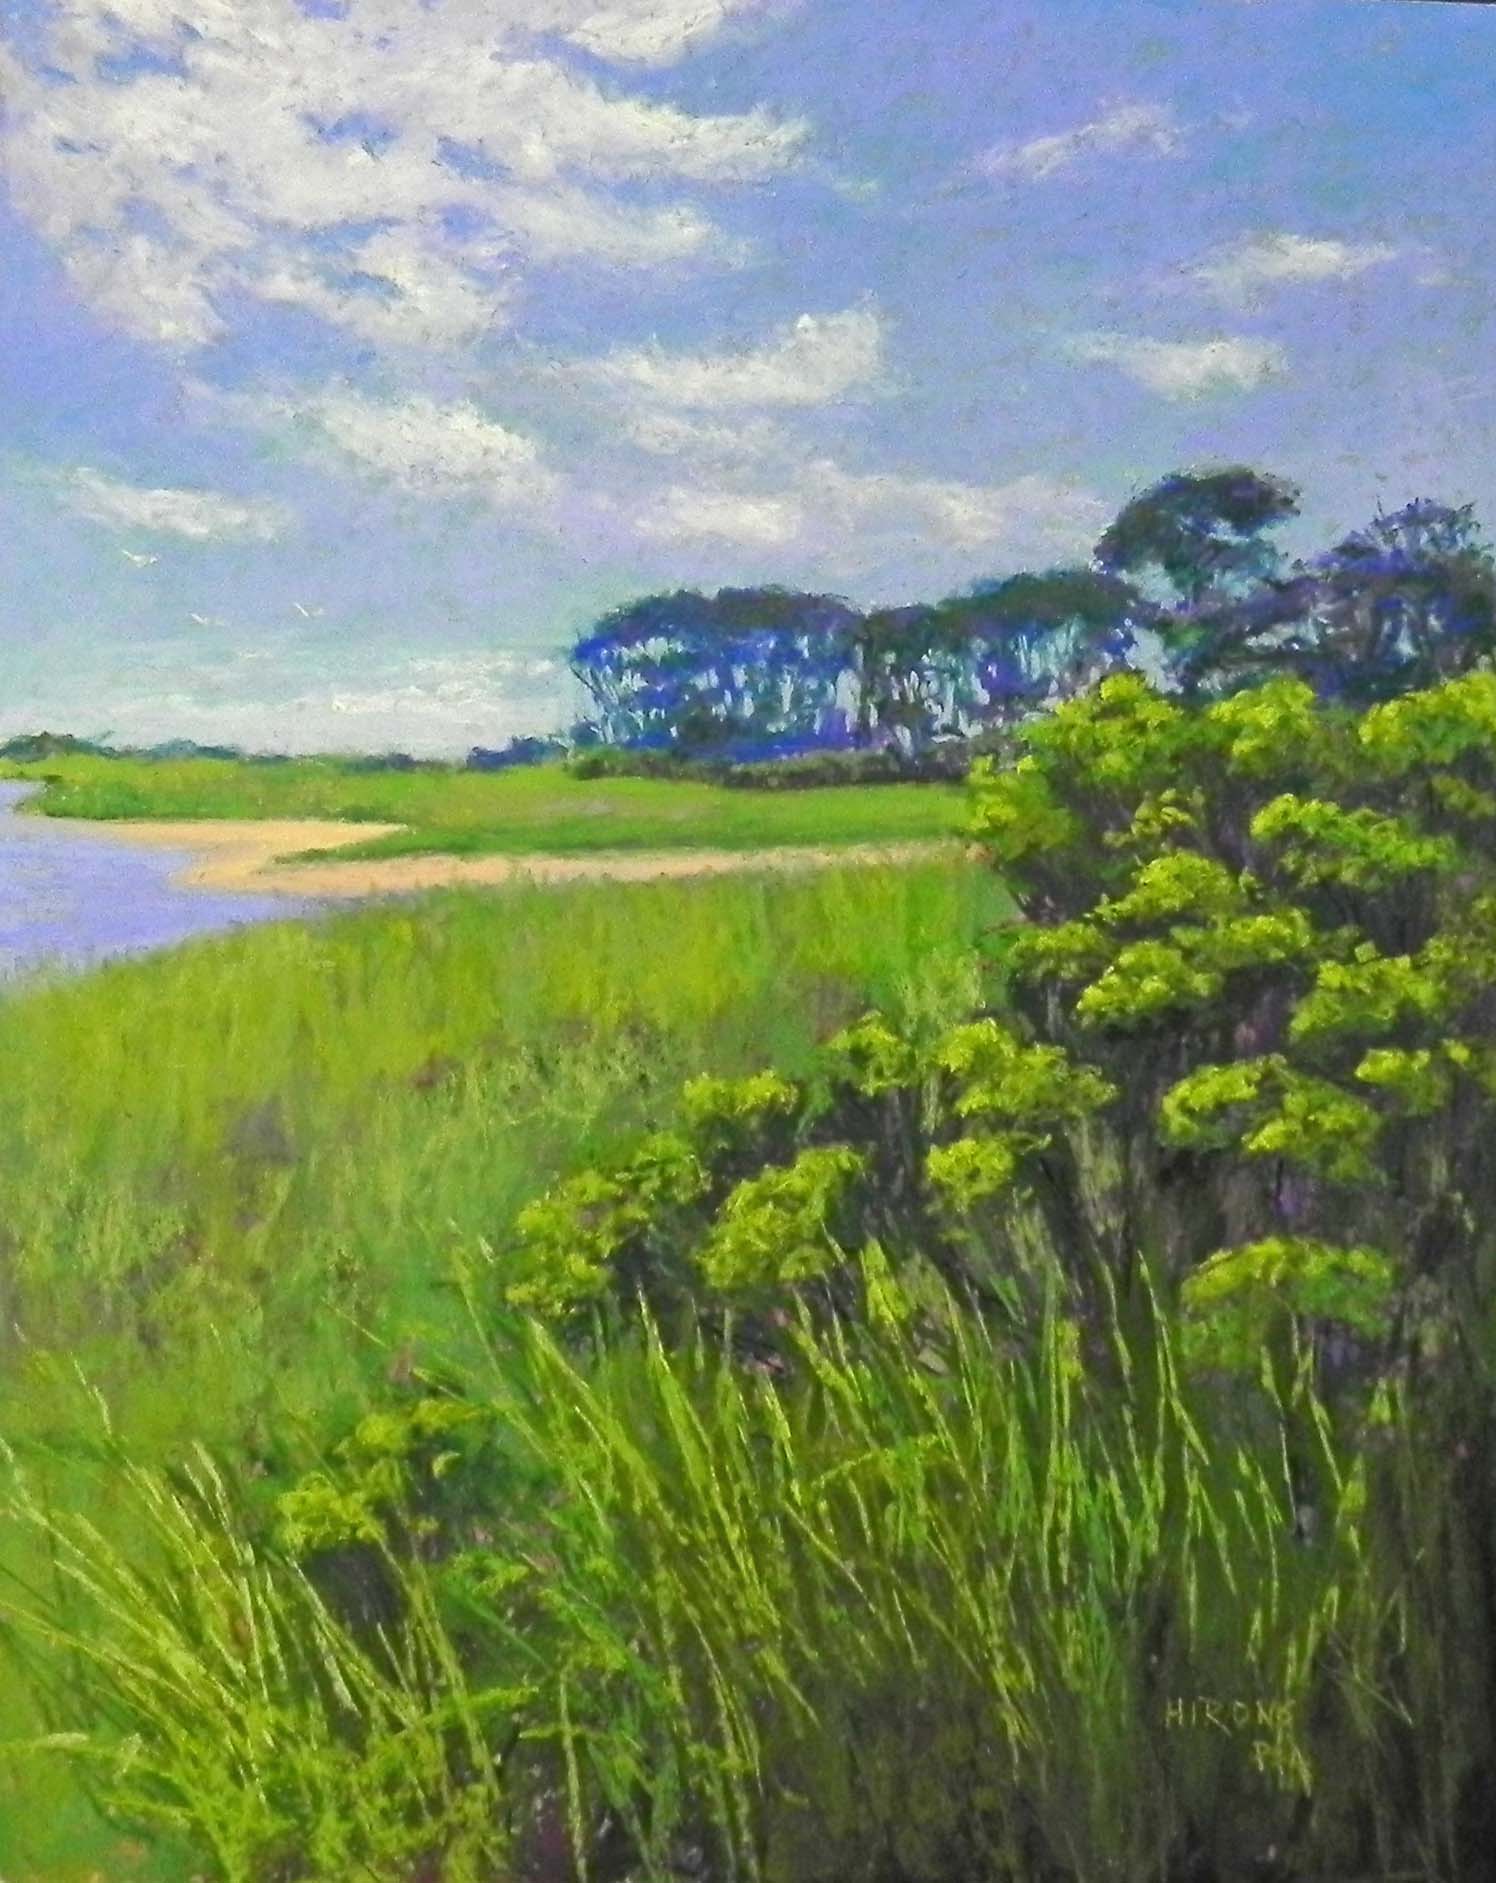
When we were in Portland on our trip to the Northwest in October, we took walks in the early evening and morning and I experimented with taking shots with low light.  My Iphone 11 was supposed to be good at this and the shots came out really nicely. So I  wanted to paint my favorite one of a bungalow with beautiful blue sky behind it.  I did a half size drawing and immediately decided to add more to the sky and some of the road.  Then I did a color study on black Canson and realized that working on black was the way to go.  SO–I ordered 5 16 x 20 UART dark boards and eagerly waited for them to arrive.  A friend who paints with me has been using it for some time and I was happy to finally have the chance to give it a try.

The paper is much darker than it appears in the photo (cell phone really adds a lot of light), but it’s not black.  However, you can’t use graphite, so I used a pastel pencil.  I hate sharpening them and resist using them!  But for this painting, having an accurate drawing was essential.  I tried a hard pastel and it was too think and ungainly to use.

I began with hard pastels and, as you can see, started the sky too light.  But it didn’t seem to matter. I basically used the colors I was seeing but focused on blues and greens.  What I wanted was a painting with a lot of nuanced color with light hitting the trim on the window and posts, as well as the car.  The light was from a street light–no moon, unfortunately.

While i was working on “dark”, nothing ever seemed to be dark enough.  And now this photo, looks too dark!  I used a lot of my Terry Ludwig intense darks.  But I also used my Roche petit blues that I received as a gift last Christmas.  The grayed blue of the sky is a Blue Earth, but the rest of it is Roche. As are many of the colors, house, roof, etc.  They were perfect for this painting.

For once, I didn’t have a hard time doing the car!  It’s probably a Subaru (like mine) so it seemed quite familiar.

This is my first nocturne and i hope I’ll find more subject matter to do others. I’ve already started a quite different painting (also from Portland) on another of the dark boards and am loving it.  So who knows–this might be my next kick!


Moody Blues (Pike and Rose, #2)

Moody Blues (PIke and Rose, #2), 20″ x 16″, UART 320 board

Reference photo

10 x 8 drawing

Underpainting, stage 1

Underpainting with alcohol

It’s been awhile, once again, since I’ve posted.  But in the time since the last posting I’ve completed 3 16 x 20s and 3 9 x 12’s (which I won’t post).  So I’ve been busy!  This painting is my second from the relatively new area of N. Bethesda known as Pike and Rose.  And, it was a real challenge.  I’m including the reference photo so you can see what the challenge was–a tree and a car!  I really loved the greenery in the foreground, but I knew the car had to go.  That meant having to fill in the two cars that were there and the street.  And I had to make changes to the background in upper left as well, having removed the tree.  I seem to be in a blue and green mode these days!  I DO love the combination and had fun playing with various Ludwig grayed greens and blues for the buildings.

Unlike the last painting, where the umbrellas were the focal point, this time I wanted it to be the greenery in the foreground.  I had the umbrellas too large at first and I used Blue Earth pastels on them.  I then brushed it all off and made them smaller and used Girault, saving the Blue Earth for the foreground.

The biggest challenge, by far, were drawing the two cars.  I did several versions of the one in the back and brushed them both off.  Then took a reference shot of my neighbor’s car and used that!  I think it worked well enough.  At least the front is now distinguished from the back!

After adding all of the various blues and greens, I added the bright magenta flowers in the foreground (which were there), gave more of that color to tail lights, and added it into the windows behind the cars.  I really liked the effect.  I also made the vertical sign in upper left pink. I added the lettering using a hard pastel with the painting on the table and glassine over it.

I had no idea what to call this painting.  My husband suggested “blue mood”  which I immediately changed to Moody Blues!  Not sure how moody this picture is but at least it’s got a better title!

Chartreuse Umbrellas (Pike and Rose #1)

Chartreuse Umbrellas (Pike and Rose, #1), 20″ x 16″, UART 320 board

Graphite drawing

Underpainting, stage 1

Underpainting with alcohol

Hello Friends!  It’s been quite a while since I posted–one painting in Sepember and now one for October.  I started this one at least a month ago but had a lot of problems with it. And I’ve been away for two weeks.  (Lewis and Clark cruise on the Columbia River in Oregon and Washington.)  I had many problems with this painting!  It resulted in me ordering the Terry Ludwig Intense Darks set!  Came right after I returned.

But let me start at the beginning.  In early September, I had to be at Pike and Rose in Rockville to deliver miniature paintings for the upcoming show at Strathmore. It was early morning and a beautiful, sunny day.  I decided to walk around and quickly realized that this place was quite charming and might lend itself to a new “city” series.  This is a fairly new development off the Rockville Pike, with nice stores, colorful umbrellas, and lots of potted plants.  Subsequently, I went back and took another series of pictures and this first (only?) painting is from the second set.  I really liked the way the sun was gleaming on the car and the way the umbrellas were radiated reflected color.  And, while the top is a rather strange configuration of pieces of colored steel, it forms a nice triangle, and with the shading on the street, gives some structure to the composition.  I also like the way the strong diagonal line of the shadow, leads to the light piece of side walk, which leads the eye to the umbrellas and car.

However, this was a challenge!  First, I didn’t get the drawing right and had to correct the lower left side, which is really critical to the success of the painting.  So I brushed it all off and redrew it.  Then I found that the colors I used just weren’t dark enough.  I was using the Blue Earth sets and using the darkest colors in them, but they weren’t working.  So I ordered the Ludwigs and found them to be more successful.  I really needed the background to be dark to set off the umbrellas, and I also wanted to keep it from being too detailed. Before applying darker color over what I had, I sprayed most of the painting with workable fixative. That allowed me to apply the darker colors without it looking muddy.  And I have to say that the Ludwig set is really DARK!

Everything in this painting was difficult–the street, the trees, and especially the cars!  The first car is, of course, the most important, being the center of interest (not something I normally do).  John pointed out that the wheels were too small. I made them taller and it looked much better.  But the sunburst on the windshield took three tries.  The first two had too much light and it looked really hokey.  So I lessened it and found it to be much better.

It’s been awhile since I did a city painting and it reminds me of how much easier a landscape is!  I hope I’ll do more with this series.  We’ll see.  My other painting in progress is of Mt. Hood at sunrise–quite different.

Autumn Hydrangeas (Cape Cod)

Autumn Hydrangeas, UART 320, 16″ x 20″

Underpainting, stage 1

Underpainting with alcohol

It’s been awhile since I posted.  Since doing my last 16 x 20 house painting from Maine, I’ve done six small paintings for December shows at two galleries. And I started teaching my classes this week.  But I was back in Massachusetts last week and got a few lovely shots from Sandwich on Cape Cod.  Decided to do this painting of hydrangeas, after having painted the June roses.

I loved the subtle color of the flowers, along with the green and orange roofs. And then, of course, the reflections of the flowers in the windows!  My original drawing left out the light post and the pot with flowers in lower left.  But when I was doing the painting, I decided it needed both, but I moved the lamp post to a spot I liked that would break up the hydrangeas.

I used violets, oranges and greens pretty much throughout the painting and in the shadows. But the blue of the sky is pretty intense and it needed to be reflected in the windows.

I did several color studies to figure out the colors of the hydrangeas. I began with a grayed orange from the Blue Earth set, then a very warm green, followed by some very light grayed whitish green and a little coral color.  The result was just what I wanted.

I also wanted a soft, more impressionistic look to the picture, which I probably didn’t get, but I decided to add some light orange to the lower part of the sky, which you can see above the orange rood.  I also left some of the yellow green underpainting show through in tiny pieces.

I hate doing shaddows on lawns!  I realized that as I was struggling with this last part of the painting!  But I loved painting the smaller building on the right and the bush in fronot of it.  The smaller details were fun in this painting.

Got my husband’s approval and wrapped it up in glassine, then unwrapped and reworked about five times!  Now I think I’m finally done.  I was originally planning to do this as a demo–what was I thinking???!!!

Two Houses, Portland, Maine

Two Houses, Portalnd, Maine, 16″ x 20″, UART 320 board

Underpainting with alcohol

I’ve just completed another painting from Portland, Maine.  This one has no roses or flowers of any kind. But a lot of windows and leaves!  The drawing took most of my free time on Saturday.  For the underpainting, you’ll see that I ended up using local color for the houses.  For the foliage, I used what’s become my favorite NuPastel–Prussian blue. This was such a complicated picture, I decided to use the real color, but a little darker. I liked doing that in the last painting with the brick building and it worked quite nicely in this as well.

While everyone else wants to be loose, I find that I LOVE detail!  Particularly the small details of light and shadow, like in the small window in the middle of the painting.  This turned out to be one of my favorite spots.

Doing the shadows was fun on this picture.  I used a combination of darker yellow oranges and yellow greens for the yellow trim in shadow. For the cast shadows on the yellow house, I used a yellow green mixed with the same turquoise from the left side of the house.  For the darker blue shadows, I used brown and two blues.  And in other areas, such as around the lower window, I used pure pieces of dark turquoise.  This turned out to be the most enjoyable part of working on this painting.

I was concerned about the complexity of this painting and what the center of interest really is.  The light strongly leads to the yellow house.  But there is the porch at left with rainbow Pride flag, and the interesting windows. My husband said that was it.  I think so as well, and I added small pieces of very whitish yellow to the window frames on that side.  If you look closely, you’ll see a hydrant by the light bush. My husband said it should be red to bring the red from the flag over. But it seemed to be painted in the colors of the two houses and I didn’t want to change that. So I added a small piece of pinkish color in the window at right. Not sure how effective that is, but…

I simplified the blue house–hard to tell! Both houses have a Dutch colonial design with curved roof lines. You can see that on the yellow house.  But I removed it on the blue. It was on the central part and I have to say I really didn’t like it!  So I took my artistic license and I’m very happy!  The house is simpler as a result.  These houses were obviously built together because of the similar design and complementary colors.  Blue green house with yellow trim; yellow house with blue green trim.  They are also set at different angles.  The yellow house faces the main road, but the blue is sideways and at an angle, with a driveway in between (I think).  It makes for a more interesting picture.

The very dark leaves are from a tree in the foreground. I like the way it provides contrast, but it was very hard to film.  The left side of the house is not as light as it looks, but I couldn’t get the tree light enough without getting the house a little washed out.

The sky is also washed out a bit. It’s the blue violet color of the road.  I loved the shadows in the road. Used blue violets with some turquoises added on top and then some warmer color over the sunlit area.

This may be it for awhile for paintings from the trip.  However, I may share some of my summer challenges paintings with you.  I have to start focusing on my fall classes and what I’ll be doing. Looks like they’ll be zoom classes at this point–until the Delta variant goes away.  BUT–I continue to love teaching via zoom when I can’t be in person. And it enables people to take from anywhere. I’ll be teaching Monday and Saturday mornings and Wednesday afternoons. I’m currently taking names in case you are interested.  The focus will be on light and shadow!

Portland Roses

Portland Roses, 16″ x 20″, UART 320 board

Underpainting, stage 1

And here is the third painting, perhaps the most challenging in some ways.  My original thought was to change the color of the building, which was an orange-red brick to either a dull light green or an off white with red brick showing through. I was afraid that the roses wouldn’t stand out against the red brick.  I did several color studies and chose some reddish off-whites.  Then proceeded with the underpainting with this in mind. But then I really liked the look of it–the warmth of the orange wals–and decided to stick closer to the picture, which meant pretty much putting the same color over the underpainting.  However, I used a cooler pinkish red, rather than the real orange.  It actually worked fine. (I seem to have forgotten to photograph the final underpainting.)

I used my Terry Ludwig “vibrants” set for the colors in the building and Girault and Blue Earth for the foliage and roses.  I really enjoyed doing the window shades, which had subtle creases in them. Used Girault blues and a cream of close values and it worked pretty nicely.

In the photo, the foreground is a driveway with the end of a car at the far right.  I intended to put in the driveway but not the car.  The driveway was also light-speckled from the tree above. And the color was a blueish violet which didn’t go with anything else in the picture. So I tried to do it with a combination of red and greens (as I used in the shadowed areas of the building).  It looked dreadful and was a complete distraction.  My husband suggested grass–why didn’t I think of that!  I brushed it off, added some orange NuPastel and alcohol, then various greens, getting darker on the right with a hint of shadows from the leaves above.  SO much better.  With all the business of the rose bushes, a simple foreground that complements the building works much better.

This might be it for rose pictures for now.  But it’s been fun!


Cape Cottage with Roses

Cape Cottage with Roses, 16″ x 20″, UART 320 board

Drawing with 2B graphite

Underpainting, stage 1

Underpainting with alcohol

My second painting is a full size version of a scene that I first painted a week ago as a 4″ x 5″ miniature.  This is also from Sandwich, this house being in the older area of  the town, which I particularly like. I removed a car and large travel van from the left side that might have given it a more funky look!  But, hey–I’m going for roses!

There were a lot of problems with this one.  To begin with, the house. With leaves of the trees blocking much of it, I didn’t realize for some time that what was on the far left was actually a roof that came out from the door, and not the left side of the house.  As you can see from the underpainting, I had it much further to the left and it just didn’t read right at all!  The change made a huge difference (it was my husband who spotted it!).  The shadows are also rather odd.  The light is obviously coming from the left, hitting the left side of the house and the white fence.  The shadows must be coming from the tree branches over head.  I followed the photo here as I’m not about to question the science of it all!

I also had problems with the right side of the house, which I believe is weather-beaten shingle, unpainted.  I meant to add a few lines in there and I will before i frame it.  There was only one window, I added the one on the right to minimize the area of house, whose color I couldn’t figure out what to to with!  It’s a combination of brown and violet and I think fairly innocuous.

The roses here are quite small and harder to see.  Again, I used my pinks, but added small pieces of a pinkish orange Schmincke to some of them and that really made them pop.

The road was the last challenge.  I completely used up a violet Girault on this!  Then I added some pinkish color over it and a little greener blue, then the shadows of the telephone wires and the tree shadows.  There seems to be enough interest in it now and I’m quite happy with it.

What I love best about this one is the opening in the fence that invites us into the garden and the shadows of the rose bush on the fence.

A note: I began another painting prior to this one. It was a picture of a stone wall with roses and a large house from Marion, MA.  For the June Roses painting I had used odorless mineral spirits for the underpainting and loved it.  It was like painting.  I ran out and decided to use turpenoid. BIG mistake. It didn’t dry and then, when it finally did, it left the surface very pock-marked. I started the painting but hated every minute of it and decided I really didn’t want to paint Marion afterall!  So, don’t use turpenoid as a solvent!  For this painting, I went back to my trusty alcohol, and it was just fine.

June Roses (Cape Cod)

June Roses (Cape Cod), 20″ x 16″, UART 320 board

Underpainting, stage 1

Drawing with 2B graphite

I’ve been having problems with my blog interface and have finished three paintings without being able to share them.  Fortunately, I was able to reinstall the old format, so now I’m ready to roll!

I have been doing paintings of roses.  Some larger, some smaller.  This first painting has the largest rose bush in it and is unquestionably my favorite. The picture is from Sandwich on Cape Cod.  I loved the house to begin with, and then there was this beautiful bush of pink roses in the foreground spilling over and under a lovely fence.  A new subject for me!  

While I did a drawing half scale, I had a terrible time getting it right on the board. The house was way too big and the fence just wasn’t right.  So I worked and worked, and finally got it.  I’ve learned to work until you are happy with the drawing, before beginning the underpainting! Speaking of which, it’s kind of wild!  A lot of orange and brown and blue.  But it worked. I got a nice dark for the violets that would go over the house.  And I got the composition the way I wanted it.

For the house, I used a blue violet Girault that was fairly bright. So I added the dark grayed red violet into it. That really helped tone it down, while retaining enough of the color.  The biggest challenge was the right side of the house in sunlight.  It’s always a trick to get a dark cool color to look like it’s in sunlight!  There must be some yellow. So I began with a light cool green, then added some light but brighter red violet (soft) into it.  It was perfect!  Kind of like magic!  (I keep looking at the house and I don’t think the lines are straight, but I’m going to leave it.)

The large bush in front of the house was a perfectly rounded bush (just one). I made it more irregular and by adding light on the right side in two places, I came up with two of them!  One seems to be right in front of the house and the larger one is  by the fence. Much more interesting and it just sort of happened!  

I’m very happy with the fence.  I used blue grays, grays, browns and it worked nicely.  I simplified the foreground post and was really happy with it.

Then came the roses.  I’ve never tried to do them before.  For the underpainting, as you can see, I decided to block out the overall shape with green–no odd color that would make it more difficult.  I used various pinks from my quinacridone red Blue Earth set and some warmer orangey pinks and yellow white.  I loved that some were in shadow under the fence, making them much more interesting.  It took patience and I had to keep stopping and coming back to it.

After getting the roses done, I realized that I needed to tone down the kousa dogwood blossoms by the house.  I did this by smudging them a bit and adding a slighter darker color over some of them.  It went back and had a lot less priminence and I was happy.

This is one of the happiest paintings I’ve ever done.  I took the picture on a beautifully perfect June day. And later that day I had dinner with my sister Marcia, who I hadn’t seen in three years!  So it was very special.  Unfortunately, my other rose pictures aren’t quite like this one, but I’ll definitely look for more like this in the future.  

Boats at Twilight

Boats at Twilight, 16 x 20, Pastel Premiere, white

Boats at Twilight, 16 x 20, Pastel Premiere, white

Underpainting, stage 1

Underpainting, stage 1

Underpainting with odorless mineral spirits

Underpainting with odorless mineral spirits

It’s been awhile!  I focused on my Rock Workshop during late May and early June and I was away in New England and the Finger Lakes for two weeks.  Had lovely weather and it was wonderful to see Mattapoisett, my sister, and some of Cape Cod and southern Maine.  AND–when I got home I learned that I’ve sold 3 16 x 20 paintings in Jud Hartmann’s gallery in Blue Hill, Maine.  Two will be sold without the frames, so I needed to do a new painting.  I decided to do this picture from early evening in Mattapoisett. The only 16 x 20 boards I have currently are the Pastel Premiere white, whose grit I’m not happy with!  (I didn’t order right)

For the underpainting, I decided to forget watercolor and use hard pastel with something other than alcohol.  I used odorless mineral spirits and really loved it!  I could really move the pigment around with the brush as it didn’t dry right away.  You can see the results–quite lovely I think!

There were several challenges with the photo.  The house was under construction and covered in white paper and there  no windows showing on the front!  So I had to make that up, including the effect that the brigh sunlight would have on them.  Secondly, there was a shadow that pointed to the small bush in the middle of the picture (its in the underpainting).  At first I thought was being cast by the bush, but the light was coming from the right. So it must have been a pole. Anyway, I decided I’d better leave it out.  Also, there was more rigging for the house construction hehind the boats and it was a bright orange.  Lovely, but I had to eliminate that as well!

I used soft Blue Earth greens for the tree and its shadowed lawn.  For the house in shadow, I used several blue green Giraults, then bright yellows for the sunlit side.  I thought the fence would be difficult, but it wasn’t. I put some color in first and used a very soft, brighter yellow Schmincke and quickly drew in the lines.  Worked great.  Added a few pieces of green into the cracks afterwards.

The boats were more of a challenge, as they were hard to see.  And I had the orange boat pretty bright, then decided to tame it down.  I was debating whether the center of interest should be the boats or the area of fence, tree, bush in sunlight.  Decided on the latter, but the boats are pretty important as well — and they are the title!  I had a rock between the boats and the clump of rosa rugosa on the left and took it out, replacing it with blue water. I loved the shape and simplicity that resulted (my husband’s suggestion!).

The most difficult part was the foreground.  There was a bare area and tall grasses in the sun.  I thought first of getting rid of the bare part, but that left too much green.  So after some experimentation, I went with what was in photo and liked it.  The brown adds some contrast and an interesting shape, and it’s close in value to the shaded greens.

So it’s good to be back to painting again. And now, I’m focusing this summer’s “Summer Challenges” classes that I’ll be giving each Monday via zoom to 20+ people.  Hope to do lots of painting and piano playing!  Have a lovely July 4th holiday.


Jean

Henlopen Light

Henlopen Light, 20 x 16, white pastel premiere

Henlopen Light, 20 x 16, white pastel premiere

Watercolor underpainting

Watercolor underpainting

Charcoal added over watercolor

Charcoal added over watercolor

For my second painting, I wanted to capture the light of the late afternoon sun on the grasses in Cape Henlopen on the walk to Gordon’s Pond. It was quite spectactular.  But I couldn’t find any one photo that had enough compositional interest to it. I finally found one with distant pine trees and bayberry bushes in the foreground and used another for the grasses.

The more difficult part turned out to be the surface.  I used mounted white Pastel Premiere and the tooth was really weird.  I used a watercolor underpainting, which went on typically too light. But then when I started with pastel in the clouds and sky, the surface turned out to be all “pock-marked” and left little holes everywhere. It wasnt what I remember this surface being like at all!  I really loved it when I did a painting in March.  I’m wondering if its the wrong grit?  Maybe the 600 instead of the gritty 320-400.  Anyway, it was a big disappointment.

The underpainting wasn’t very good, but putting the cool red under the bayberry bushes was good. The sky and clouds were kind of a nightmare due to the surface.  I should have put on one coat of pastel and used my fingers to get rid of the holes but didn’t.  And I wasn’t sure what color to make the sky. I didn’t want it to be too green.  So I started with a real blue Beacon then added several values of Ludwig violet on over it, along with a little turquise.  As I was working, I realized that — of course, red violet is the complement of yellow green and it’s the color I needed to set off the greens. That was a happy moment!  I added some red violet onto the tops of the trees and used it, along with green in the dark areas under the bushes and grasses.

As you can see, I used a lot of violets in various places, beginning the grassy background with violet, adding greens, then some darker pieces of violet to indicate plant life.  For the greens, I got out my new box of Blue Earth “earth green” and had a great time building up the colors.  Used these on their sides for the foreground grasses as well.

The clouds were a real problem.  Due to the problems with the surface, I covered up too much sky to begin with, lost the blues in between, etc.  I went back and reworked them to put in more sky holes and make sure they didn’t all end in the same place.  One thing that was nice was adding some light red violet Girault on top of the warmer colors.  It gave the feeling of light peaking through the clouds.

I think I captured the way it felt to be there.  And I painted it on a very cold, rainy day so I was thinking back fondly!  But now the sun has returned for Memorial Day. Meanwhile, the cicadas are singing up a storm! It’s a time of renewed promise and joy.   I hope you are enjoying the day and our new-found freedom!